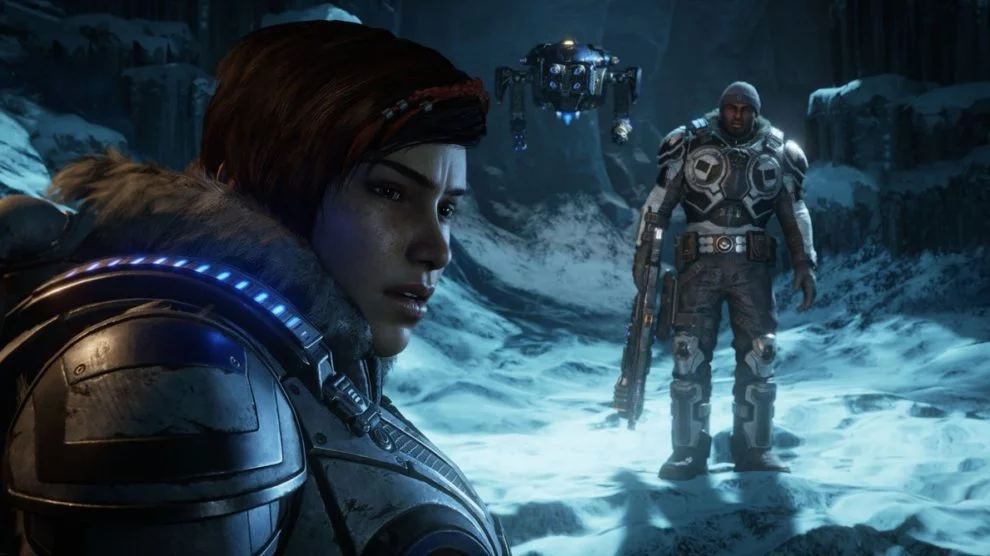
Gears 5 has a number of collectibles throughout its various acts, and this guide is designed to help you find them all.
Slight spoilers are ahead so read at your own risk! This is also a work in progress; we’ll add more items as we discover them. We’ve also throw in the towel on Components a bit — they’re bloody everywhere.
Here’s how many Collectibles are found within each act, alongside the amount of Components we’ve found — note that Jack needs quite a few Components (273, in fact) to fully be fully upgraded at this time.
Collecting all collectibles will earn you the It’s Not Hoarding If Your Stuff Is Cool Achievement, while getting enough Components and upgrading all of Jack’s abilities will earn you the JACKed Up! Achievement.
- Act 1: 26 Collectibles, 16 Components total
- Chapter 1: 7 Collectibles, 0 Components
- Chapter 2: 5 Collectibles, 2 Components
- Chapter 3: 7 Collectibles, 8 Components
- Chapter 4: 6 Collectibles, 5 Components
- Act 2: 36 Collectibles, 106 Components total
- Chapter 1: 10 Collectibles, 13 Components
- Chapter 2: 4 Collectibles, 4 Components
- Chapter 3: 6 Collectibles, 6 Components
- Chapter 4: 10 Collectibles, 39 Components
- Chapter 5: 6 Collectibles, 16 Components
- Act 3: 24 Collectibles, 152 Components total
- Chapter 1: 5 Collectibles, 23 Components
- Chapter 2: 6 Collectibles, 20 Components
- Chapter 3: 13 Collectibles, 6 Components
- Act 4: 4 Collectibles, 15 Components total
- Chapter 1: 4 Collectibles, 0 Components
Act 1 Chapter 1 Collectibles
Collectibles
- Collectible 01, Weathered Spectacles [0:00]: Right after you rappel down the area with the waterfall, head to the back.
- Collectible 02, Onyx Guard Challenge Coin [0:18]: After #01, start to head up to your objective but first head down the leftmost path to get this.
- Collectible 03, Wellness Advisory Poster [0:46]: Before using your Lancer on the first set of cables, look for a poster on the wall behind you.
- Collectible 04, COG Tags: Fallen Azura Gear [1:06]: On the ground floor of the area Dave gains access to it for you. Check the body of a COG inside the Infirmary for this one.
- Collectible 05, Chairman’s Wristwatch [1:17]: Just after the COG tags, head upstairs and search through the rooms on the left. It’s on a desk.
- Collectible 06, Lightmass Missile Strike Authorisation [1:52]: On a left-hand side room after you’ve fought some Swarm.
- Collectible 07, UIR Hammer of Dawn Blueprints [2:07]: On the desk of a small room right before the actual Commander’s office area.
Act 1 Chapter 2 Collectibles and Components
Collectibles
- Collectible 01, Photograph of Kilo Squad [0:00]: In Baird’s lab.
- Collectible 02, Mark 3 Lancer Blueprints [0:19]: Still in Baird’s lab, same room as the Flash upgrade for Jack.
- Collectible 03, Trauma Record: Marcus Fenix [0:35]: Same room as #02, opposite side of the room.
- Collectible 05, Gym notice to trainees [0:57]: We got this one before #04; it’s on the wall inside the gym where you fight Fahz.
- Collectible 04, DBI Marketing Brochure [2:33]: It’s not last in the in-game menu, but we actually picked this up last. It’s outside the gym/armory on the way to see Jinn.
Components
- Components 01 & 02: These are both in the Armory; one’s on the desk, one’s behind that in the bank of lockers.
Act 1 Chapter 3 Collectibles and Components
Collectibles
- Collectible 01, COG Tags: Fallen Raven Pilot: Beside a COG in the same room you start the chapter in.
- Collectible 02, The New Ephyran: 20th Anniversary Edition: In the next room from #01, sitting on a desk in the back corner.
- Collectible 03, Seditious Literature: Head up the stairs after a firefight and look towards a desk in the corner.
- Collectible 04, Settlement 2 Welcome Package: After Component #06, head to the little room to the left. It’s on a desk.
- Collectible 05, Storied Embry Star: In the upper set of rooms where snipers were shooting at you, look to the back right corner.
- Collectible 06, COG Tags: Fallen Gear at Condor Crash: On the left path after Component #07, look to the ground after a small fire.
- Collectible 07: Seran Colossus: After Component #08, head round the left into a fancy bookshop and look to the centre.
Components
- Component 01: Just off a side room from Collectible #02, sitting on a desk.
- Component 02: On a desk behind Collectible #03.
- Components 03-05: After entering an apartment building and being shot at by a Gear, head down the stairs and head to the right. These are in a little box on the wall.
- Component 06: After a woman asks if you’re there to pick her up, look in the little room directly behind her.
- Component 07: On your way to Carmine, head right to a dead end — send Jack to get the Component before heading down the left path.
- Component 08: After fighting a couple juvies, look in the fruit shop on the left.
Act 1 Chapter 4 Collectibles and Components
Collectibles
- Collectible 01, Memo to Bomah Hotel Staff: Head towards a parking garage and look to an open entrance to the left. It’s at the back.
- Collectible 02, COG Tags: Fallen Gear at Hotel: Go through a set of double doors and you’ll see this right ahead of you (if you can see in the dark, that is).
- Collectible 03, Lost Horse Plush: Go through a set of double doors at the hotel and look into a small cubicle/room right ahead of you.
- Collectible 04, Settlement 2 Summer Birth Pamphlet: Go upstairs and look to a table on the right before you duck and go through a small gap.
- Collectible 05, Song Lyrics: On a desk in the backstage area of the theatre.
- Collectible 06, Worn Lighter: On a makeup table in the backstage area.
Components
- Component 01: Before heading through the door to cirumvent the fire, look to the shops to the left. It’s on a countertop.
- Component 02: After getting Stim for Jack, look for a small building with its entrance blocked by fire. It’s in there.
- Component 03: Same area as Collectible #01; head into the garage and lift a garage door. This is on the back of a truck.
- Component 04: Keep walking ahead and look into a laundry room on the right. It’s inside a wallbox.
- Component 05: As you make your way down a corridor, check a room immediately before a set of stairs that lead upwards.
Act 2 Chapter 1 Collectibles and Components
Collectibles
- Collectible 01, Hand-carved Riftworm Flute: Head down the stairs and into a room on the right. It’s on a table.
- Collectible 02, Ilima City License Plate: Keep hugging the right wall of the settlement. This is on top of a furnace.
- Collectible 03, Lost Gear Helmet: After you walk over the stage with a giant Riftworm bone, head to the left and look in the snow.
- Collectible 04, Wooden Lancer Toy: This one’s as the child is telling you that you’re a fascist. It’s outside against a cement block.
- Collectible 05, Major Howl and the Battlin’ Ants: Look to a building to the left after a kid yells at you, calling you a fascist.
- Collectible 06, New Village Rules Mandate: In a mechanic’s area, dead centre of the room on a wall.
- Collectible 07, Note to the Chief: Before heading downstairs to see the chief, look in a room off to the left. It’s on a table, though hard to see — look for the hand prompt on-screen.
- Collectible 08, Norsko’s Letter: Look on a crate to the right as you head down to see the chief.
- Collectible 09, Outsider Skiff Schematic: In the upper village, look to the left of the Silverback.
- Collectible 10, COG Tags: Oscar Diaz: In the room where you need to turn the lights back on. Look to the back right wall.
Components
- Components 01-03: In the same room as Collectible #01.
- Component 04: Keep hugging the right wall after the first Components and you’ll find this amongst blocks of ice.
- Component 05: After heading through the security doors, hug the right and look into a building.
- Component 06: Same room as Collectible #05.
- Component 07: Past the mechanic’s area in the second room on your left as you head downstairs.
- Component 08: After your vision, head into the building on the left and check the back wall.
- Component 09: Before jump-starting the generator, look into the armory-style room on the right. This is in a corner.
- Component 10: After the swarm attack and in a dark room, look to the right on a wallbox before turning on the lights.
- Components 11-13: Before turning on the light, head up the ladder to the left. It’s on a control panel.
Act 2 Chapter 2 Collectibles and Components
Collectibles and Relic Weapons
- Relic Longshot: In the same shack as Component #01
- Collectible 01, Grindlift Maintenance Notes: In the Train Tunnel side mission/location; a Component is also beside this.
- Collectible 02, Faded Photograph: Search the train cars to the northeast of the Train Tunnels. There’s a photo on the corpse in the back corner.
- Collectible 03, Lena’s Journal: Found at the Outsiders’ campsite on the way to the main objective. This is paired with a Component.
- Collectible 04, Islander’s Lost Earring: There’s some debris west of the Old COG Wall. This is in the batch furthest away from the wall.
Components
- Component 01: In a red shack near a gate you can’t open. A Crimson Omen is nearby, denoting a Relic Weapon
- Component 02: Same location as Collectible #01.
- Component 03: Same as Collectible #03.
- Component 04: There’s some debris west of the old COG Wall. This is in the batch closest to the wall.
Act 2 Chapter 3 Collectibles and Components
Collectibles
- Collectible 01, Intercepted Letter: After gaining access to New Hope, check the area to the right.
- Collectible 02, Soverign Directive 10345: In the same room/prison cell as Components 4-6.
- Collectible 03, Patient Analysis: AX-331-2: In the next room, beside hospital gurneys.
- Collectible 04, Patient Analysis: EV-184-9: After jumping through the window into the observation area, look to a table on the left.
- Collectible 05, Patient Analysis: RK-619-4: When going down a corridor looking for Niles, check a room on the right. It’s beside a Locust corpse.
- Collectible 06, Timeworn data drive: After heading downstairs, look on a computer rack on the right.
Components
- Components 01-03: After defeating the Warden, look for a door you can break through to the right. Kill the juvies and take the components — they’re in a safe Jack can open.
- Components 04-6: After falling down into a dark area, get Jack to open up a prison cell to your right (as you enter).
Act 2 Chapter 4 Collectibles and Components
Collectibles
- Collectible 01, Security Memorandum: On the floor of the East Tower Substation, north west of the eastern Radio Tower. Look to the corner.
- Collectible 02, Krav’s Locust Tag: At the entrance to one of the Old Derrick sites.
- Collectible 03, Grindlift Actuator Component: Part of the side mission connected to the Old Derrick site from Collectible #02.
- Collectible 04: Lena’s Scribbles: At the North Tower Substation.
- Boomshot Relic: Just around the corner from Collectible #04.
- Collectible 05, Orders from Ketor Skorge: In the central Old Derrick, near the entrance.
- Collectible 06, Grindlift Radiator Component: From the central Old Derrick.
- Collectible 07, Letter to Momma: Head toward the eastern Radio Tower and go up the ramp to its left. Look for a crashed vehicle and this letter is with it.
- Torque Bow Relic: Head up the hill to the right before you enter the Old Mine proper.
- Collectible 08, Frayed Pouncer-Tooth Necklace: Up a ladder on the way into the Old Mine.
- Collectible 09, Nethercutt Mining Poster: After you lift up a garage door to get into the mine, head to the right and check the room there. It’s on the wall.
- Collectible 10, Nethercutt Miner’s Journal: Once into the main Old Mine ara, keep to the left wall. It’s at the back.
Components
- Components 01-03: As you’re opening up the big COG door, check a wallbox in the room on the top left.
- Components 04-06: At the North Tower Substation near the North Tower. Look for a wallbox.
- Components 07-08: Two Components are in the North Tower Substation. The code’s obtained at the East Tower Substation.
- Components 09-11: On your way to the North Tower, these are in a safe in some Condor wreckage.
- Components 12-14: After the Warden, take out the corrupted DeeBees and check the nearby safe.
- Component 15: Once inside the next building, stay on the top floor and go into the room on the left. It’s in a wallbox.
- Components 16-18: At the northernmost Condor crash site, near a Trishot.
- Component 19: On the way out of the Condor crash site.
- Component 20: Right after Component #17, after dropping down to the area near your Skiff.
- Components 21-23: Beside the reward (in the safe) at the central Old Derrick.
- Component 24: At the bottom of the stairs of the second radio tower.
- Component 25: After using the radio tower in the south, it’s in the next room on a high shelf. Use Jack.
- Components 26-30: After Component #21, head down the stairs and look to your left as Kait is speaking about turrets.
- Component 31: On the way to the Old Mine, hug a right wall and enter an abandoned train car.
- Components 32-36: After lifting the garage door at the Old Mine, it’s in a safe to the right.
- Components 37-39: Same room at Collectible #10.
Act 2 Chapter 5 Collectibles and Components
Collectibles
- Collectible 01, Nethercutt Helmet: After a red-screen cutscene (spoilers!) and an objective to power generators, head backwards and to the right. Look for the helmet on a flat, icy surface.
- Collectible 02, Subject Analysis: UL-119-2: After turning off the cryojets and draining the lab, go up a ramp to the right. It’s on a desk. 5 Components are also nearby.
- Collectible 03, Subject Analysis: TE-872-3: After Niles’ tour/cutscene, look immediately to the floor on your right.
- Collectible 04, Lexigram Board: After stopping the generator, look at at corpse just around the corner.
- Collectible 05, Subject Analysis: EV-184-9: After lifting the lockdown, go back and check out the small work area where the cryo jets were spraying.
- Collectible 06, Sketchbook: In the next room, look to the left of the rug, on the floor.
Components
- Components 01-05: After cloaking to get to the generator in the back, look inside a wallbox in the room.
- Component 06: Inside the frozen lab, up the stairs on the left. It’s in the next room.
- Component 07-11: Beside Collectible #02 in a wallbox.
- Component 012: On the right as Niles is giving you a tour.
- Components 13-15: When using Stim to get through the cryo leak, look to a shelf on your left.
- Component 16: Beside Niles’ corpse when lifting the lockdown.
Act 3 Chapter 1 Collectibles and Components
Collectibles
- Collectible 01, Corisku Newspaper: Right when the act starts, look behind you on the bar.
- Collectible 02, Doomed Empire, by Logan Hobbs: In the corner near baggage collection.
- Collectible 03, Missive to Agent 9: In another airport room, on a desk in the back corner.
- Collectible 04, Nomad’s Creed: To the left of Paduk, on a table near some tents.
- Collectible 05, The Astounding Lighting Rangers!: After speaking with JD and Fahz, go to Hangar 4 and look to the left of the vehicle.
Components
- Component 01: In the small room just off the bar before heading downstairs.
- Component 02: After heading down the stairs, hug the right and look behind the counters.
- Components 03-05: In the next room from Collectible #02, up on a shelf. You’ll need to send Jack.
- Component 06: In a room that’s off to the right, past the security check that’s directly opposite the pathway to Baird. The Collectible #03 is in the same room.
- Component 07: To the right of Baird.
- Components 08-10: To the right of Baird at the testing area after you install Hijack.
- Component 11: After you exit the airport, head left before talking to Paduk.
- Components 12-16: In a safe around the back of Paduk.
- Component 17: Before rescuing the Nomad from the Water Tower, go upstairs and down the pathway. Get Jack to grab this one.
- Components 18-20: On your way to the objective, you’ll have the City Ruins pointed out to you. Look to a small alcove off to the right, where a corpse is sitting beside a Longshot. Be prepared for a fight.
- Components 21-23: After entering the Rocket Hangar (after the big turret fight) hang a right at the entrance and follow the path around. Look for a wallbox.
Act 3 Chapter 2 Collectibles and Components
Collectibles
- Collectible 01, Hammer of Dawn Command Case: After entering the command room and turning the lights back on, look to the right-hand side of the room.
- Collectible 02, OZP-11 Termination Directive: After exiting the control room, go into the main hangar area and check the bottom left area. It’s on a barrel and before you use the gantry.
- Collectible 03, UIR Space Mission Brief: After a brief bit outside, followed by a firefight, head to the right of the room, up a small ledge and around into a small office building. It’s at the back.
- Collectible 04, Loyalist Orders from Major Toly: Before your second gantry ride, look in the far right corner, past some sandbags and next to a corpse.
- Collectible 05, UIR Tag: Major Toly: After a firefight and ducking under a gap to continue, you’ll regroup with the missile. Head straight ahead to a UIR soldier against a tank.
- Collectible 06, The Major’s Speech: After the last collectible, you’ll head through a darkened hallway. When you get to the next lit room, look to the console closest to you.
- Overkill Relic: As you head toward the bridge, look for a rock in the middle of the sand with a Crimson Omen icon on it.
Components
- Component 01: After entering the hangar, go down some stairs and immediately up the set in front of you. Look into the darkness.
- Components 02-04: After riding the gantry, head to the leftmost path and it’s in a wallbox at the end.
- Components 05-07: To the right of the lift you’ll use to exit the chapter; look for a wallbox.
- Components 08-10: At the back of the area in the Scavengers: Shipwreck location, past the raised bridge.
- Components 11-15: After the storm, look for the debris. These are in a safe at the back.
- Components 16-20: After lowering the bridge for the missile (yeah, we’re suprised this isn’t Act 3 Chapter 3 yet either), look for a grouping of three trucks on the way to the training centre. There’s a fight after you pick these up.
Act 3 Chapter 3 Collectibles and Components
Collectibles
- Collectible 01: Nomad’s Sketchings: You can do this as early as Act 3, Chapter 1. It’s in the same room as the Nomad in the Water Tower.
- Collectible 02: UIR LC Circuit A1: Again, accessible as early as Act 3, Chapter 1. This is after the big Hunter fight in the Scavengers side mission, City Ruins.
- Collectible 03: Well-Worn Vasgari Flag: On the way out of the City Ruins, look behind you as you move towards your Skiff; it’s on a wall.
- Hammerburst Relic: Just past the City Ruins in the upper area — look for the Crimson Omen on the side of a building.
- Collectible 04: UIR Tag: Fallen Loyalist: This is to the right of the Rocket Hangar entrance; look for a dead body.
- Collectible 05: Loyalist Orders to Lieutenant Melich: South of the Harbor Docks, sitting at the back of a derelict tank.
- Collectible 06, UIR LC Circuit B1: At the back of the Shipwreck area, part of the Scavengers side mission. Can be obtained in Act 3, Chapter 2 as well.
- Collectible 07, Emergency Loyalist Radiogram: This is upstairs at the Artillery Battery location (Scavengers side mission).
- Collectible 08: RNV Borascu Captain’s Log: Found in the Cargo Shipwreck area; stick to the right-hand side and look inside a shipping container.
- Collectible 09, UIR LC Circuit C1: This is in the Artillery Battery location, as part of the Scavengers side mission. Look upstairs.
- Collectible 10, UIR Tag: Lieutenant Melich: This is in the Turntable control room — head to the back of the dark area of the room and look around. DON’T ACTIVATE THE BUTTON USING JACK or you can’t get this. (We obtained this in Act 3, Chapter 2)
- Collectible 11, Lightmass Missile Fragment: Right of the gigantic crater when you’re working your way toward the Cosmonaut Training Facility.
- Collectible 12, UIR Tag: Captain Tagger: After completing the centrifuge battle, check right beside the beacons you’re supposed to grab.
- Collectible 13, Fallen Nomad’s Visor: Found within the Nomad Convoy location; as soon as you enter the area, immediately turn to the right and look to the ground.
Components
- Components 01-03: On a wallbox on your way out of the City Ruins, right before you drop down to your Skiff.
- Components 04-07: Same room as the Collectibles 07 & 09. Scavengers side mission, Artillery Battery location.
Act 4 Chapter 1 Collectibles and Components
Collectibles
- Collectible 01, Encyclopedia of Tyran Military History: After meeting up with Cole and taking a car-lift to a building, head downstairs and look to the right.
- Collectible 02, Ruptured Gear Helmet: After the Swarmak fight, you’ll head to an area with a fork in the road. Rather than going left to the battle, head right. It’s at the end of a dead end.
- Collectible 03, COG Tags: Mihn Young Kim: Just before you enter the tomb, look for a wrecked car past the door. It’s on a nearby slab of concrete.
- Collectible 04, Restoration Notice: To the right of the tomb door as you’re about to enter.
Gears 5 is available now on Windows PC and Xbox One.
This article may contain affiliate links, meaning we could earn a small commission if you click-through and make a purchase. Stevivor is an independent outlet and our journalism is in no way influenced by any advertiser or commercial initiative.


