


Find each and every Lorestangir and Face.
While Hellblade 2 is a fairly short gaming experience, some of the collectibles can be tough to find. This Senua’s Saga Hellblade 2 collectibles guide covers all of the rock faces and all of the Lorestangir (Icelandic for Lore Bars according to google translate) in order from start to finish.
We’ve done our best to reference key points in the game and have sorted them by chapter and each chapters acts so you can easily jump to a specific area if you need to. However this guide is probably more easily followed in order from start to finish.
Warning: Spoilers are ahead. We strongly suggest that you play and complete the game before reading on.
All up, there are 17 Lorestangir and 18 Faces to collect.
Senua’s Saga is made up of six chapters with a varying number of acts in each. Once the game has been completed, players can access a chapter menu which will show how many Lorestangir and Faces are in each but it won’t break them down per act — we’ve done that work for you below, so you don’t have to.
Chapter 1 | Chapter 2 | Chapter 3 | Chapter 4 | Chapter 5 | Chapter 6
Chapter 1 Reykjanestá collectibles
| Act | Lorestangir | Faces |
| Landfall | 1 | 0 |
| Shore of Slaves | 0 | 0 |
| Capsized Ship | 0 | 0 |
| Slave Master Found | 0 | 0 |
Act 1 – Landfall
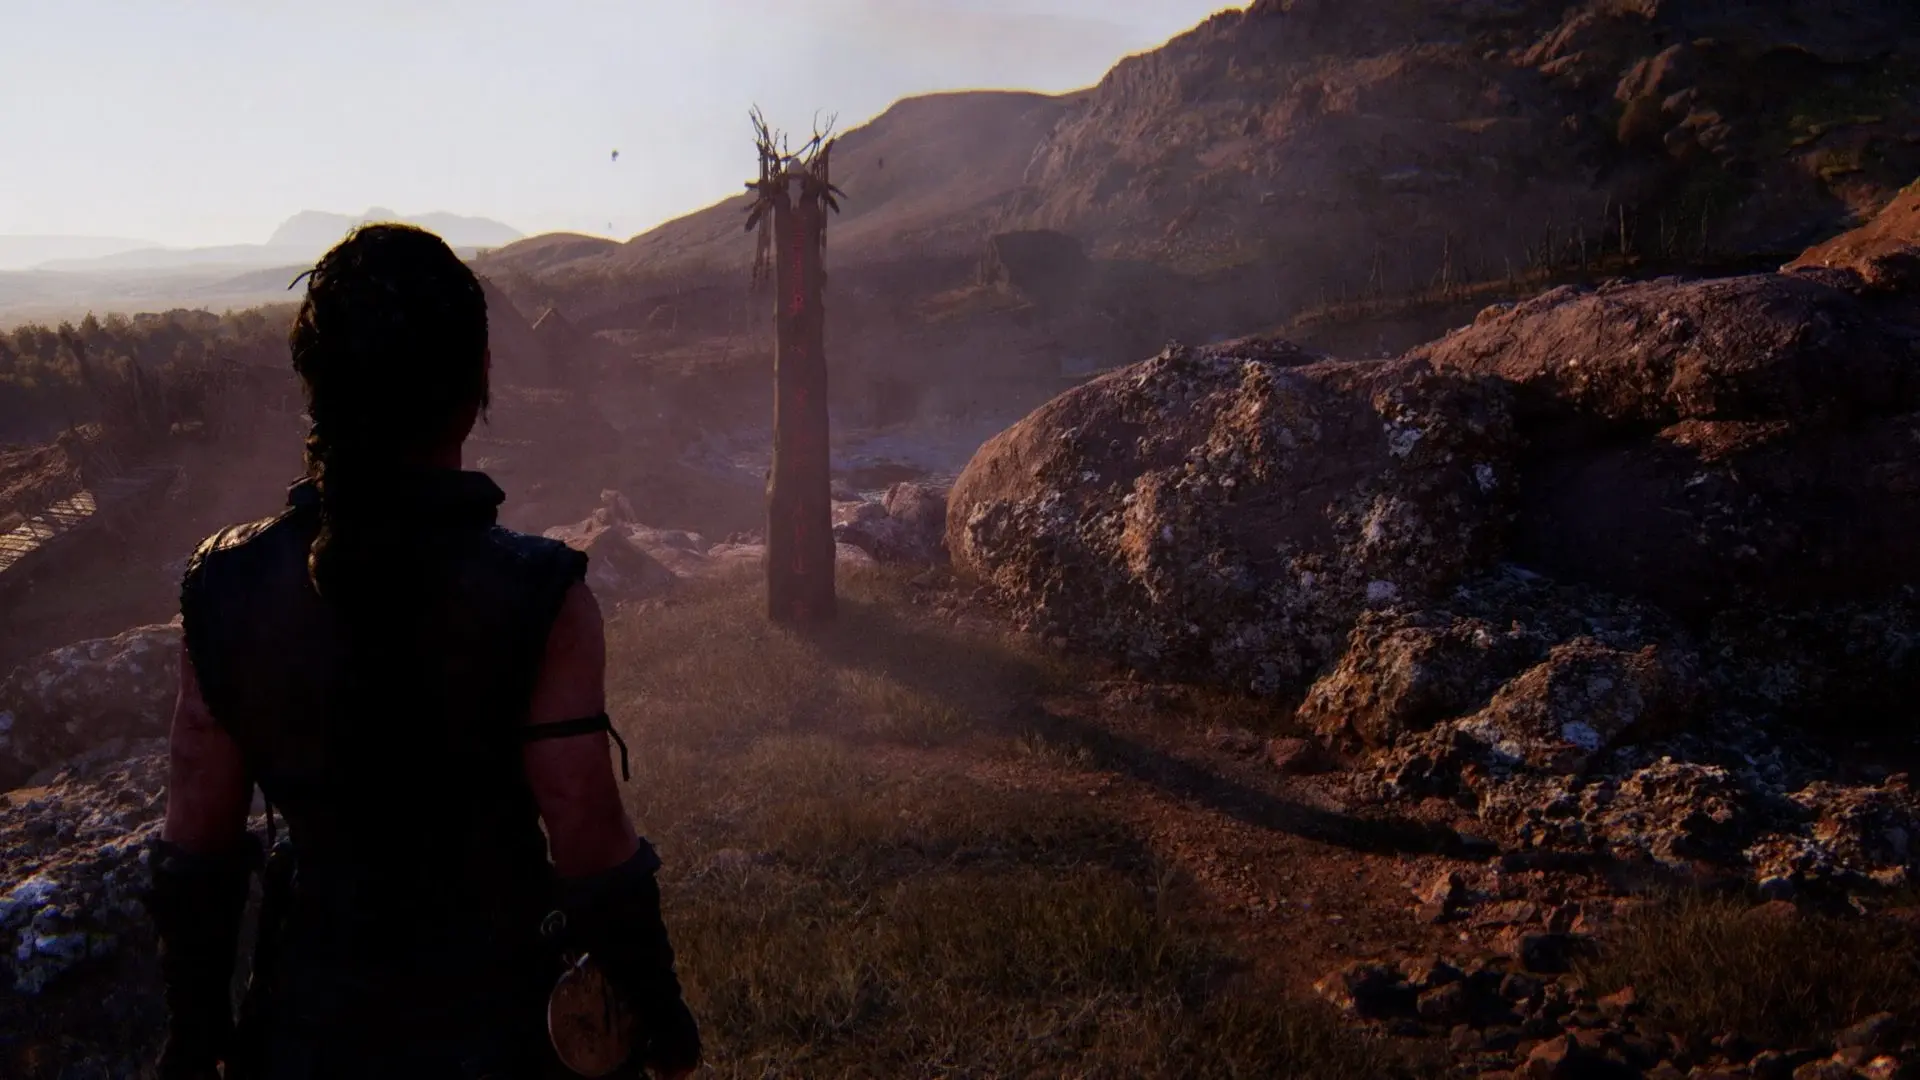
- Lorestangir 1: This Lorestangir is unhidden and you will come across this naturally as you play through the first part of the first chapter. When you discover the symbol of the slavers on a flag pole you will soon walk past two bodies on the ground, one on each side of your path. The first Lorestangir will be visible in a clearing to the right after you pass the bodies. If you get to the point that you’ve seen the first slaver and haven’t found the Lorestangir, you’ve gone too far.

Chapter 2 Freyslaug collectibles
| Act | Lorestangir | Faces |
| Freyslaug Sighted | 1 | 0 |
| Settlement Entrance | 0 | 0 |
| Return Home | 1 | 1 |
| Draugar Ceremony | 1 | 0 |
| Draugar Battle | 0 | 0 |
| Meeting the Stranger | 1 | 1 |
Act 1 – Freyslaug Sighted
- Lorestangir 2: The first Lorestangir in this chapter is visible in the distance to the right as soon as you regain control of Senua.

Walk between the two huts and past the haystack. You can’t miss it.
Act 3 – Return Home
- Lorestangir 3: When you enter the house containing the body hanging from the roof “like a cow” you can see this Lorestangir from the blocked doorway on the left at the far end of the building.
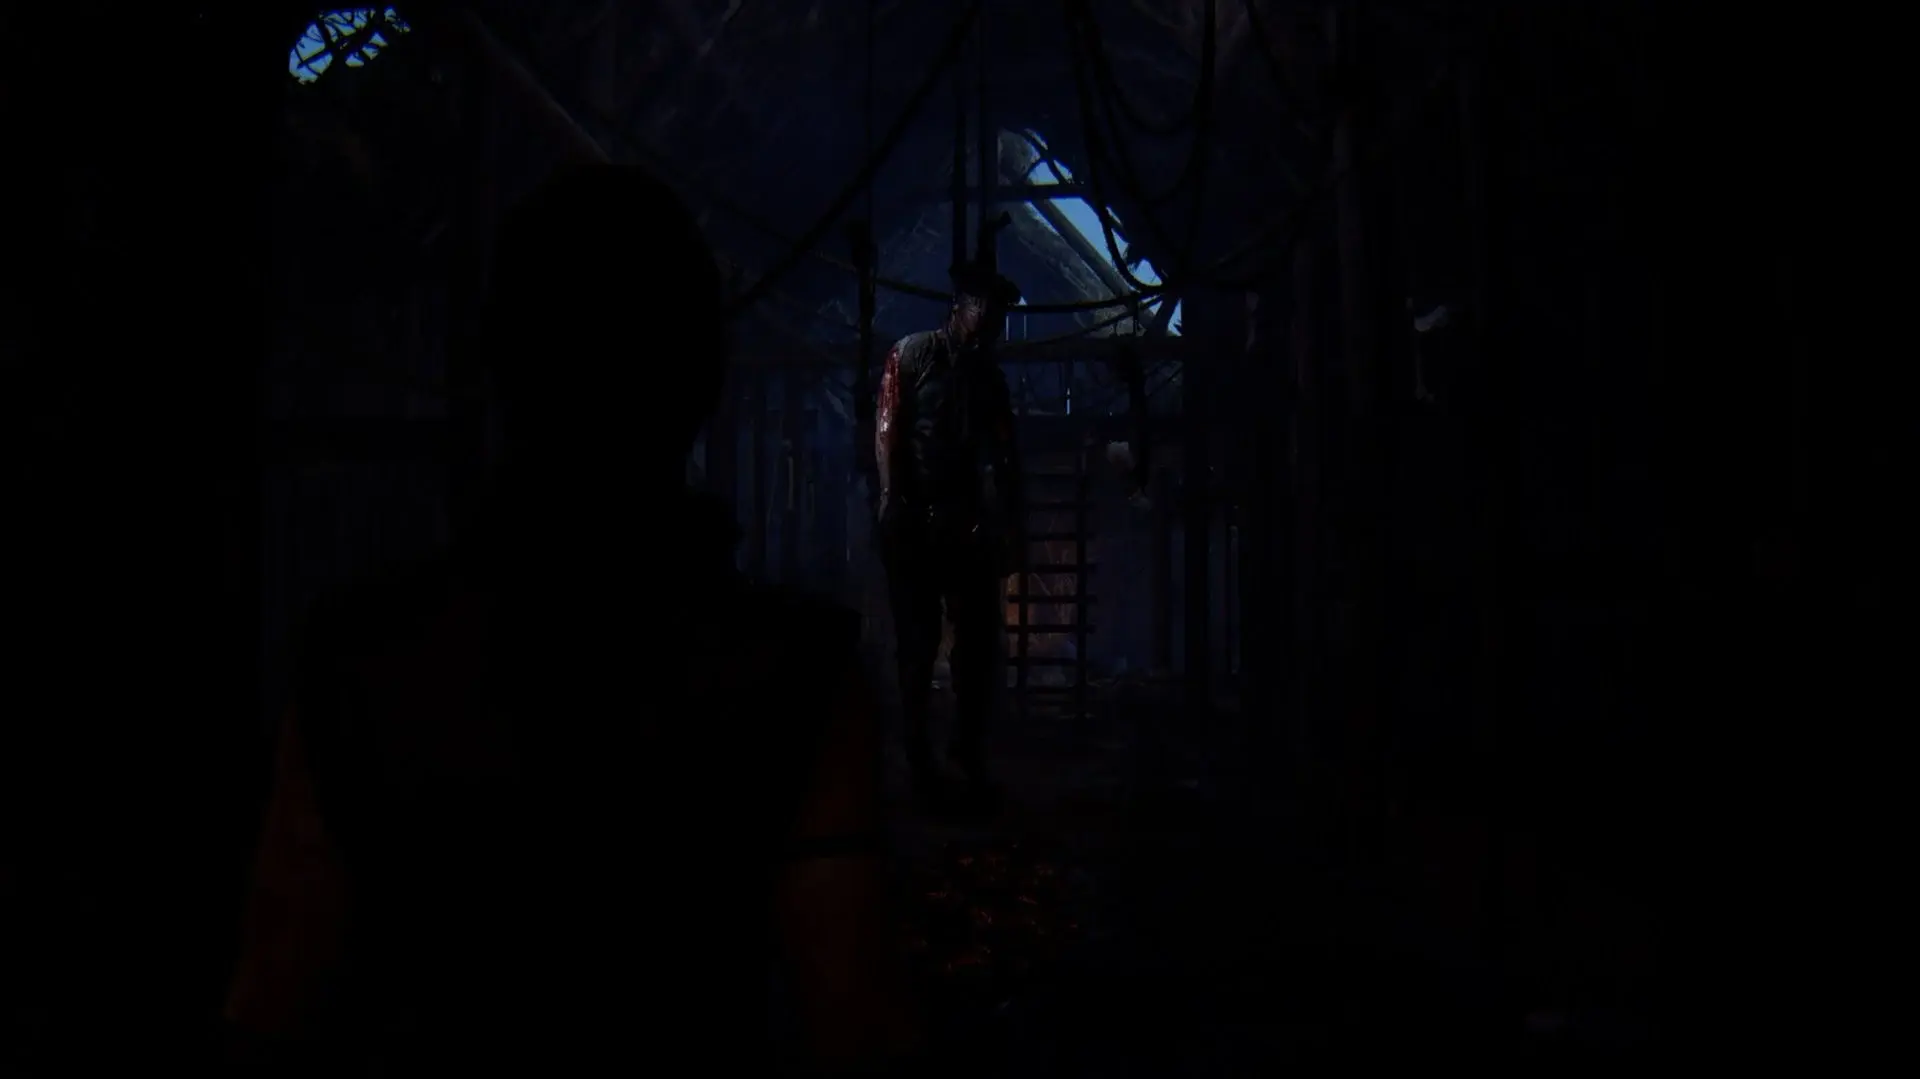

To access the Lorestangir, after exiting the house turn left and then after a few steps turn left again as you pass the fence. Then make your way through the small gap in spoked fence. On the left side of this area you’ll find a gap in a wall which you can crawl under.

You’ll then find your Lorestangir.
- Face 1: Very shortly after finding the above Lorestangir you’ll see a burning torch just beyond two buildings. The voices in Senua’s head will guide you to find the first face which is in a rock against the wall of a cottage. Focus on it and walk through the house to find the first tree of the game.

Act 4 – Draugar Ceremony
- Lorestangir 4: After watching the Draugar fire ceremony and edging across a cliff edge where you witness two innocents being murdered, you’ll get to a narrow area that you need to sidestep through. Before going through the narrow area, look to your left to find an alternative path with a ladder at the end of it. Note the image below has been artificially lit in the games photo mode to highlight the ladder. It’s much harder to spot in game.

- Climb the ladder and follow the path for a few steps until you hit a dead end. On the right side of the dead end is a ledge you can climb over. Climb the ledge and follow the path to your next Lorestangir.
Act 6 – Meeting the Stranger
- Face 2: After saving Fargrímr the two of you will come to a broken bridge. He will lead you towards the right but first you want to take the path on the left of the bridge to find your second rock face. Once you’re on the path you can’t miss the face.

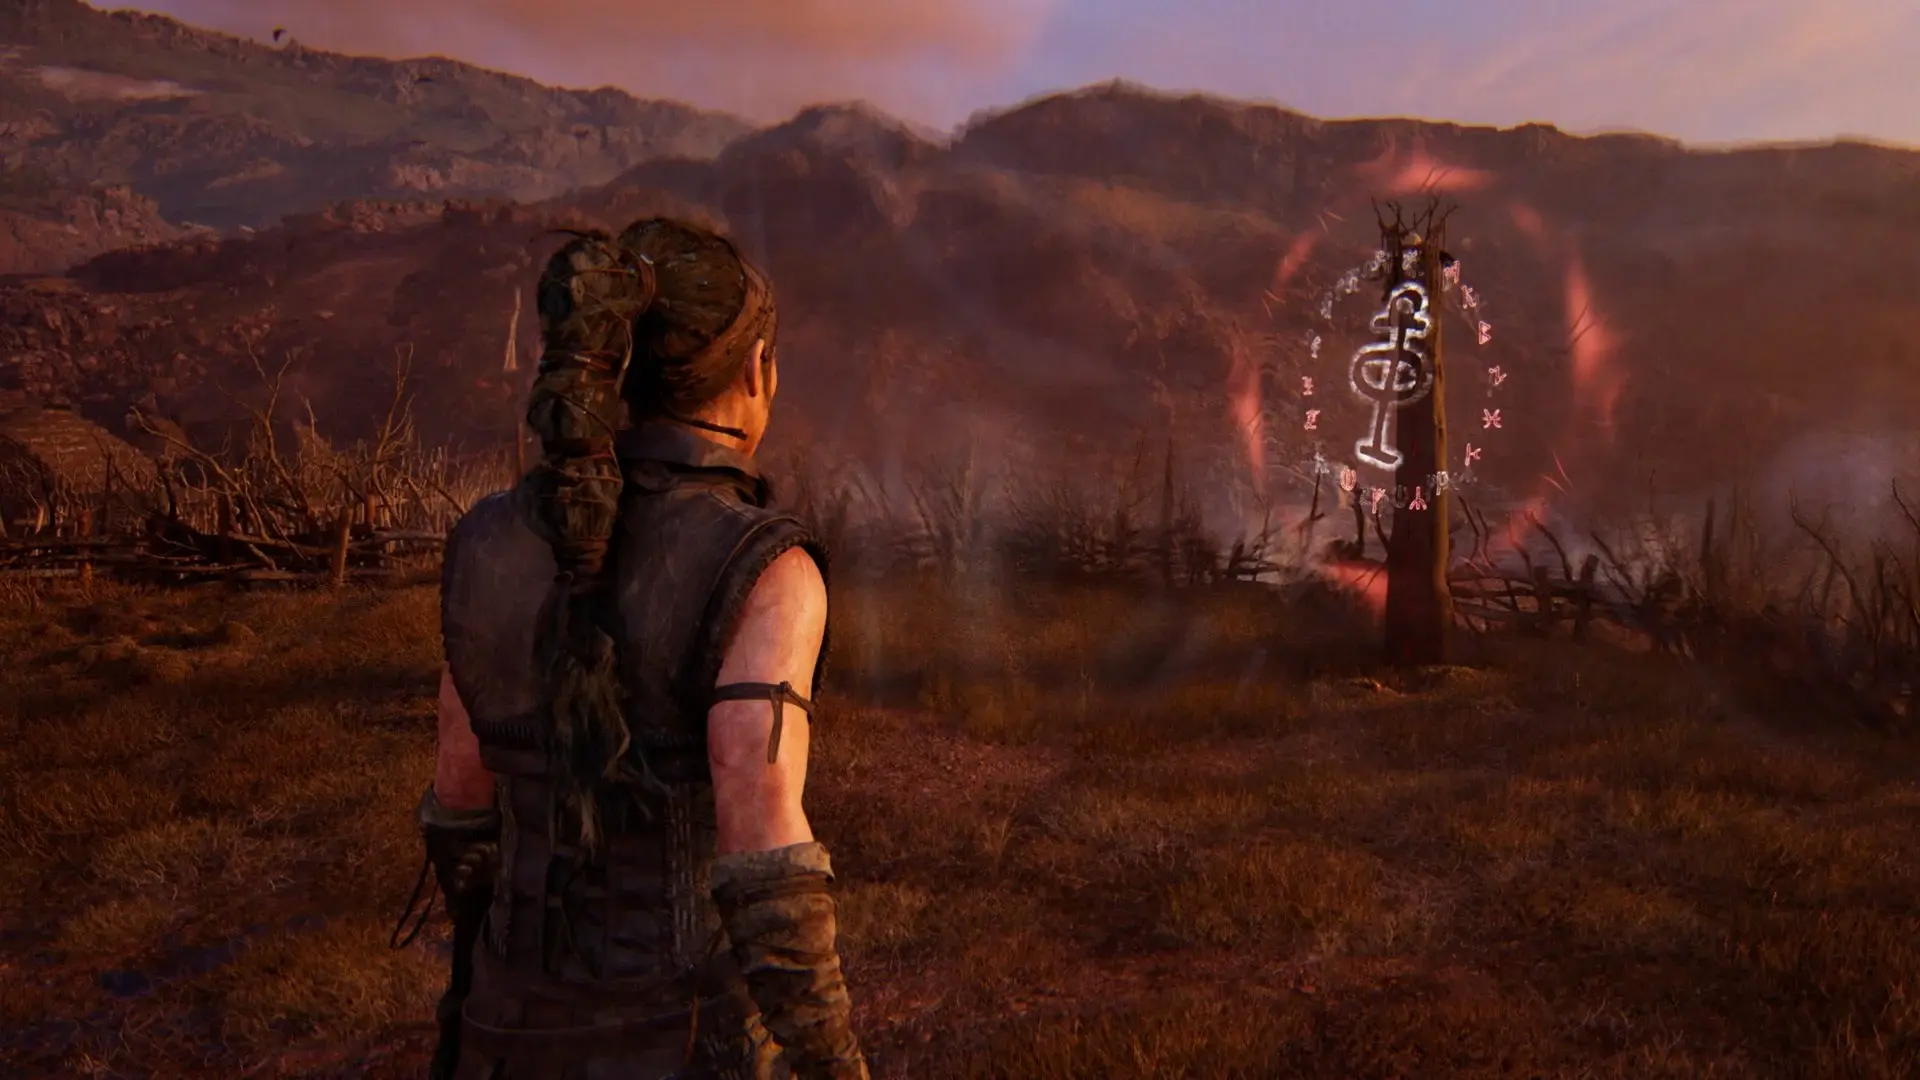
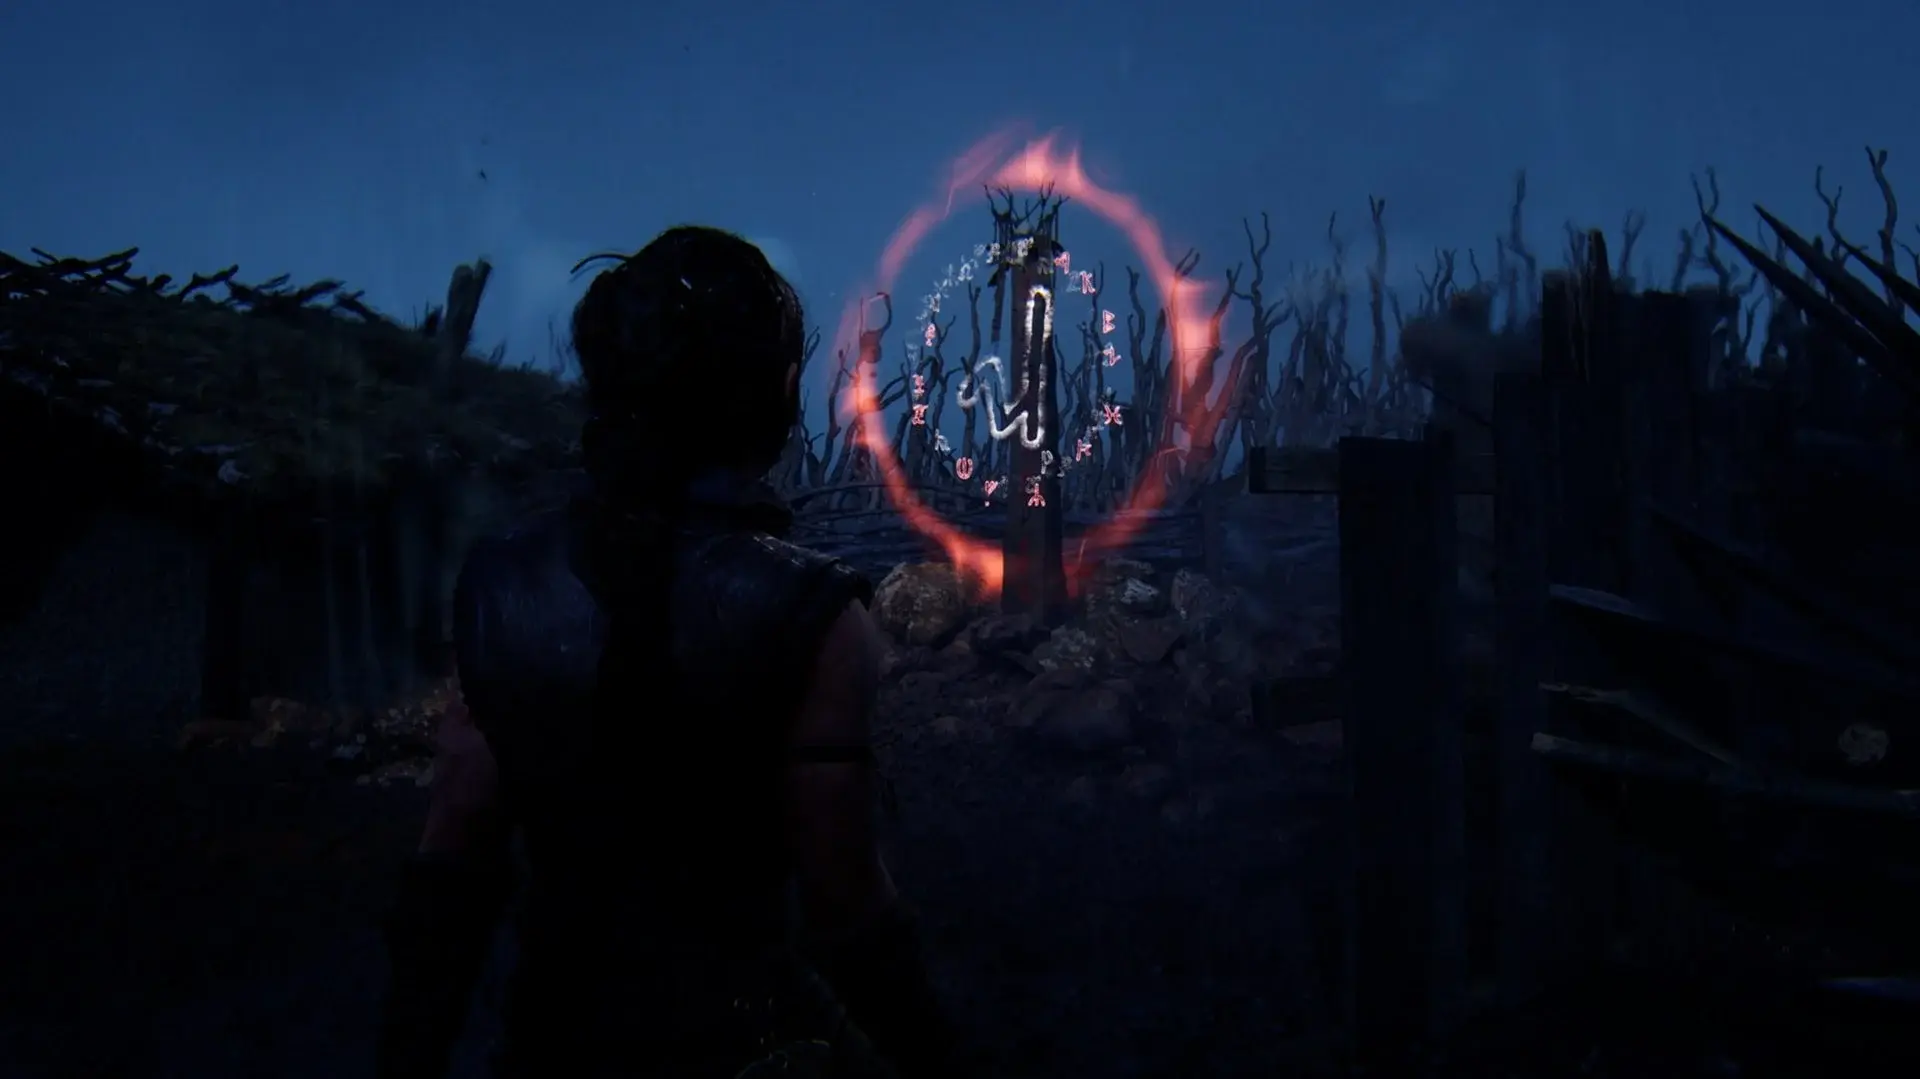
- Lorestangir 5: As you continue to follow Fargrímr down the path, watch for a wooden pole/marker sticking out of a small pile of stones on the ground. Fargrímr will once again take the path to the right, however you will once again take the path on the left to find the final Lorestangir in this chapter.

Chapter 3 Raiðhólar collectibles
| Act | Lorestangir | Faces |
| Red Hills | 1 | 2 |
| Illtauga | 0 | 0 |
| On the Hill | 4 | 3 |
| Find the Hidden Folk | 1 | 0 |
Act 1 – Red Hills
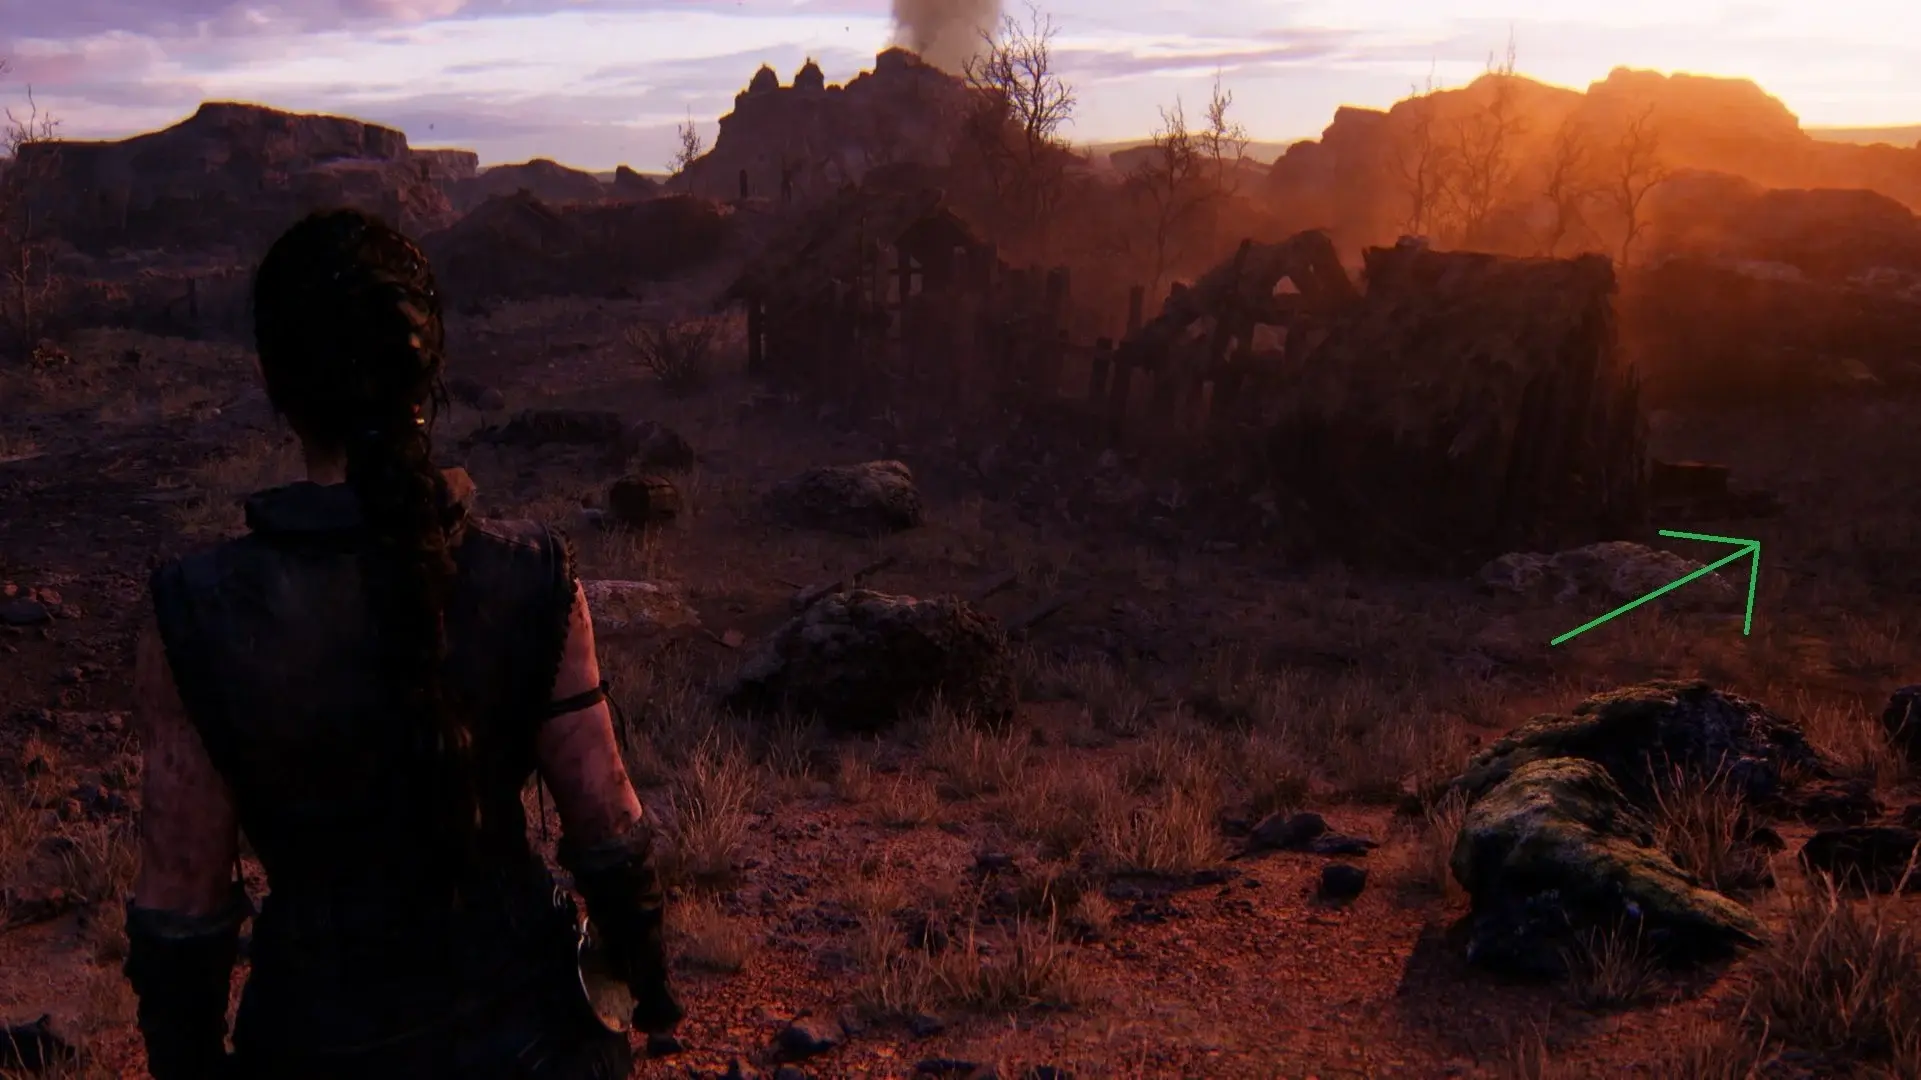
- Face 3: At the very beginning of this chapter Fargrímr will lead you down a hill whilst telling you the horrors of what the giant Illtauga has been committing against the people of his village. As you descend you’ll find a marker in front of you similar to the one mentioned when finding Lorestangir 5 above. Just beyond the marker you’ll find ruins to both the left and right. Go left first. Senua’s inner voices will talk about the crack in the ground as you approach the ruins. Keeping the ruins on your right side, walk past some dead shrubs/trees and you’ll find the next face behind them.

- Lorestangir 6: As soon as you exit the hidden area you just accessed, turn left and you’ll find a Lorestangir.

- Face 4: From Lorestangir 6 (above), walk back that way you originally came towards the marker. Continue beyond to the other ruins and turn right so you’re almost heading back the way you came with Fargrímr.
At the end of the path you’ll find the second face in this chapter.

Act 3 – On the Hill
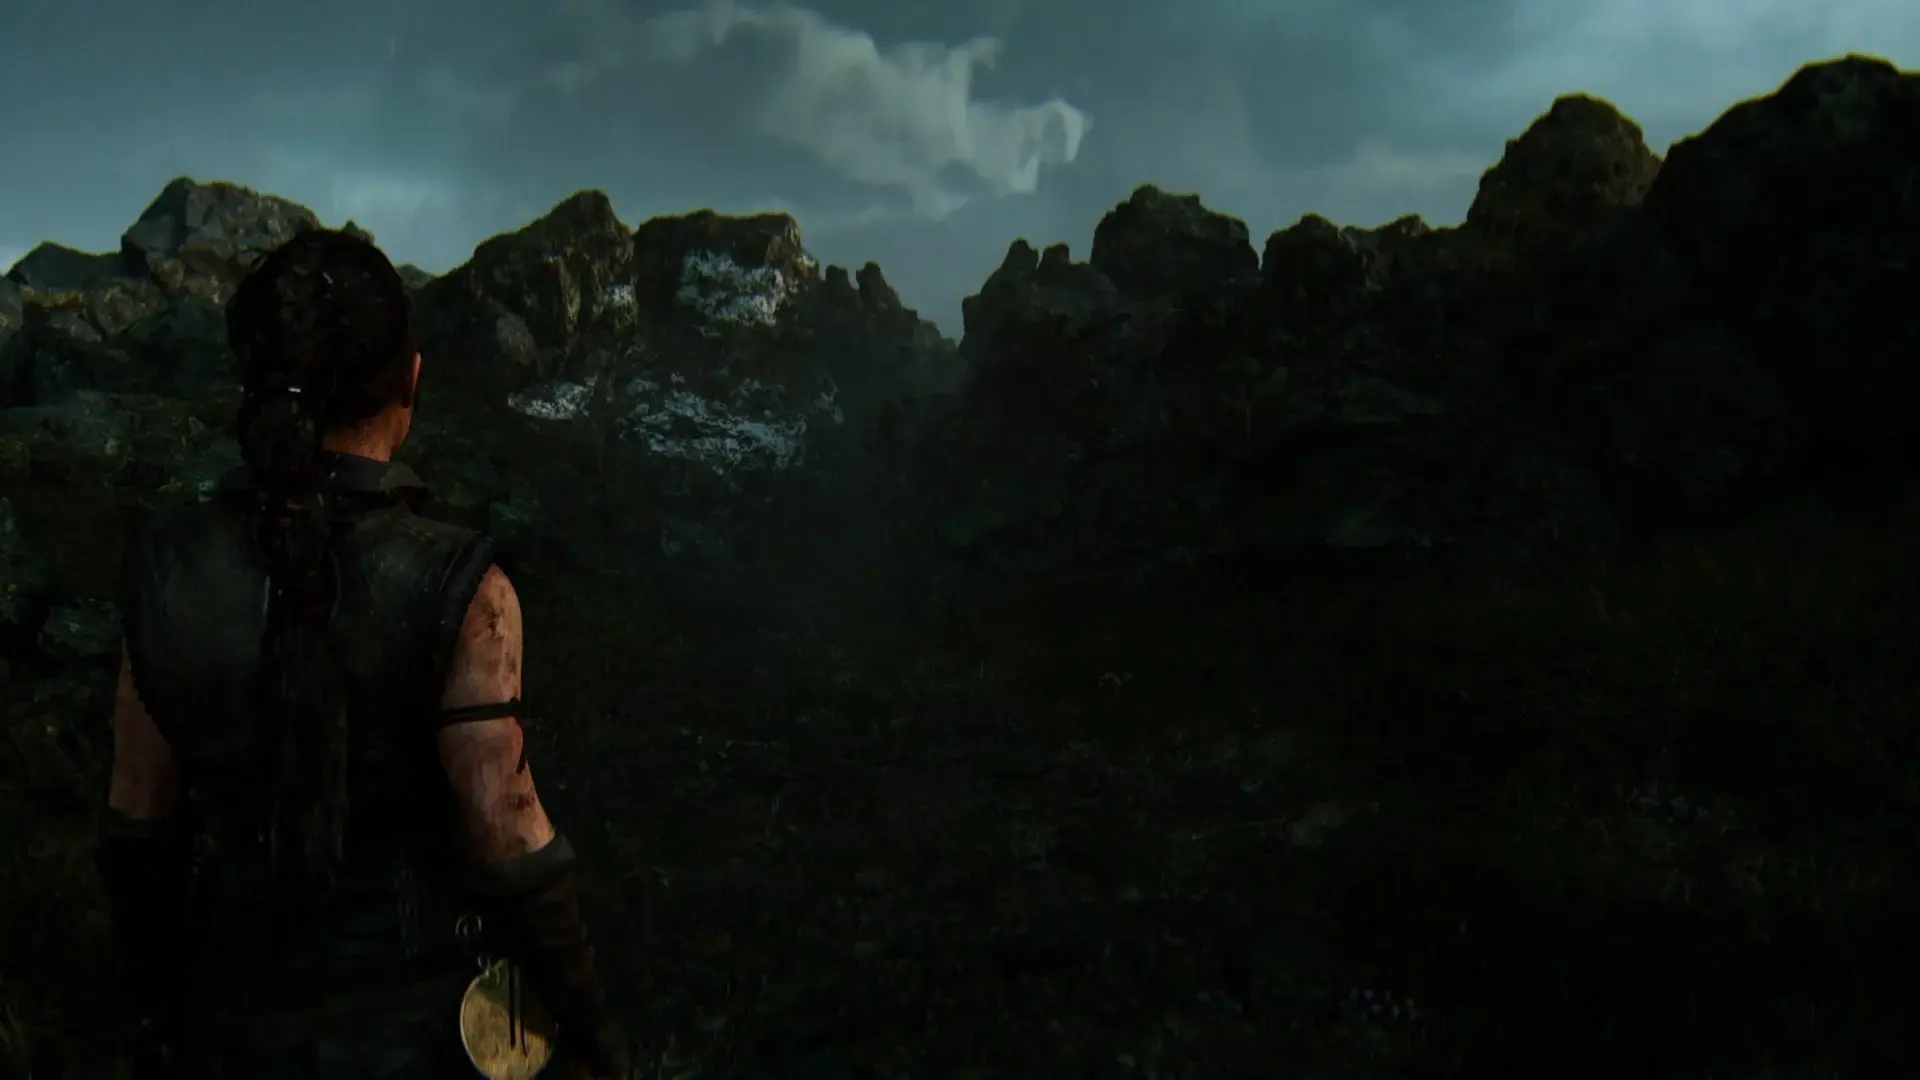
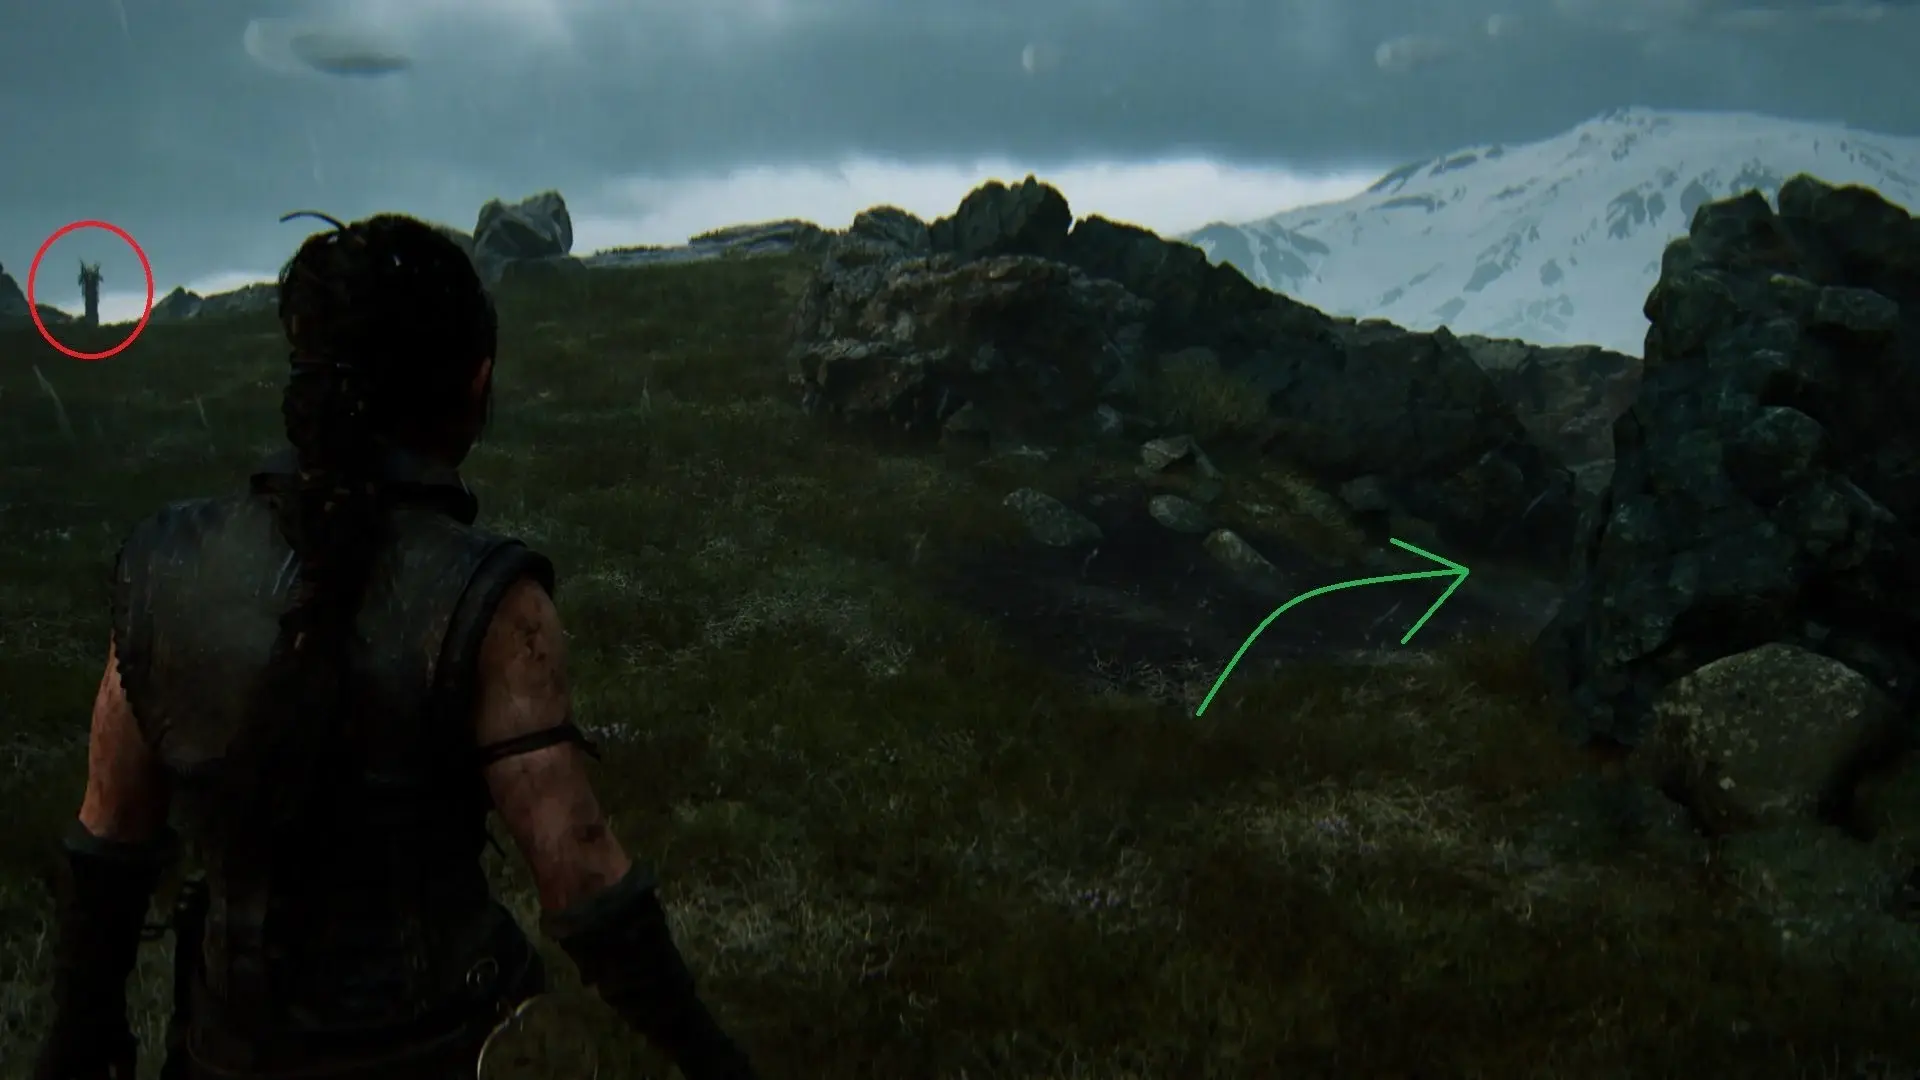
- Lorestangir 7: After returning from your hallucination you will find yourself on a hilltop speaking with Fargrímr who will talk to you about the Hidden Folk. Once he has finished speaking, look around to find the largest structure on the hilltop. You will see the Lorestangir from where you stand. To access it, walk counterclockwise around the structure. You’ll hear some villagers inside the structure discussing your presence. Take a left turn to find the Lorestangir.

- Face 5: After making your way down from Fargrímr’s hilltop via some wooden platforms you’ll come to a small pool of water in a clearing. Continue past this down the only path you can take. After a short while you’ll find a large face on your left.

This is down a very short path but you can easily see it from the main path.
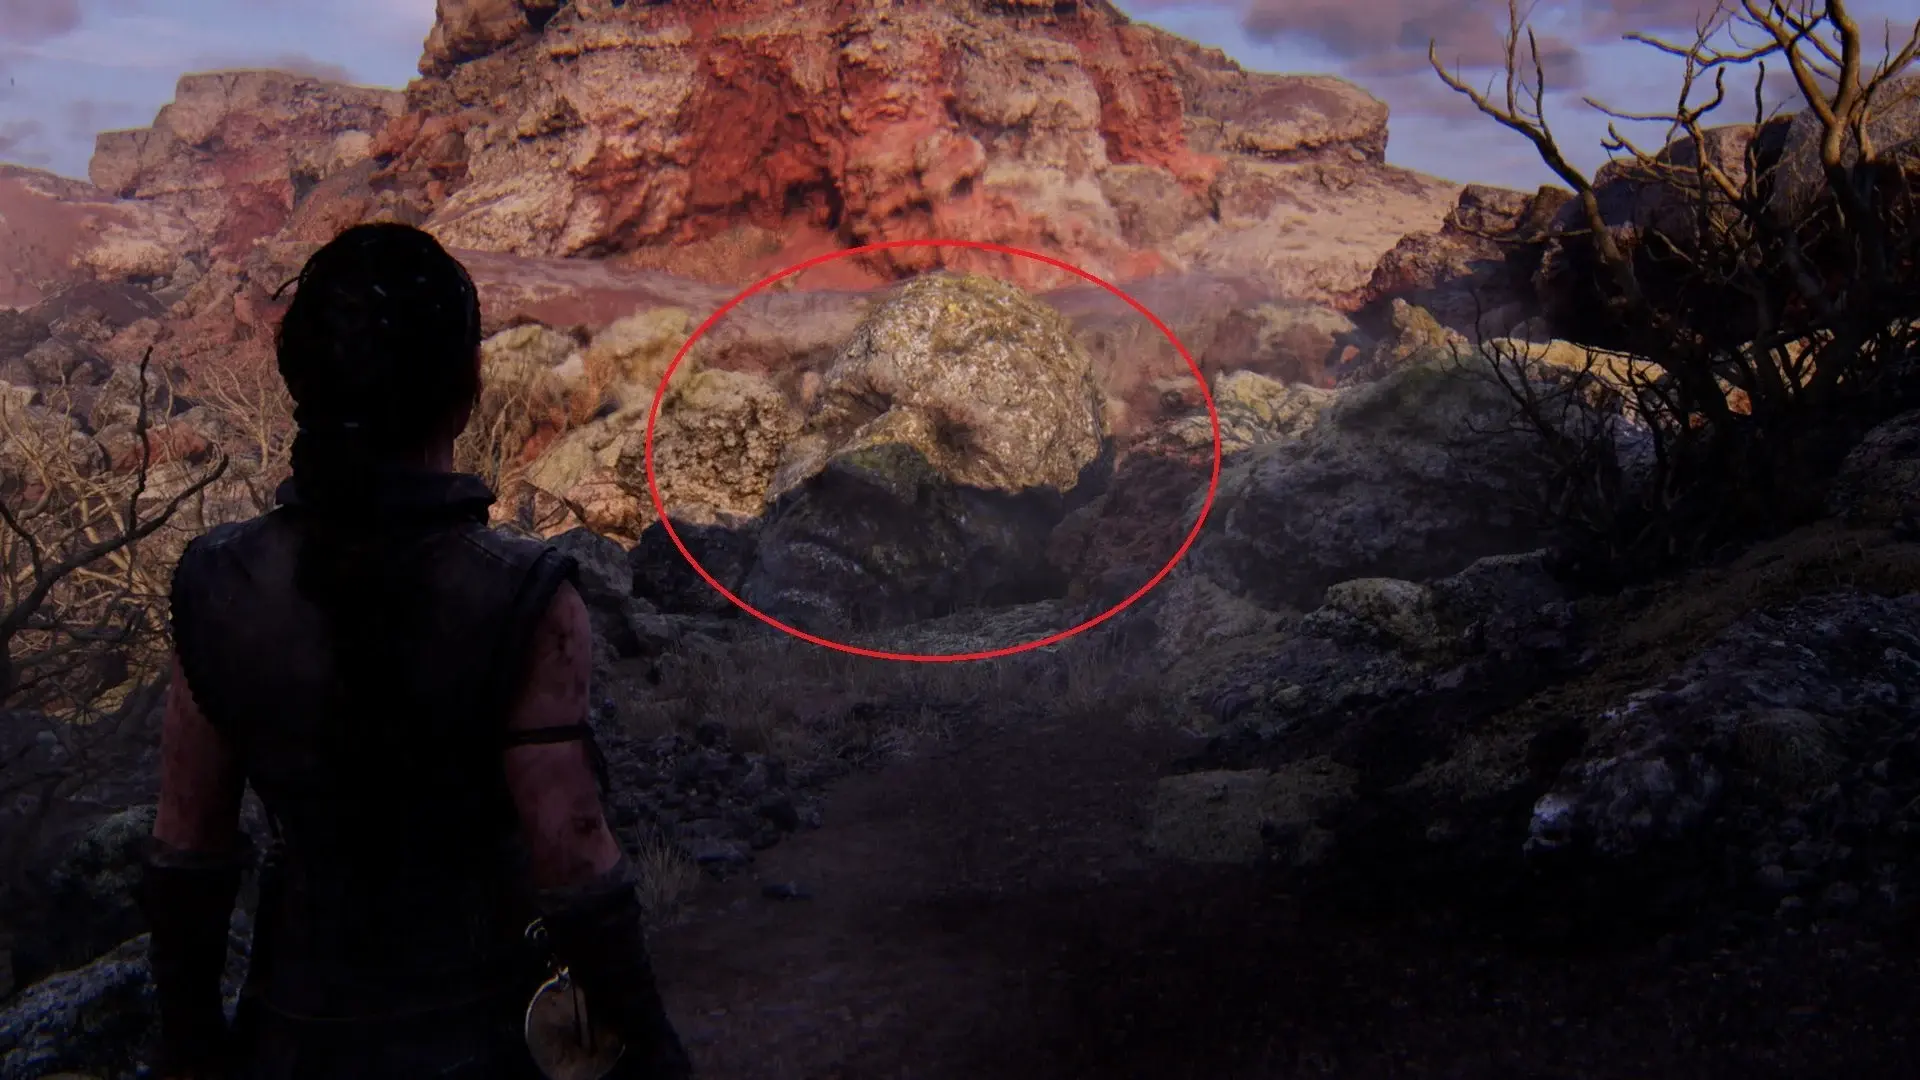
- Face 6: The next face can be found just after completing the first puzzle area with the two offering stones. Exit the puzzle area and follow the main path for a short while. The face is huge and can be found on your right.

- Lorestangir 8: Almost immediately after exiting the hidden area you just accessed the main path will open up a little and on your left you’ll see a ledge that’s too high to climb. Beyond that ledge you’ll see the next Lorestangir. To access it, walk up to the ledge, turn to the right to find a narrow path. Follow it until you reach a climbable ledge on your left. Climb up and continue on until you reach the Lorestangir.

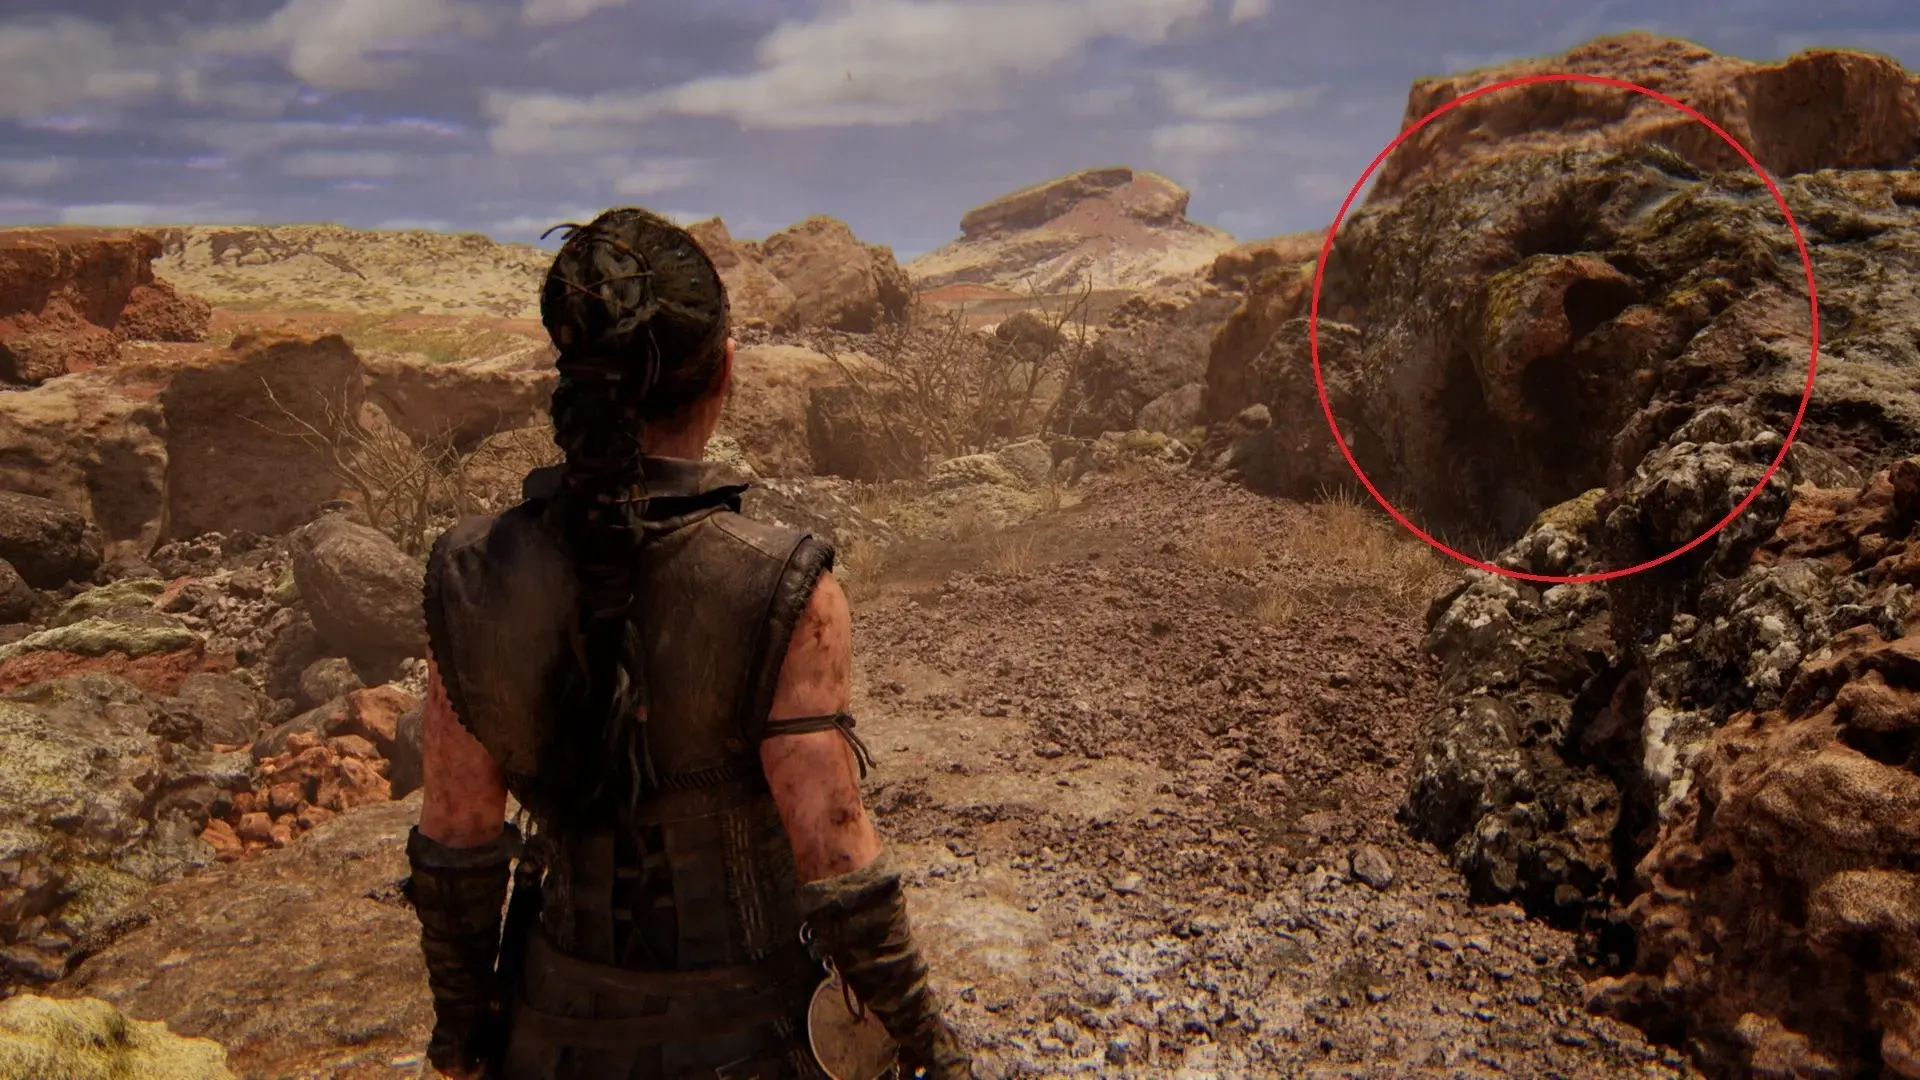
- Face 7: After completing and exiting the second puzzle area in this chapter, Senua will drop down off a couple of ledges. As you walk up the path keep an eye out on your right-hand side for two small climbable ledges. If you get to the small pools you’ve gone too far.

Once you’ve climbed the 2nd ledge you’ll find the face on the right-hand side.
- Lorestangir 9: After passing the pools of water a shadow will be cast over Senua. To the left you’ll find a narrow passage you can edge your way through.

Follow this to the Lorestangir. Once accessed a ledge will lead you back to the main path with the small pools in front of you again.
- Lorestangir 10: After passing the small pools for the 2nd time, keep an eye out for a dark cave on your right. This will lead you to the next Lorestangir.

Act 4 – Find the Hidden Folk
- Lorestangir 11: This Lorestangir is hidden in the 3rd puzzle area of this chapter also known as the Lake puzzle. Like the puzzle before it, you’ll collect offering stones and place them in their pedestals. Before you pick up the third stone, look to the ceiling on your left to find the last Lorestangir of this chapter.

Chapter 4 Huldufólk collectibles
| Act | Lorestangir | Faces |
| Enter the Caves | 2 | 3 |
| Trial of Wisdom | 0 | 0 |
| Into Darkness | 0 | 0 |
| Act of Sacrifice | 1 | 1 |
| Breaking Through | 0 | 0 |
| A Gift Returned | 0 | 0 |
| The First Ritual | 0 | 0 |
Act 1 – Enter the Caves
- Face 8: As you enter the caves beneath the lake in search of the hidden folk Senua will collect her trusty torch and then spend some time slowly working her way through a tight section of the cave. She’ll then drop down off a ledge which is a point of no return and then soon after will make her way through a section where the cave ceiling hangs very low forcing her to bend down to get through. Whilst in this section the path splits in two. Go left to find your next rock face.

- Lorestangir 12: As you continue on, Senua’s inner voice will comment on the cave getting smaller. As this happens you should see a small trickle of water in the distance.
Walk towards the water but look to your right side where you’ll eventually see a small opening in the cave wall where a Lorestangir stands. You can’t access it from here though.

Continue on and drop off a ledge where you’ll see a discarded shield and some weapons. Follow the cave that leads around behind the weaponry (keeping the weaponry on your right side) and climb a ledge to your next Lorestangir.
- Face 9: This face is found in the second area with the blue flame brazier. It’s important to ensure you’re in the correct space. The first time the blue flame appears in the game Senua lights the brazier to proceed. This is not the area you want. You want the second of these rooms in which Senua must extinguish the flame to unblock the door. After extinguishing the blue flame, turn around 180 degrees and you’ll see the face behind the blue mist.

- Face 10: Soon after finding the above face Senua will jump down a deep hole into waist deep water. As soon as you land, turn around 180 degrees to find a dark cave behind you.
A rock face lies at the end of this cave but it can’t be seen until you get close to it.

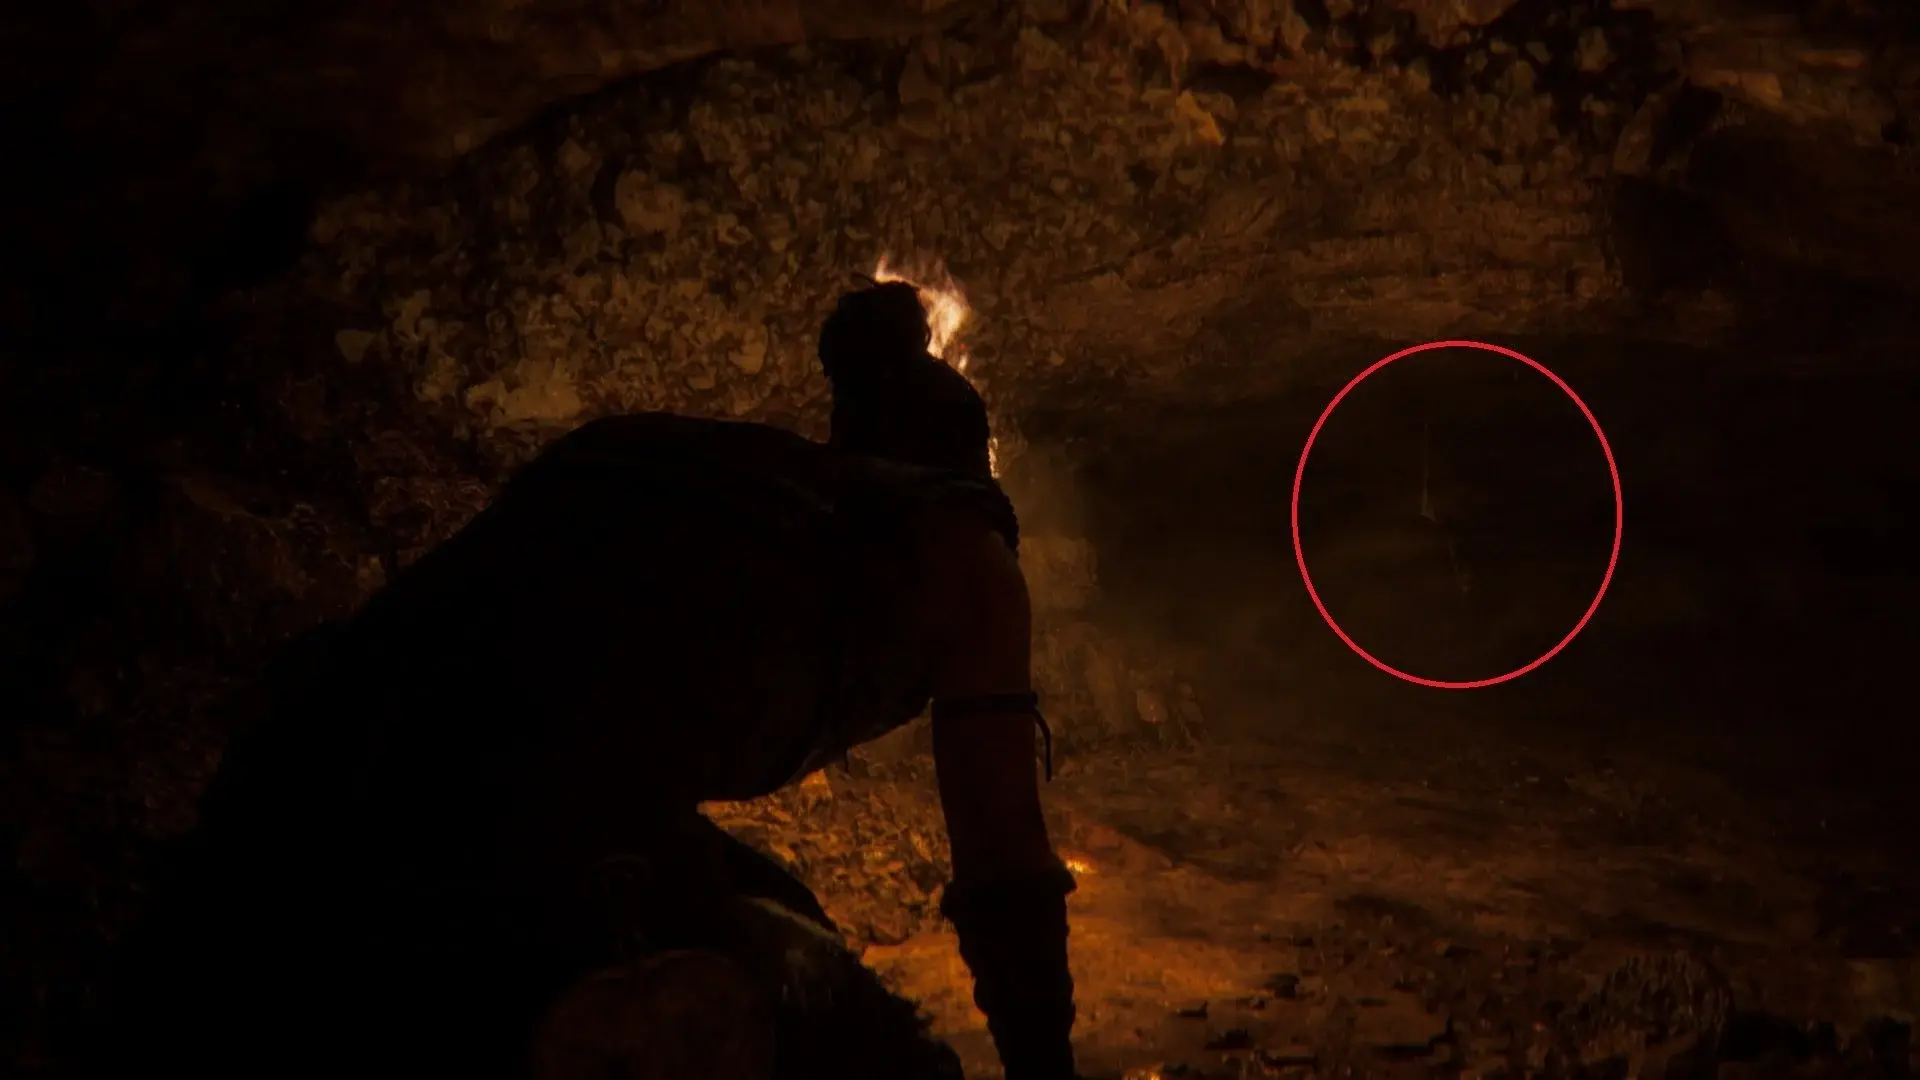
- Lorestangir 13: After you first see your ghostly self carrying a torch ahead of you, you’ll follow in its footsteps down a path that has a rock wall on the left and an open void on the right. The Lorestangir will be visible across the void. Accessing it is deceptively easy. All you need to do is look for the ledge right in front of the totem and jump down onto a rock bridge and make your way across the void.

Act 4 – Act of Sacrifice
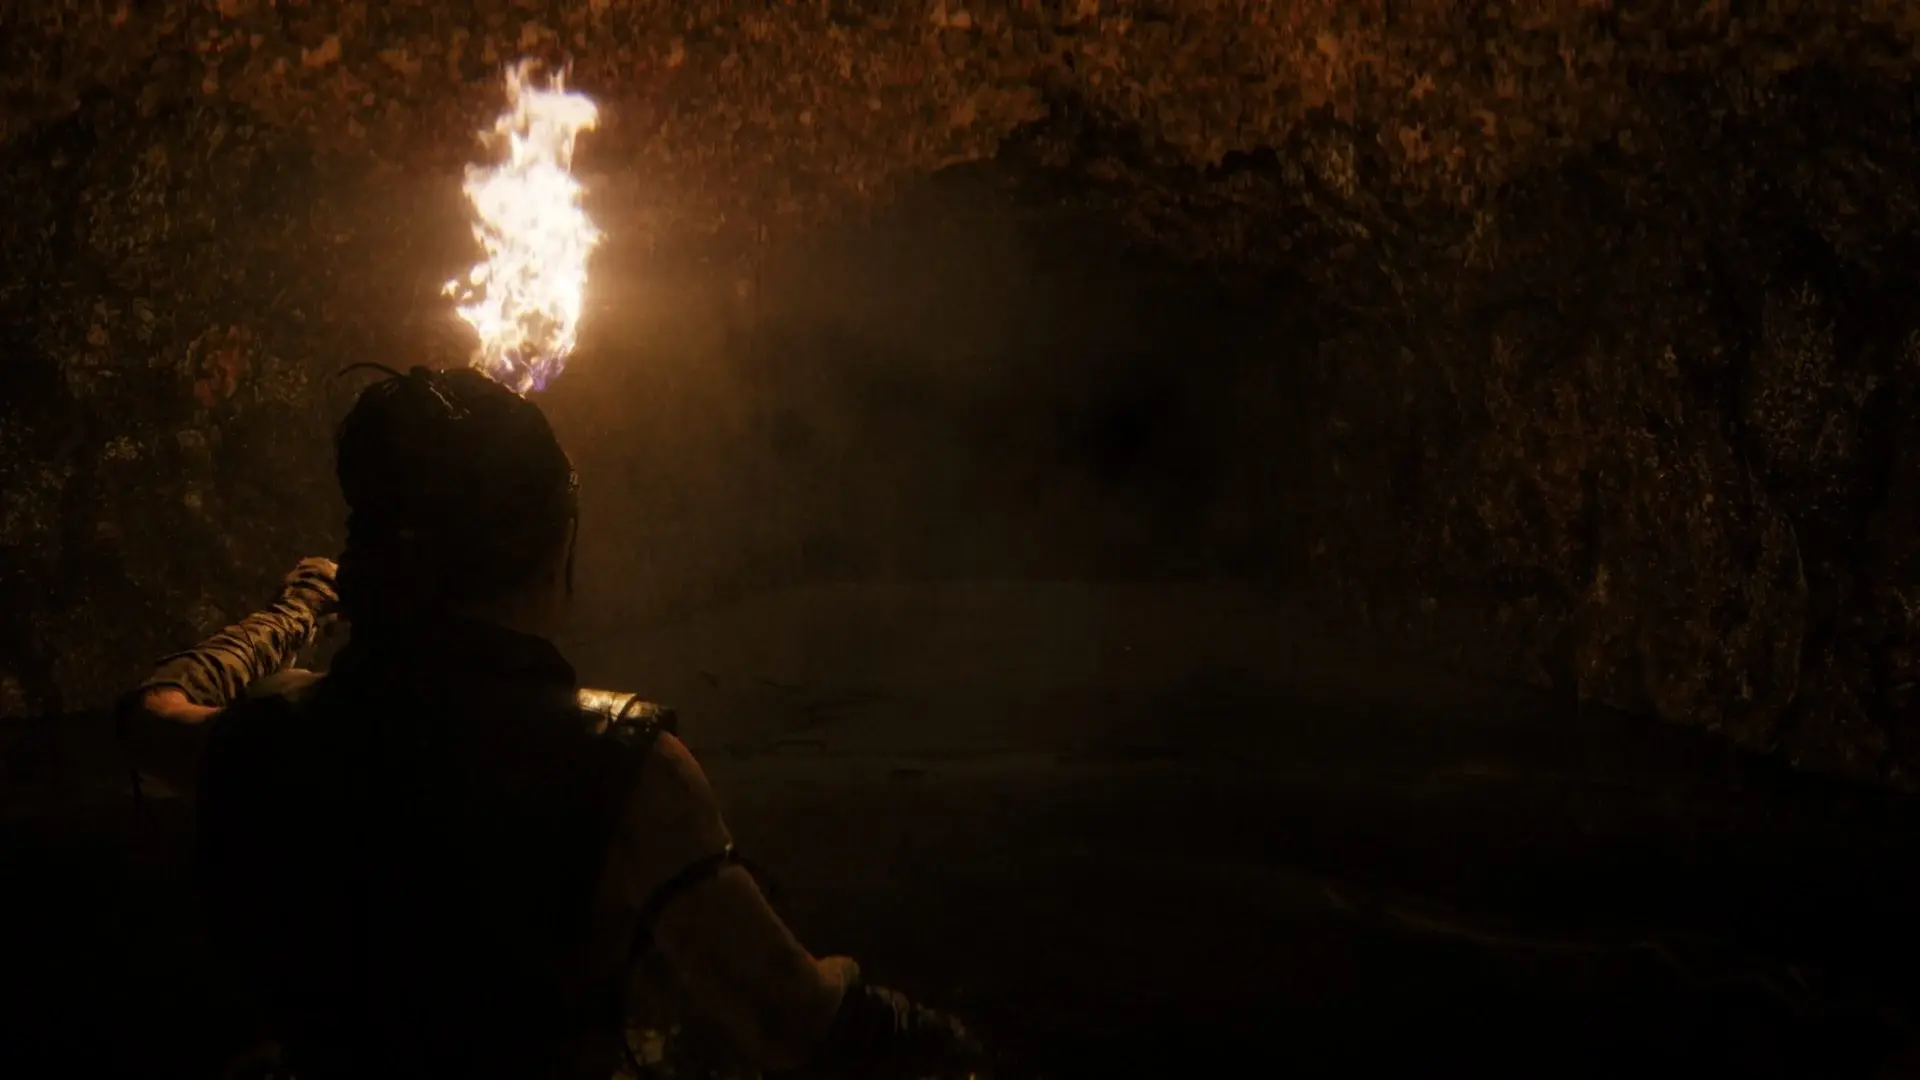
- Face 11: The next face isn’t found for quite a while after the one above. After following the blue lights and ensuring the monsters in the dark don’t get you, you’ll be climbing through a long narrow passage. After this you’ll find yourself in a new that has the first natural light you’ve seen in a while. Travel down the cave for a short while until you see some rocks floating in the air both to your left and to your right. Turn almost 180 degrees to the left and look at the wall behind you to find the last face in this chapter.

- Lorestangir 14: Continue on until the floating rocks fall on the ground. You’ll soon come to a tunnel on your left that looks to be your exit. Walk past that tunnel and carry on forward and to your right where you’ll find the last Lorestangir of this chapter.

Chapter 5 Bárðarvík collectibles
| Act | Lorestangir | Faces |
| To the Sea | 1 | 1 |
| Sjávarrisi | 1 | 1 |
| Another Question | 2 | 2 |
| Ástriðr’s Story | 0 | 0 |
| Waking the Giant | 0 | 0 |
| The Second Ritual | 0 | 0 |
| Borgarvirki | 0 | 0 |
Act 1 – To the Sea
- Face 12: The first face you’ll find behind the small waterfall on your right as you descend into the (first) valley

- Lorestangir 15: Right after the waterfall the path leads back up the other side of the valley. Look for a path to your right and follow it to another larger waterfall.
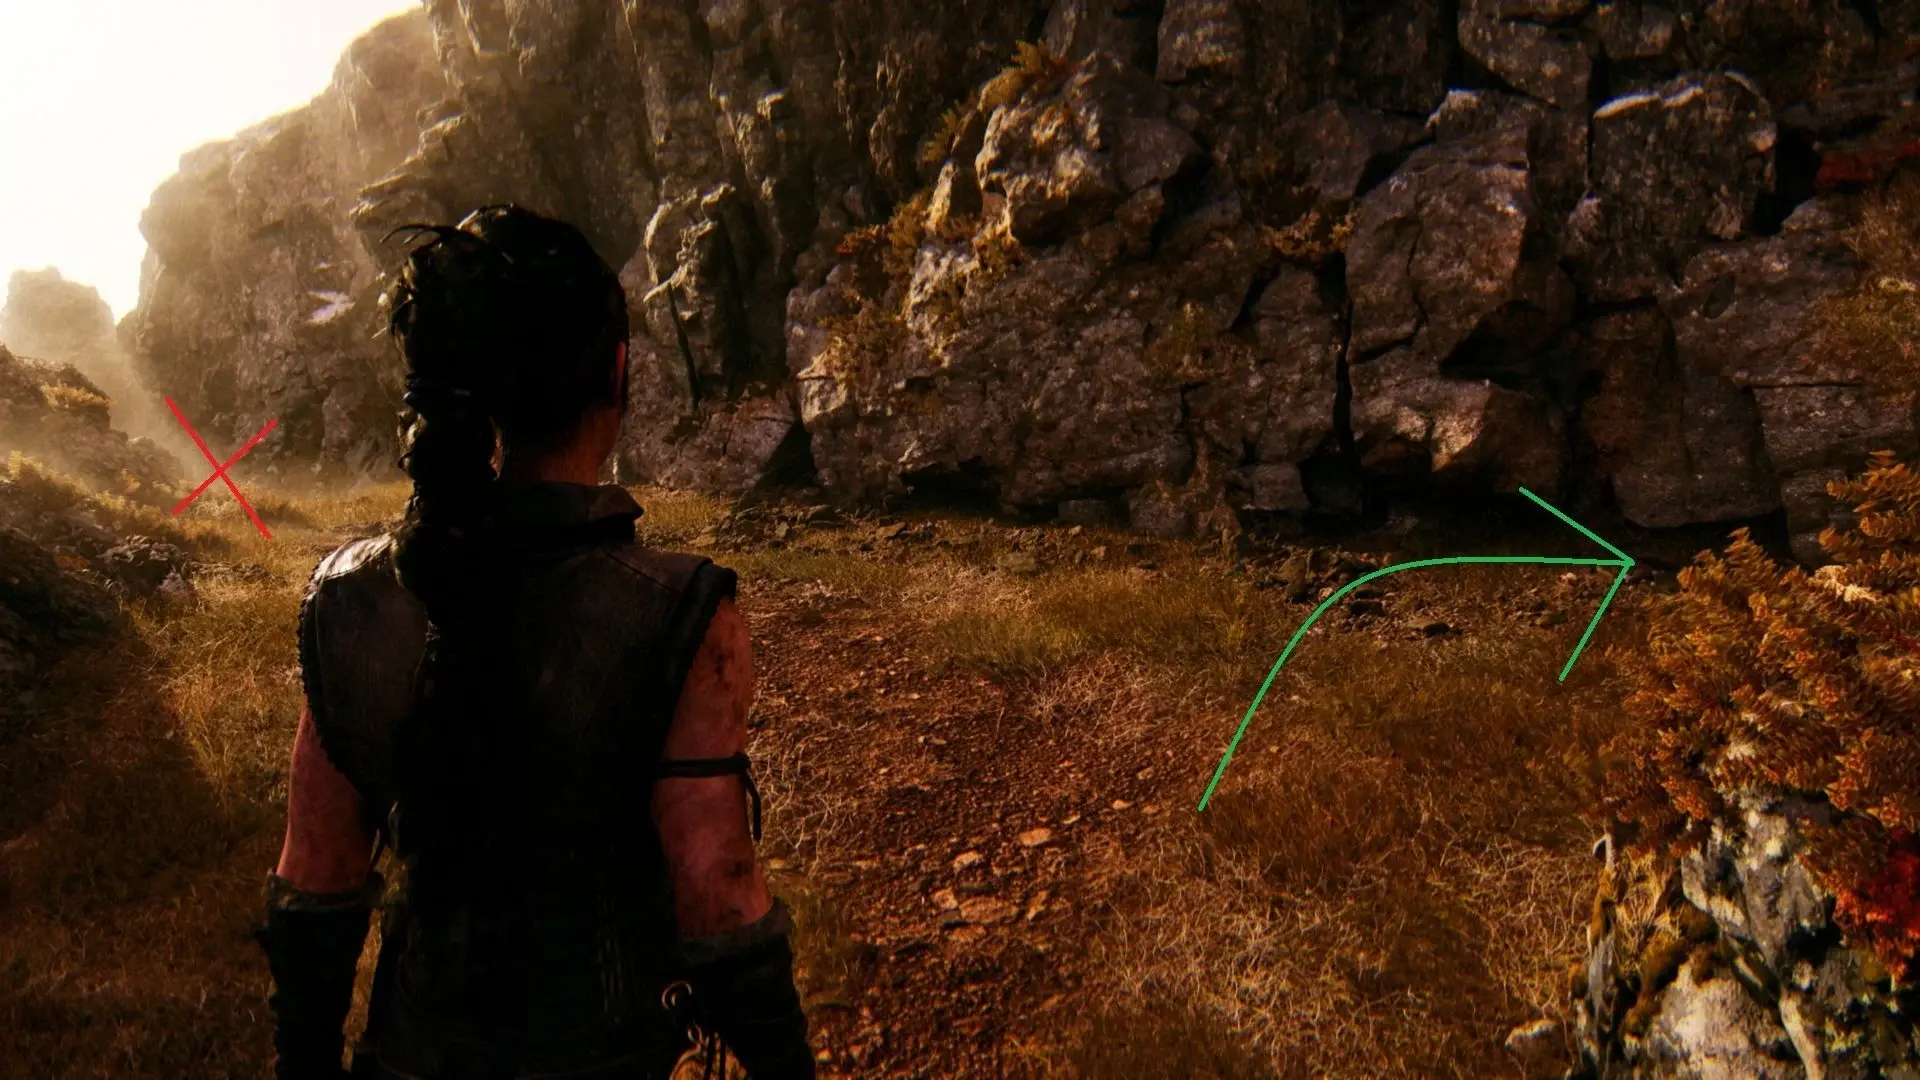
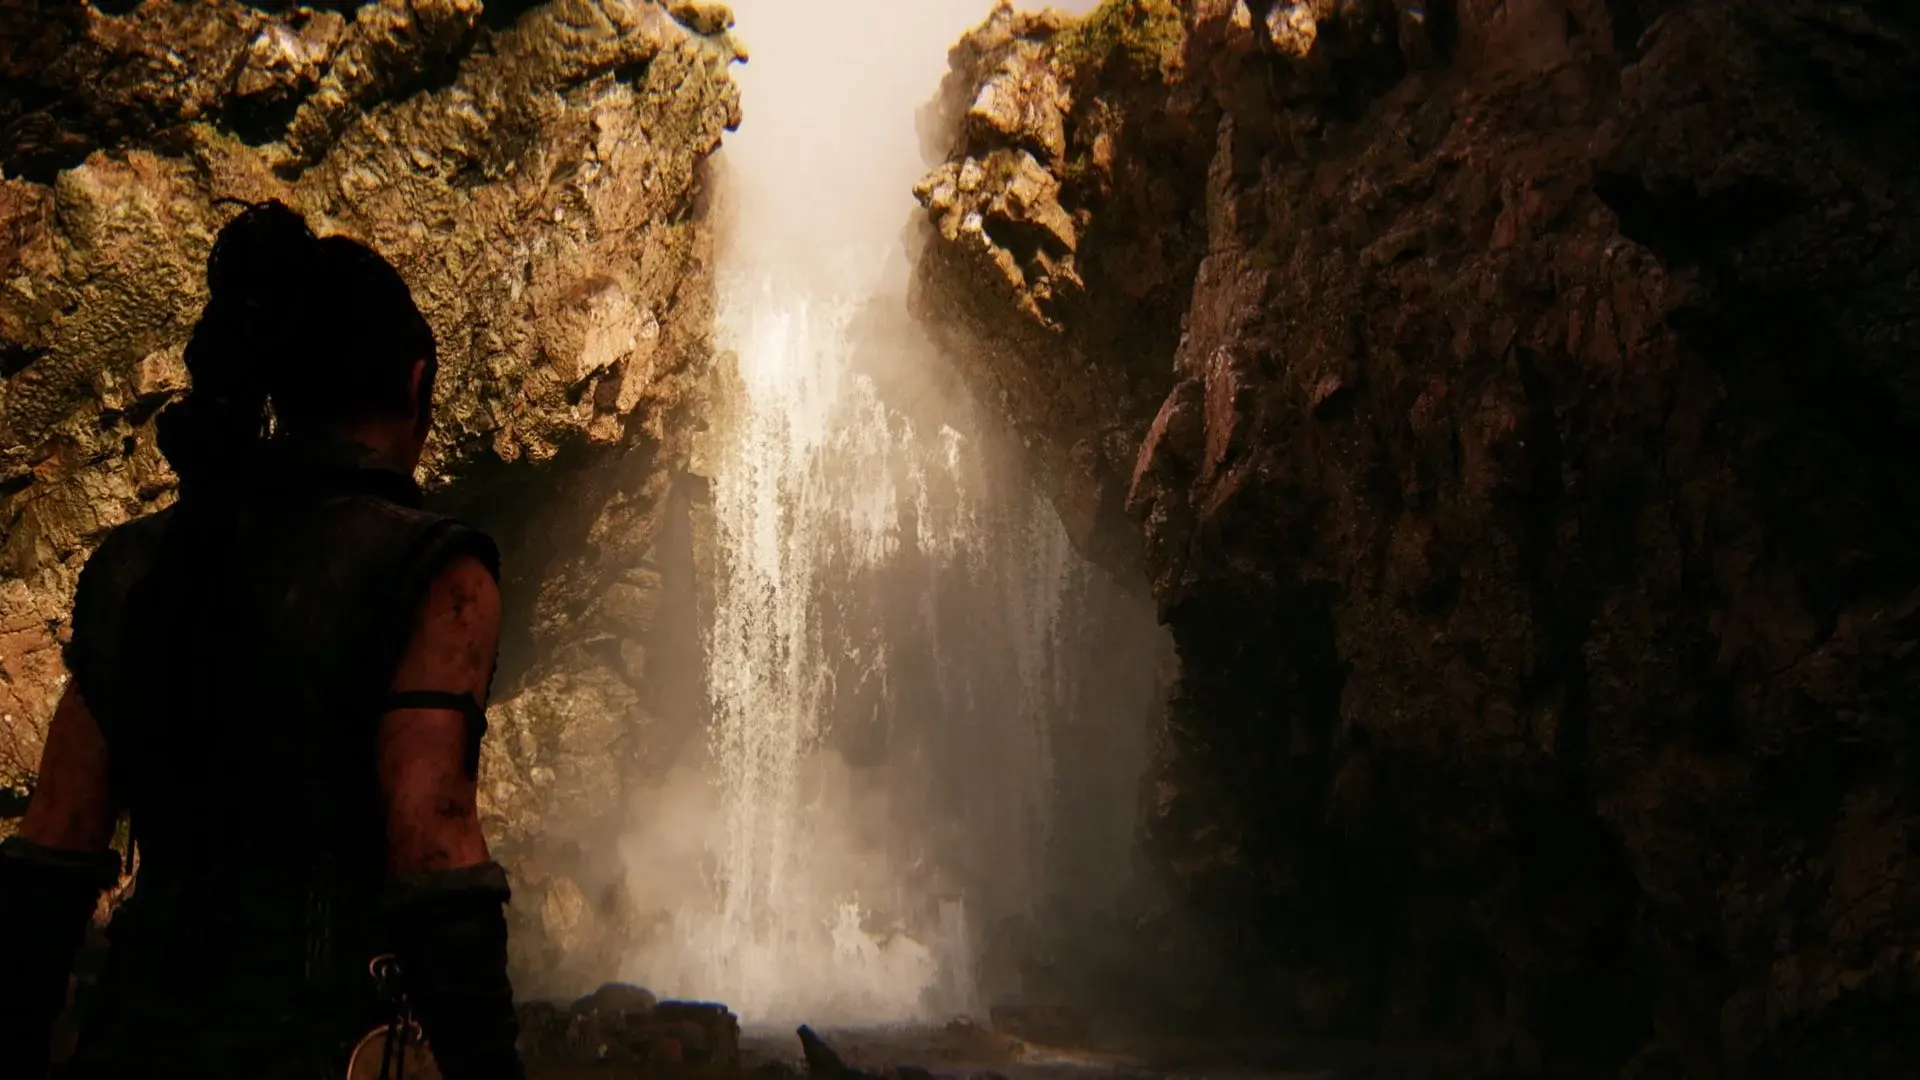
Approach the waterfall then turn around to follow the flow of the river and you’ll soon find the silhouette of this Lorestangir.

Act 2 – Sjávarrisi
- Face 13: After meeting Ástríðr follow her until you get to a small gap you need to sidestep through. It has white paint on the left-hand side of it so it’s hard to miss.
The easiest way to find this face is to walk right up to the gap but don’t walk through. Instead turn almost 180 degrees around to the right to look for the face in the rock which (as you’ve now turned around) will be on the left side of the path you’re on.

- Lorestangir 16: This Lorestangir is visible over the horizon to the right immediately after you follow Ástríðr over a small rock wall.

To get to it, walk towards the Lorestangir looking for a pathway to your right.
Follow the path through a small cave and you’ll find the Lorestangir.
Act 3 – Another Question
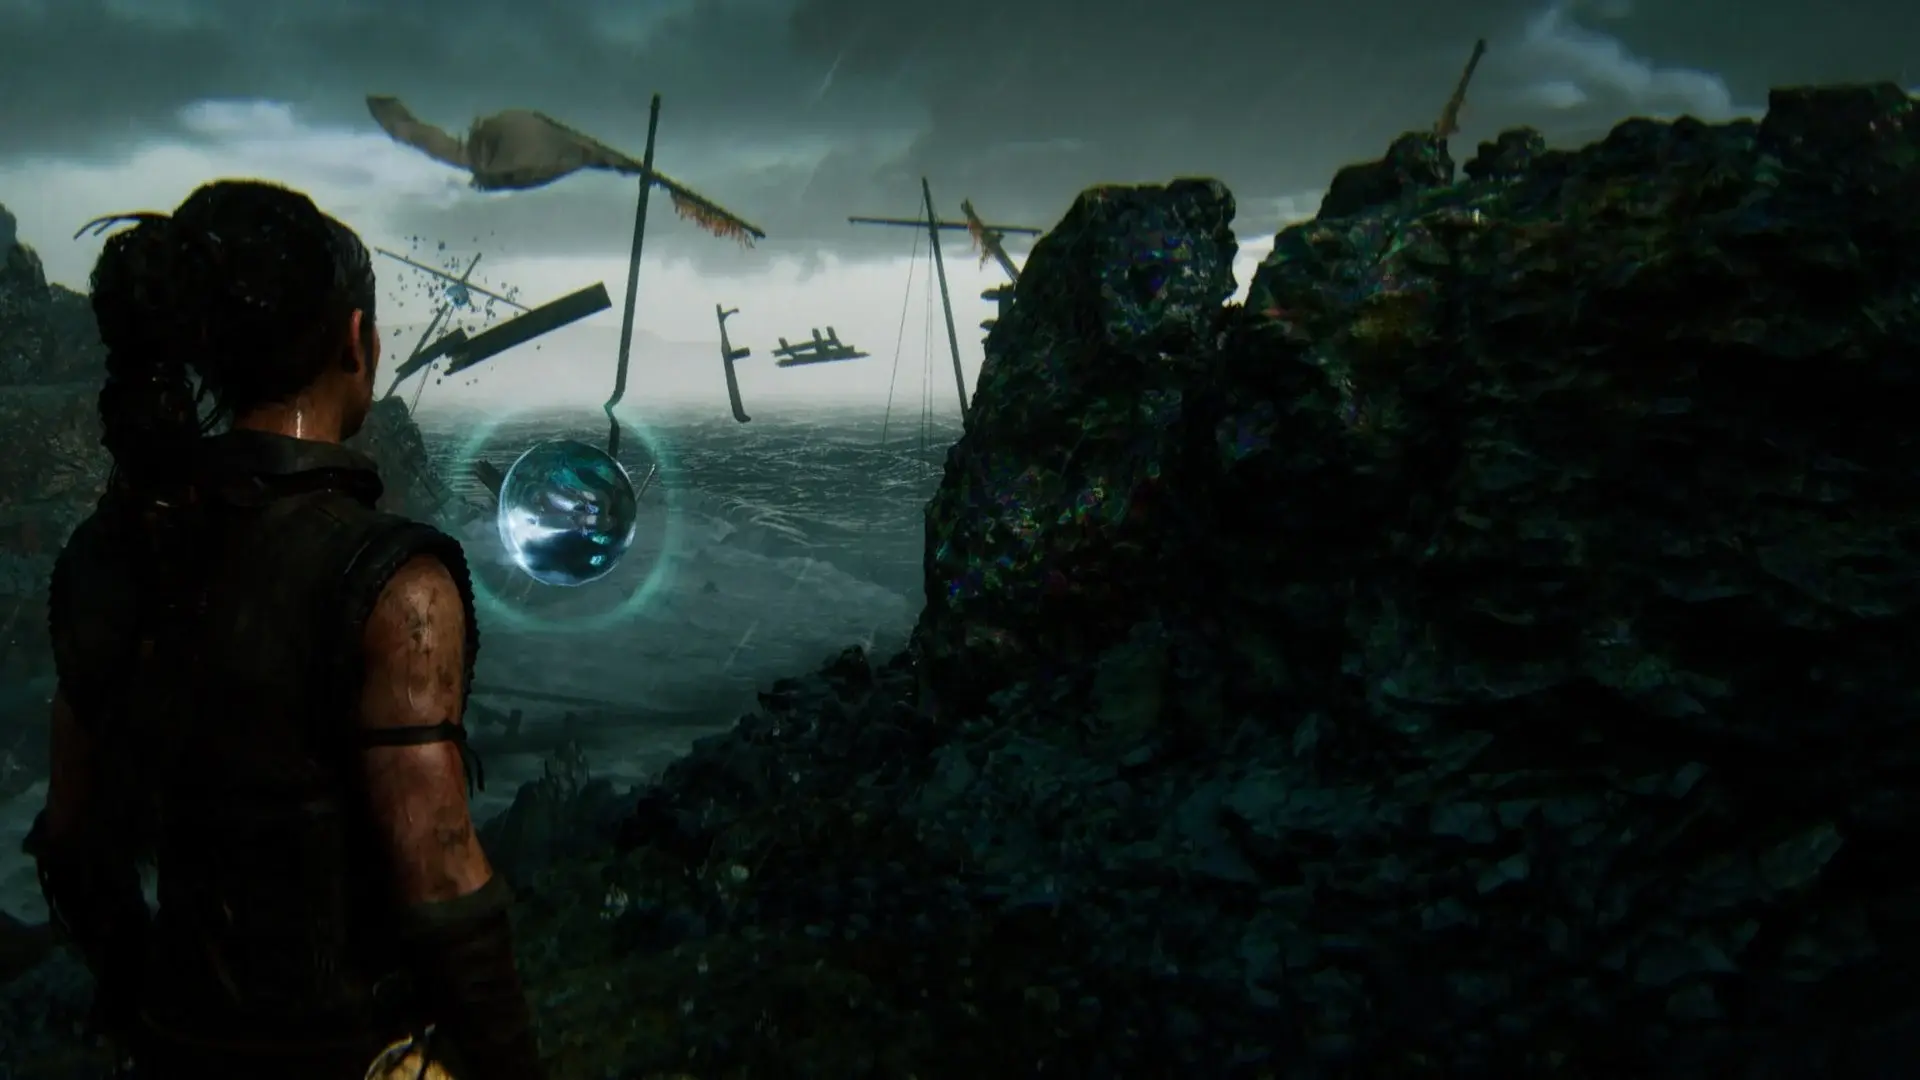
- Lorestangir 16 and Face 13:Both the next face and Lorestangir are by far the most difficult to find in the game, and describing how to find them with a great degree of clarity is no picnic either so please be patient with us.
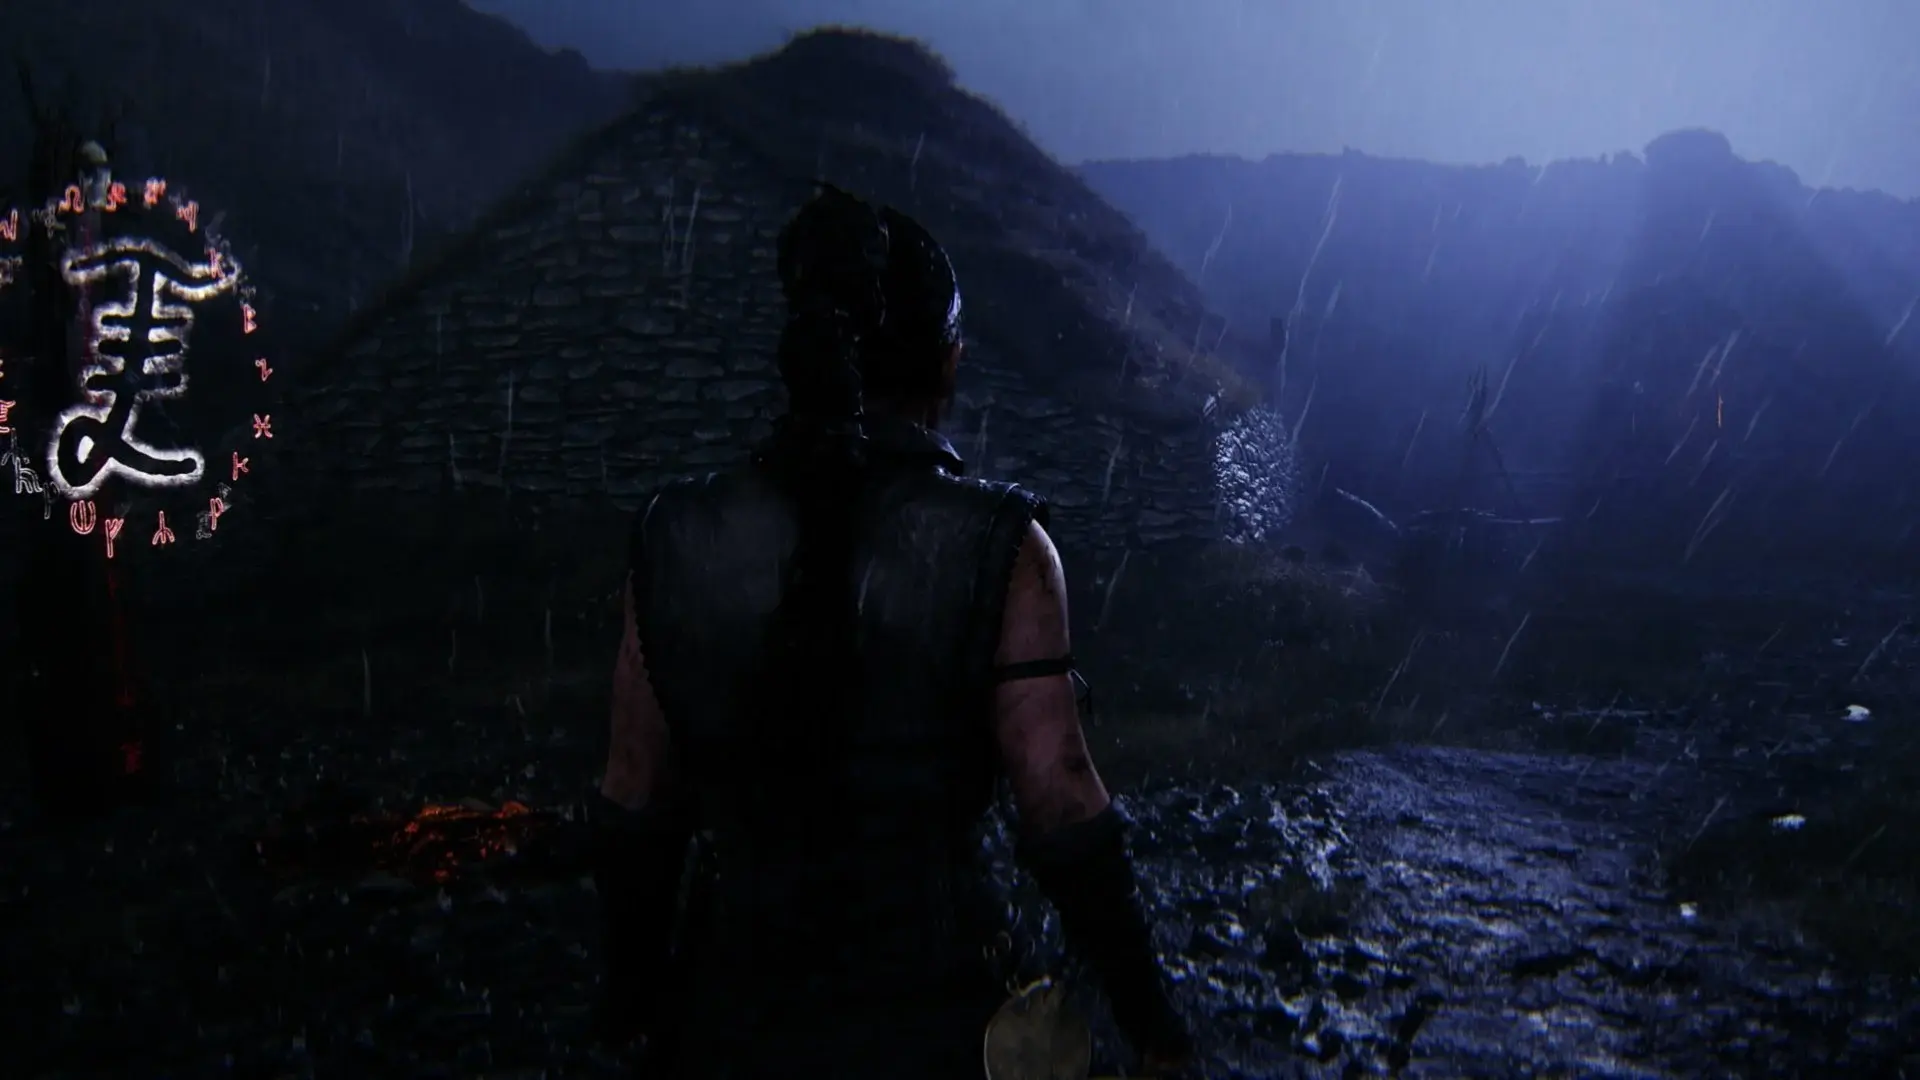
After parting ways with Ástríðr, make your way down the cliffs until you reach an area with a rune gate.
Start with your back to the rune gate as per the below picture:

Move towards the ledge on the opposite side of this area beyond the ship debris as per the below pic:

Climb the ledge and immediately turn left and follow the path
When the switch on your left becomes accessible, trigger it to clear the rocks in your way.
Continue down the path, (picking up the centre part of the rune on your left if you haven’t already done so)
Continue to follow the path around until you drop off a small ledge. You’ll be in front of a large section of a wrecked ship. Walk past the wrecked ship and into the blue glowing area behind it where you’ll find a small crack in the rocks to slip through.

Walk through the cave on the other side of the crack until you’re out in the open again.
- Lorestangir 17: Walk around the right-hand side of the rock in the middle of this area and you’ll find the Lorestangir.

- Face 14: Once you’ve picked up the above Lorestangir, turn around and come back the way you came. You’ll find the next rock face in the cave.

- Face 15: Once through the rune gate carry on down the path. To your right you’ll find a small pathway where you can see your next rock face.

- Face 16: After the underwater section where you learn of the next giant’s origins, you’ll find yourself washed up on a pebbly beach again. Move up the beach towards Ástriðr’s village and walk through it. You’ll pass three burning torches. Walk through the village until you see a torch on your left and a pole with cowbells hanging from it on your right.

Turn right into what you would call the yard of one of the houses. In the distance you’ll see another torch near a fence beyond the house. Head towards it where you’ll soon see a face in the rock to the right of the torch.
- Lorestangir 18: When you get to the far end of the town the game will lead you up a path to the right where a torch burns near a cottage. Take the path to the left.

Follow the path around the stone walls until you find the game’s final Lorestangir and you’ll also pick up an achievement.

- Face 17: After finding the above Lorestangir, do not go back the way you came. Instead turn to the right, keeping the two cottages on your left side.
As you pass the second cottage in this area you’ll see another torch burning. Walk between the torch and the cottage to find the final face in the stone wall for another achievement and some additional content as your reward.

And that was the last collectible — congratulations!
Chapter 6 Borgarvirki collectibles
| Act | Lorestangir | Faces |
| Into The Forest | 0 | 0 |
| Borgarvirki | 0 | 0 |
| Heart of Darkness | 0 | 0 |
| The Last Lie | 0 | 0 |
Senua’s Saga Hellblade 2 heads to Windows PC via Steam the Microsoft Store alongside Xbox Series S and Xbox Series X later today. We reviewed it here.
 |
Senua's Saga Hellblade 221 May 2024 (PC, Xbox), 12 August 2025 (PS5)PC PS5 Xbox Series S & X
|
This article may contain affiliate links, meaning we could earn a small commission if you click-through and make a purchase. Stevivor is an independent outlet and our journalism is in no way influenced by any advertiser or commercial initiative.