


Spoilers obviously follow.
Alone in the Dark is out now, and we’re here to help you if you’re stuck with any of its head scratching puzzles… cause there are a lot.
We’ll present to you all of Alone in the Dark‘s puzzles, chronologically, and with as little contextual information as to not spoil things, but still have everything make sense. Be warned of course that spoilers follow in terms of key items, locations, and the like.
All good? Let’s get into it!
Chapter 1 | Chapter 2 | Chapter 3 | Chapter 4
Chapter 1 puzzles
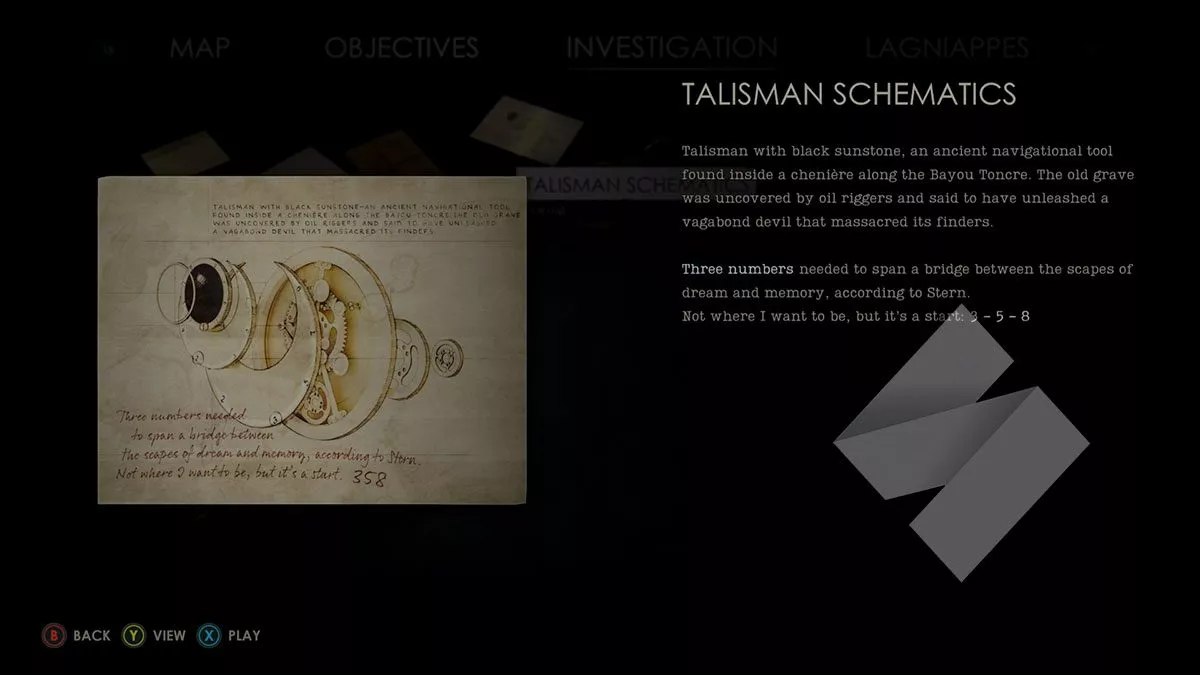
First talisman code
The first code you’ll need when you pick up can be found inside the talisman schematics document. It’s 358, with 3 being the top-most entered number, and 8 being the bottom-most entered number.
Chapter 2 puzzles
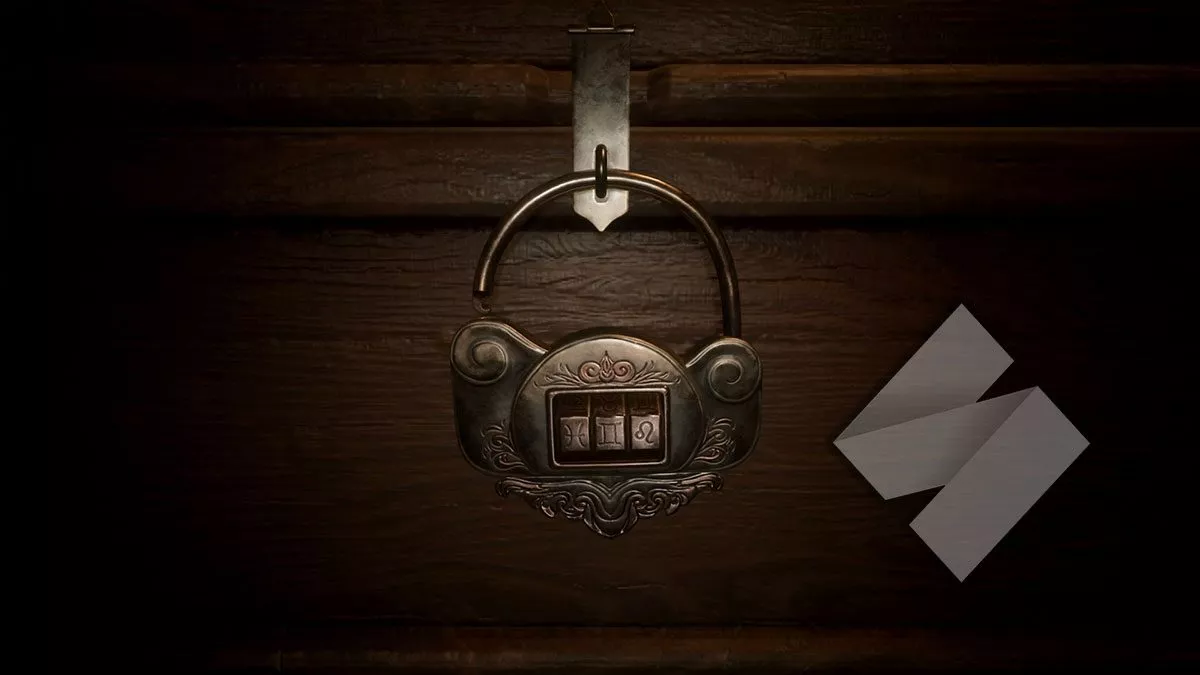
How to get the disc fragment in Perosi’s room
An important book — Perosi’s Journal — is found in this room and used in many puzzles (though you can shortcut them all with our help, of course); make sure to grab that.
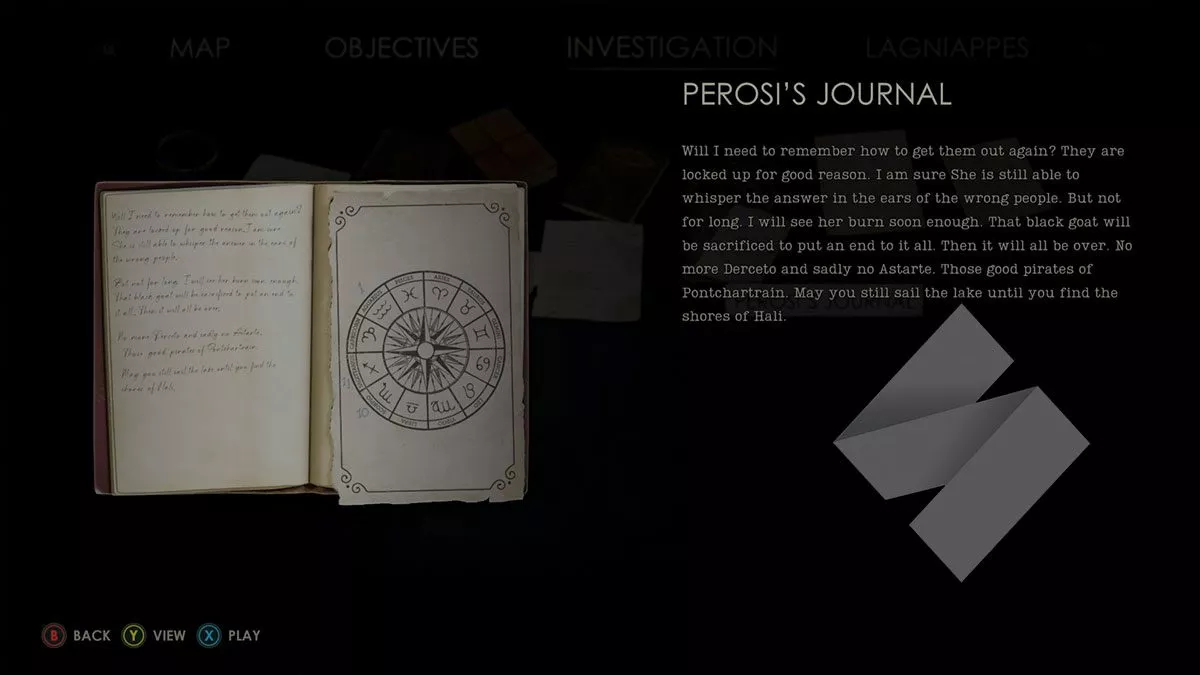
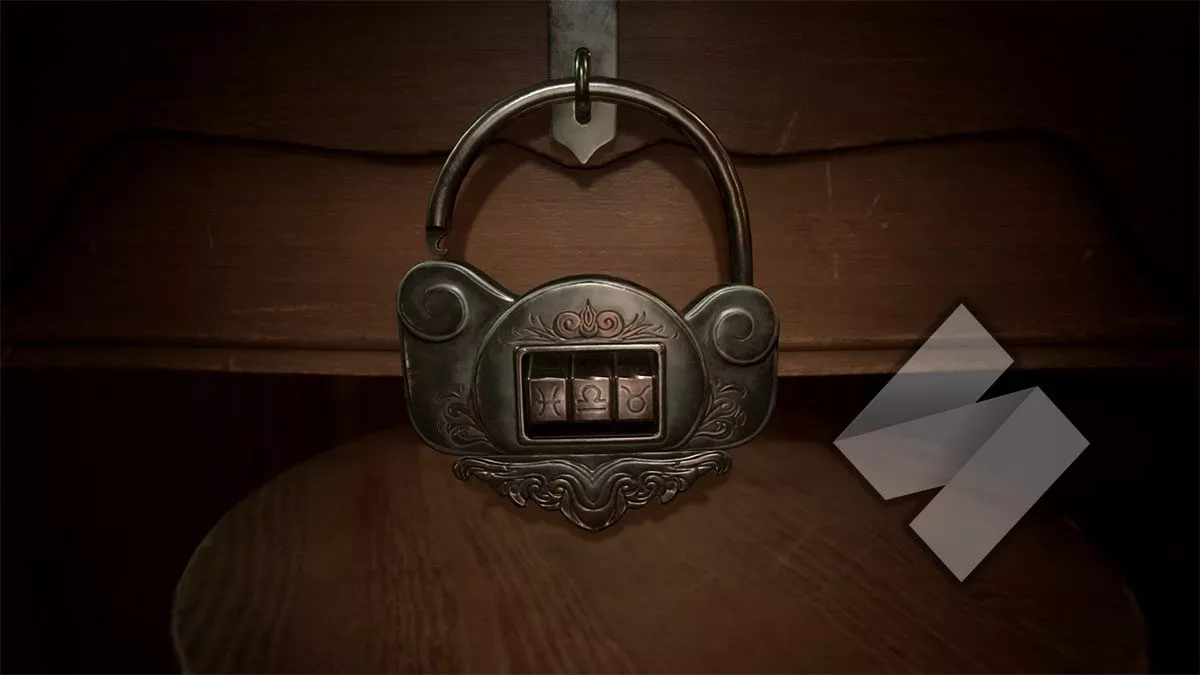
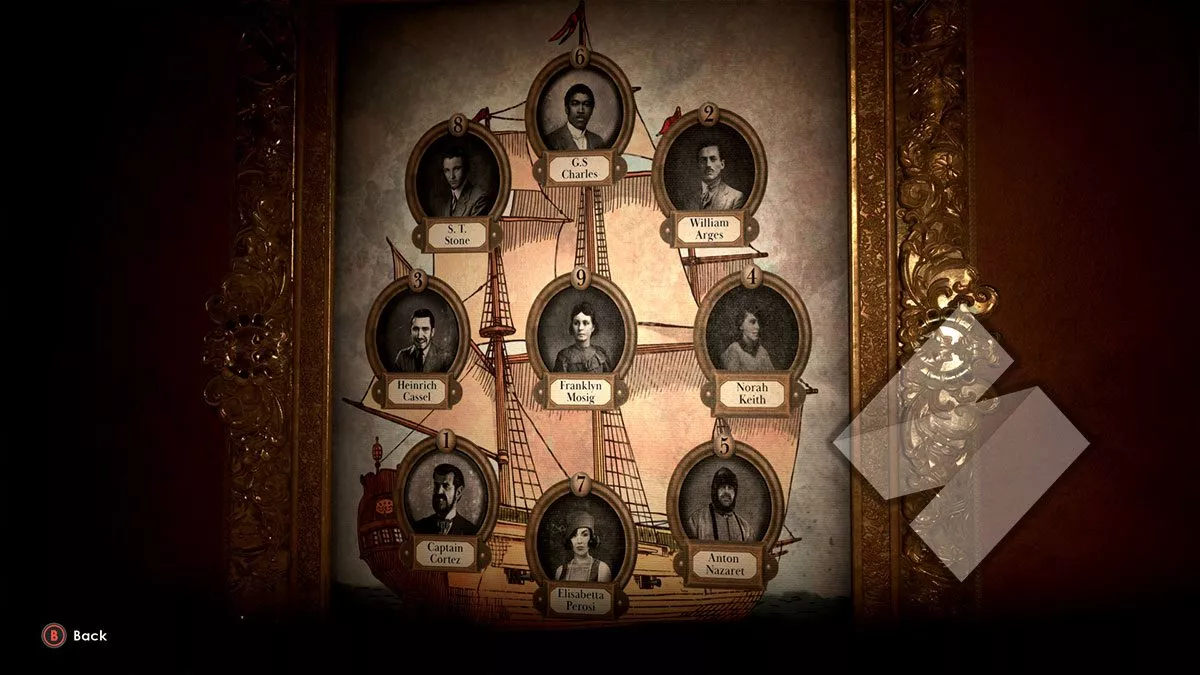
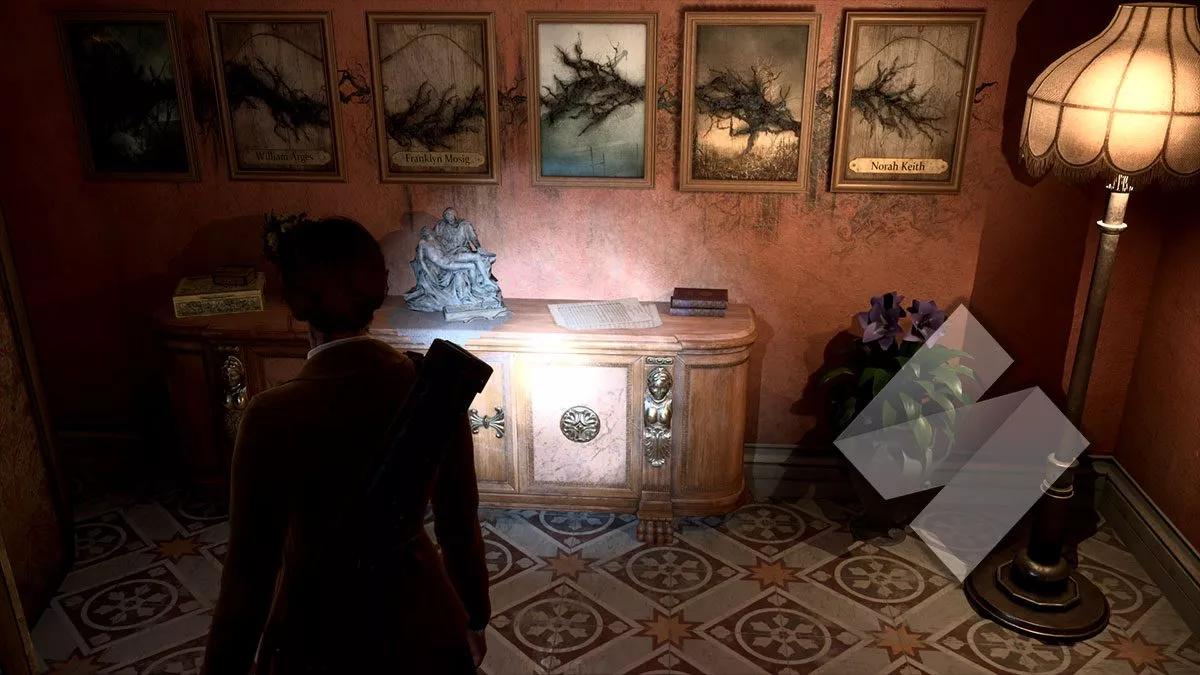
If you want to shortcut this puzzle, head to the combination lock found in this room and enter Pisces ♓, Libra ♎, Taurus ♉, which corresponds to 249 using the journal. You get those numbers through the paintings on the wall — they’re names with rot on them that correspond to another painting in the room. Take a look at the images above and below if you’re curious.
Unlocking the drawer will give you another disc fragment.
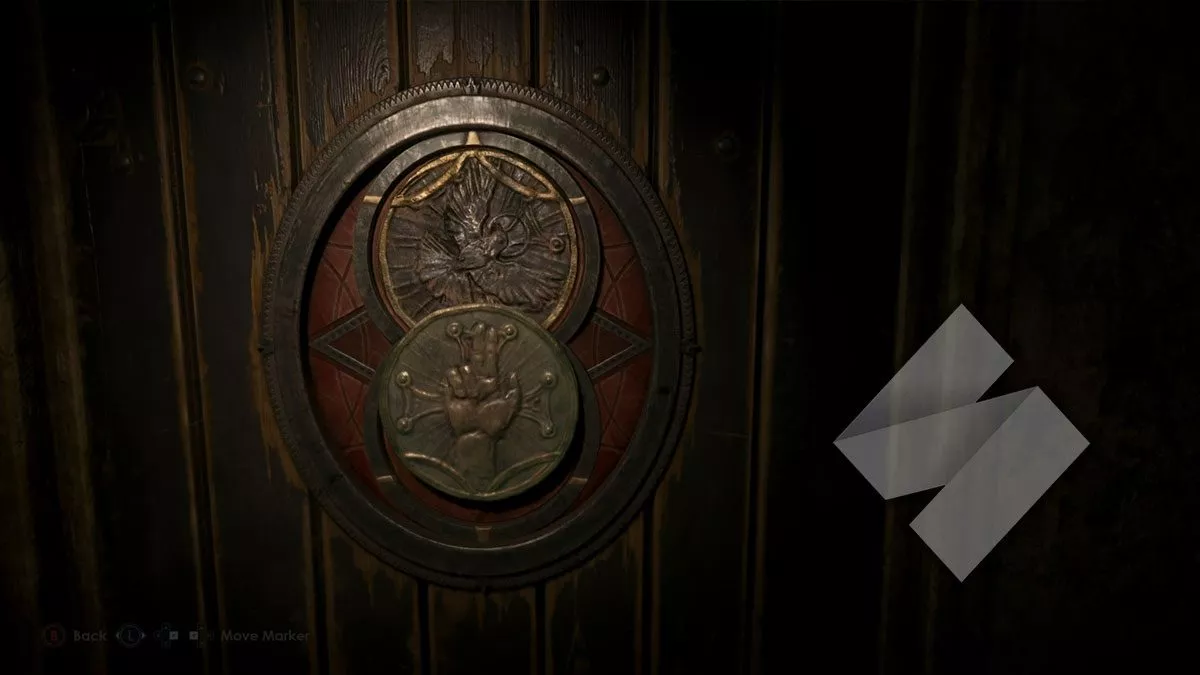
Astronomical clock puzzle and talisman code
With both disc fragments in tow, head to the Stair Hall and past the creepy statues to the astronomical clock. Add the fragments to the artwork and reproduce the image you see below.
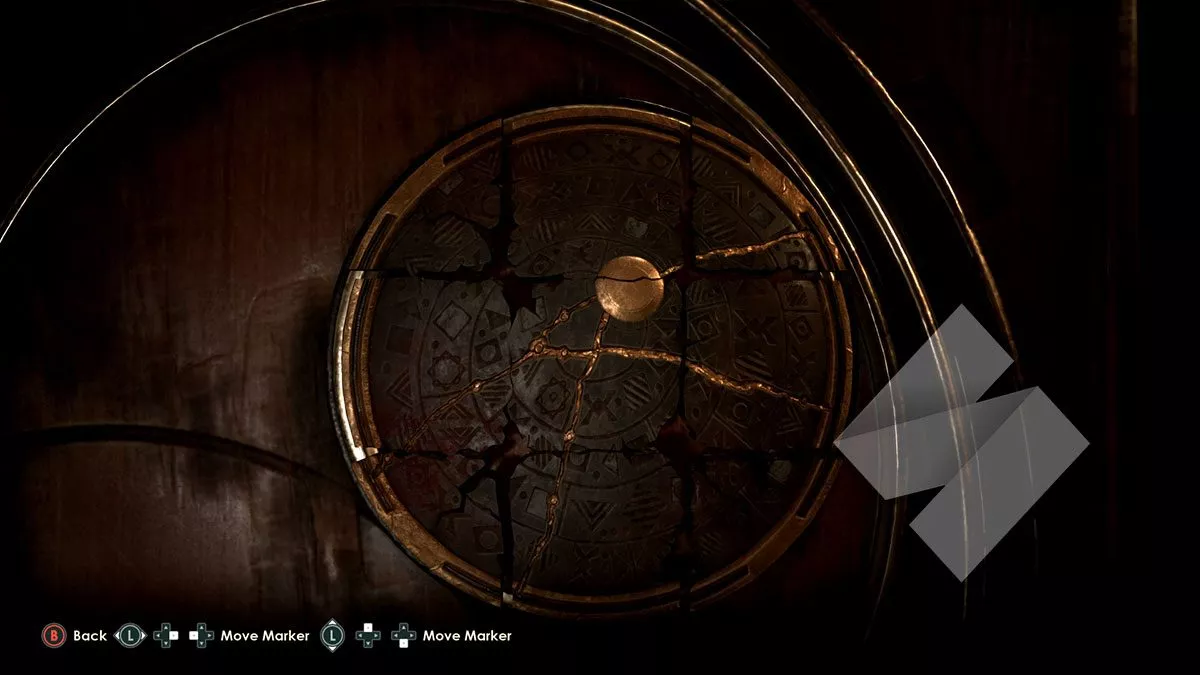
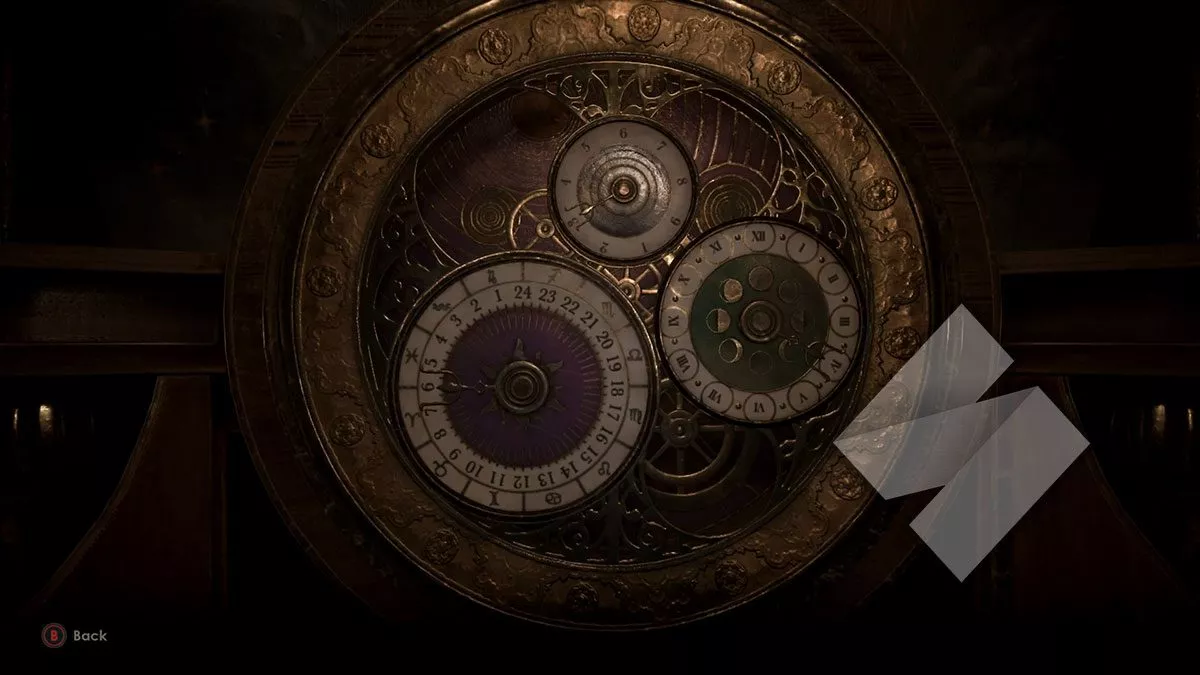
With access to the talisman area, you can now inspect the area above the talisman face on the clock to see the numbers you’ll need — it’s 643, with 6 being the top-most number and 3 the bottom-most number.
Cassandra’s room medicine bottle puzzle
Once you’ve grabbed the medicine bottles from Lottie’s room and from Cassandra’s room, you’ll need to put them in the order shown below.
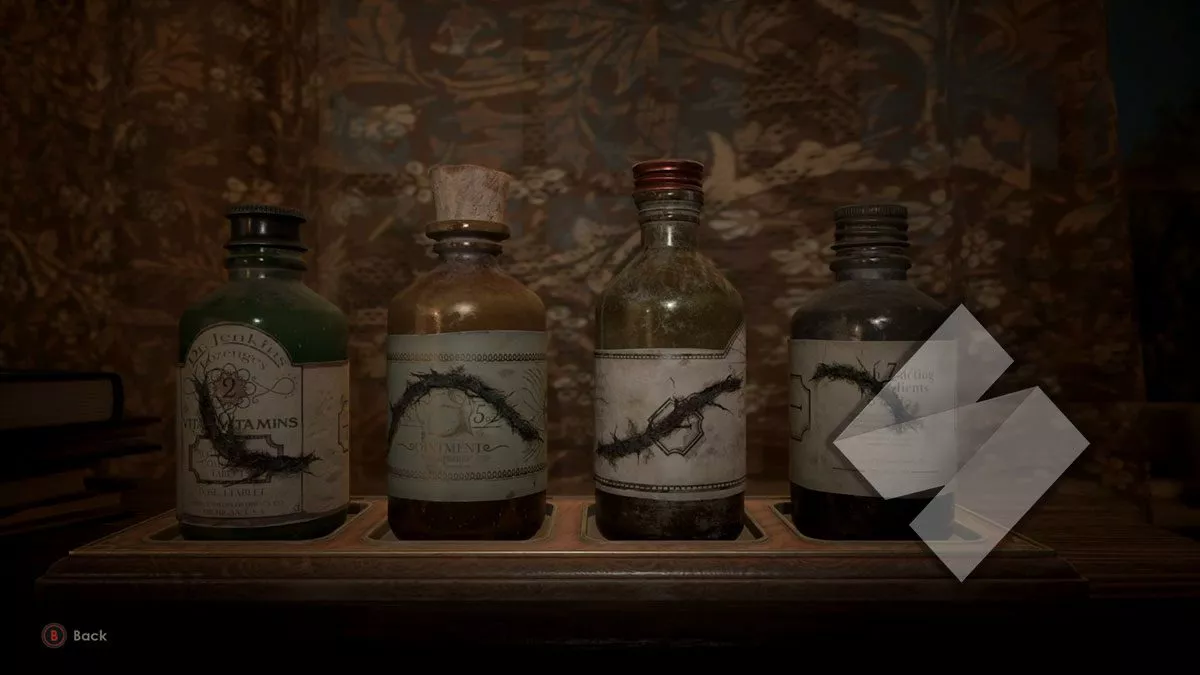
The bottles, once again, have numbers that correlate to symbols in Perosi’s journal — this time, the code for the lock is Pisces ♓, Gemini ♊, Leo ♌. You’ll get a boiler room disc fragment for your trouble. (You can also skip the medicine bottles and just go straight for the piece.)
Boiler room puzzle and talisman code
With one disc fragment in hand, head back towards the boiler room and grab the valve handle to obtain the second. Place them into the boiler room puzzle and reproduce the image you see below (and have some patience, cause it’s tricky; we’ve zoomed in so you can take a better look — and don’t be afraid to click on the image to blow it up!).

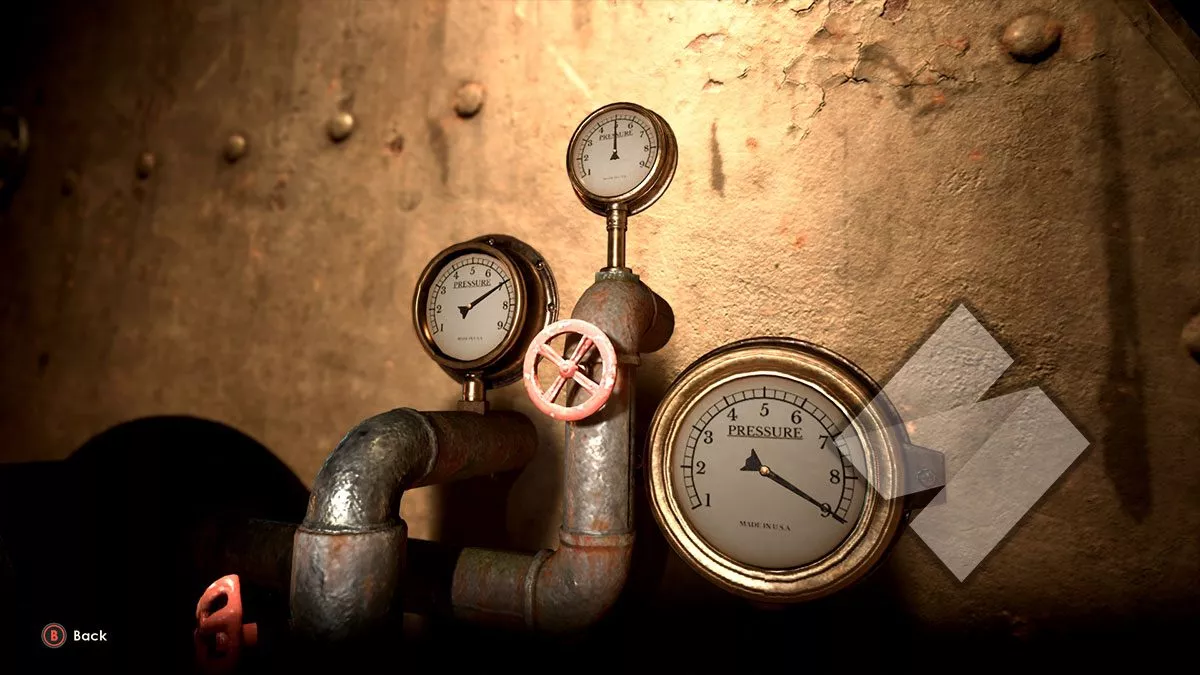
With the puzzle solved, the different meters on the device will give you the code for the talisman: 975, with 9 being the top-most number and 5 being the bottom-most number.
Cemetary two-disc puzzle and cemetary three-disc puzzle
Though it may not feel it, the cemetary (like most environments) is pretty linear, so you’ll go through and eventually pick up three discs in total. Below, you’ll find solutions for two- and three-disc puzzles. If you need help with the first disc, just position it as shown below in either picture.

Telescope puzzle
Looking through the telescope in the Drawing room nearly caused my Xbox Series X to take off. At any rate, here’s what you’re trying to find when looking through it.

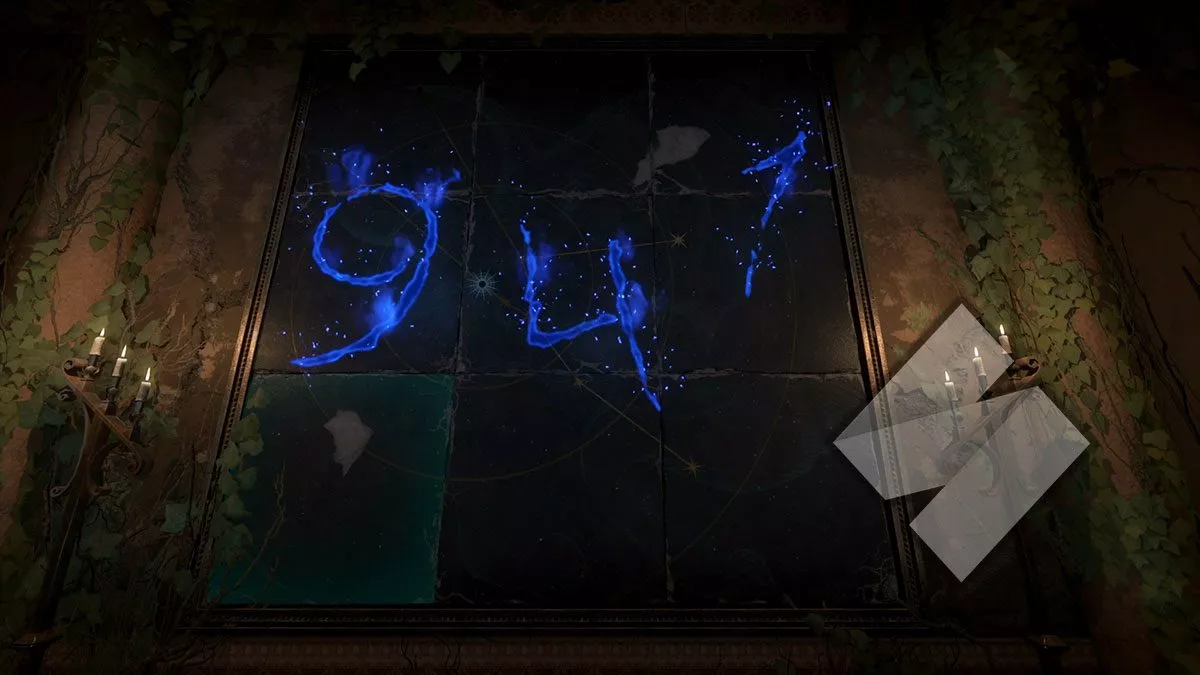
With that done, you’ll need to complete another tile puzzle; the solution is above, and gives you the next talisman code that you’ll need: 941, where 9 is the top-most number, and 1 is the bottom-most number.
Chapter 3 puzzles
Locked office safe combination
I hope you enjoyed that chase with The Dark Man. Yikes. Anyways, you’ll eventually end up in New Orleans and find yourself in an office with a locked safe (and a tommy gun!).
I don’t fully understand why, but playing around with numbers on the nearby map and a clue reference going to hell and back means that you need to enter left 4, right 5, left 4 at the safe. The video above shows you how to input that if you’re unsure.
Sarcophagus talisman code
Another day, another three-digit talisman code. This time, the key is found near the sarcophagus and corresponds (using Perosi’s journal, of course) to 258, with 2 being the top-most number and 8 being the bottom-most number.
Chapter 4 puzzles
Dr Gray’s safe combination
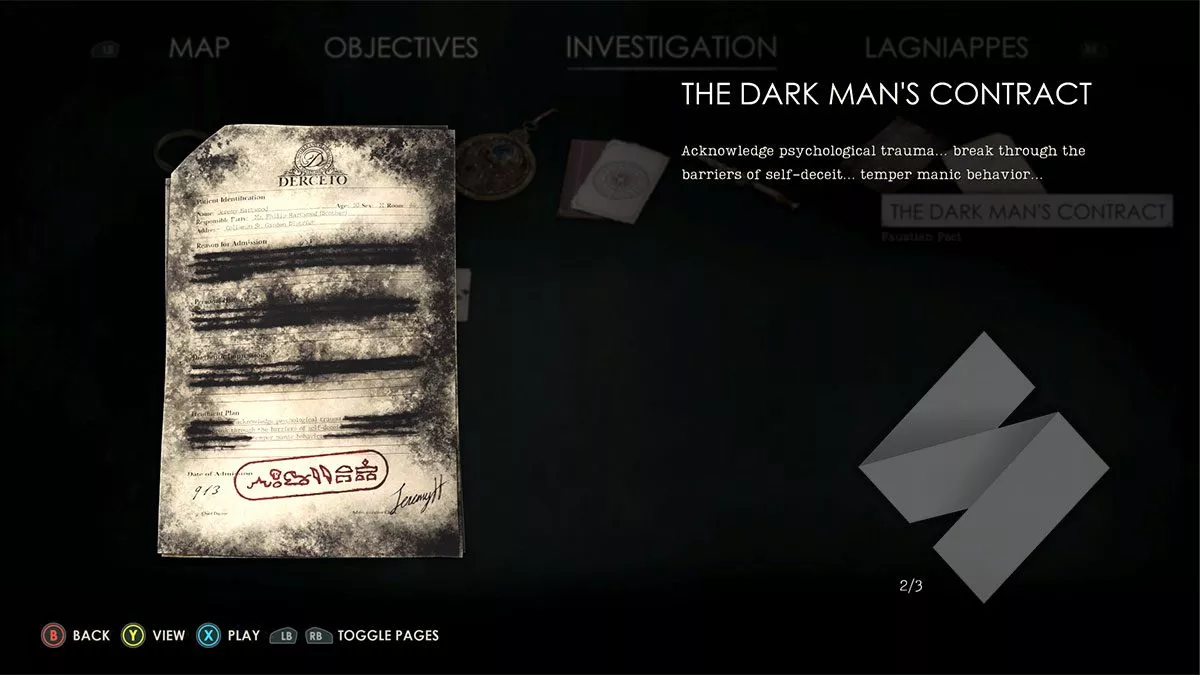
The code to the safe that will unlock Dr Gray’s office is left 9, right 1, left 3. Fun fact: you can use this combination to unlock the safe way earlier, but it won’t have the key you need and will relock for Chapter 4.
You get that from a document you obtained earlier.
Heading into Dr Gray’s office will give you three key items, including a France piece used in the globe outside Grace’s room. On the way to Grace’s room, you’ll also get the key to the first floor, which is important to continue on.
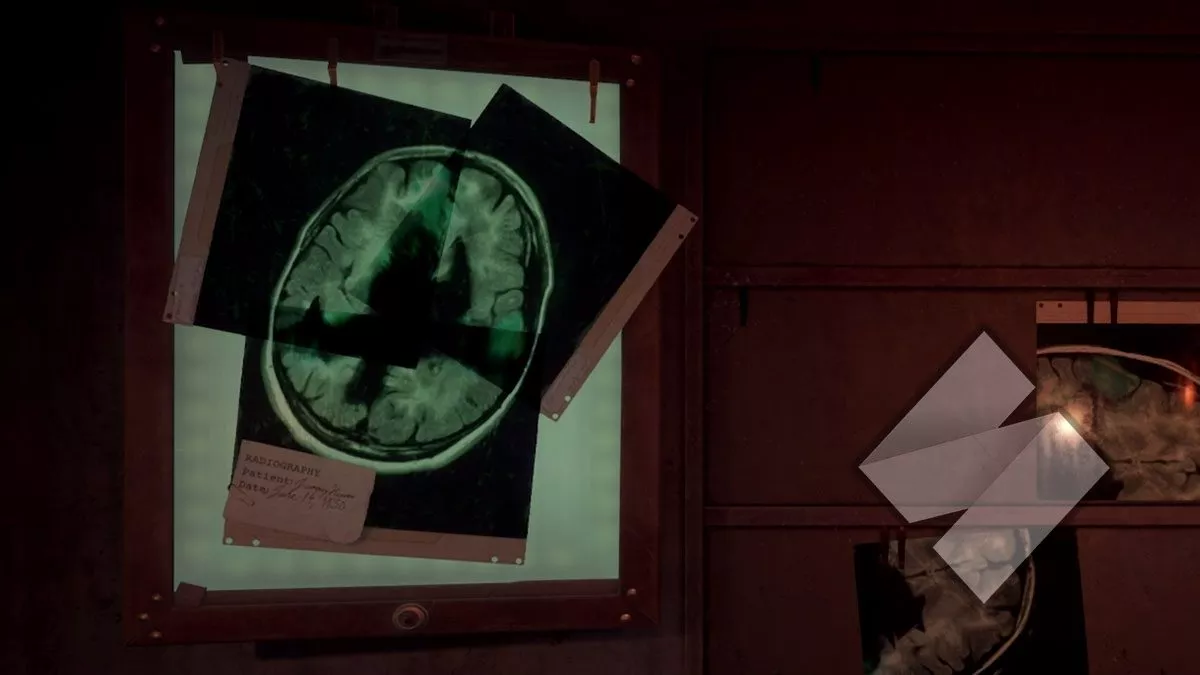
X-ray photos puzzle
Once you’ve collected all the x-rays, you’ll need to pick three and orient them in a very specific manner. See below for what you’ll need to reproduce.
Empty room safe combination (Emily)
Head back downstairs, through the locked door, get spooked by the Dark Man (extremely optional), and head into the Empty Room. The code is based on a year: 1918.
Enter left 9, right 1, left 8 into the safe and pick up the flash bulb. Then head into Ruth’s room for the next sequence.
Empty room safe combination (Edward)
Emily’s room is Edward’s, and Edward’s is Emily’s. Why are we playing the same game twice instead of one story that follows two people doing distinct things? I don’t know.
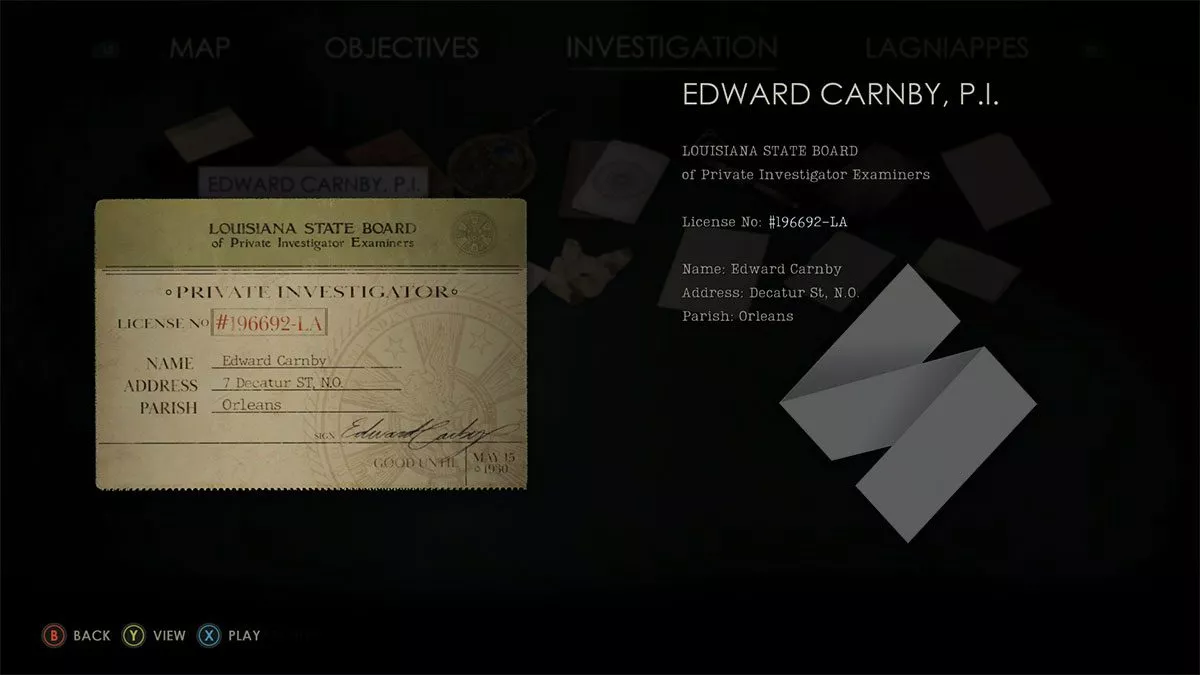
Regardless, the puzzle on the wall refers to Edward’s ID. It’s left 6, right 9, left 2.
Statue puzzle and talisman code
You’ll need to reproduce the following to complete the statue up in the attic.
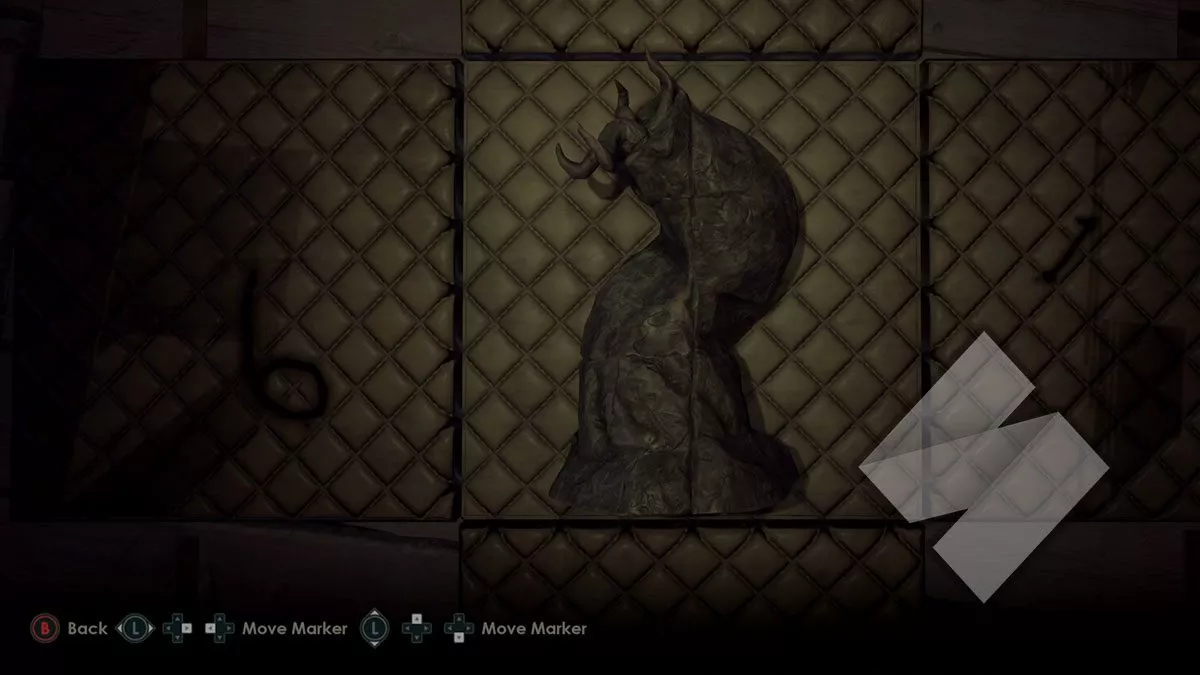
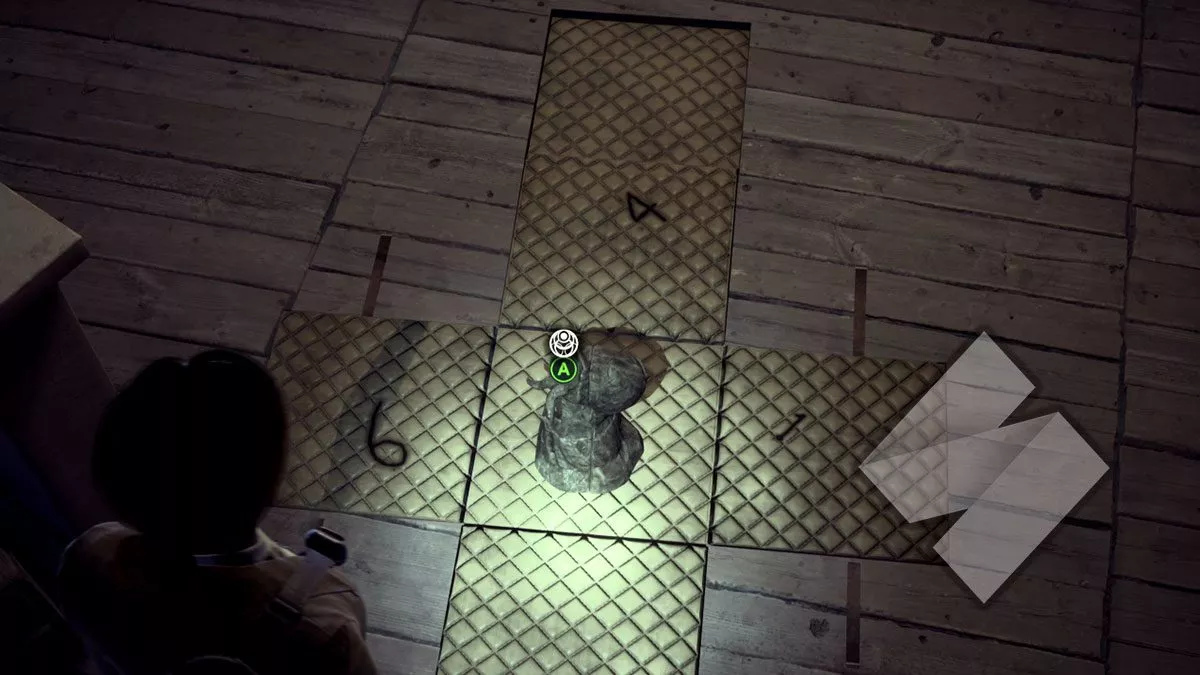
That’ll provide you with the code needed for the talisman: 641, where 6 is the top-most number and 1 is the bottom-most number.
Blueprints puzzle (Emily)
Once you’ve gathered all the blueprints, they need to be arranged in the following order:
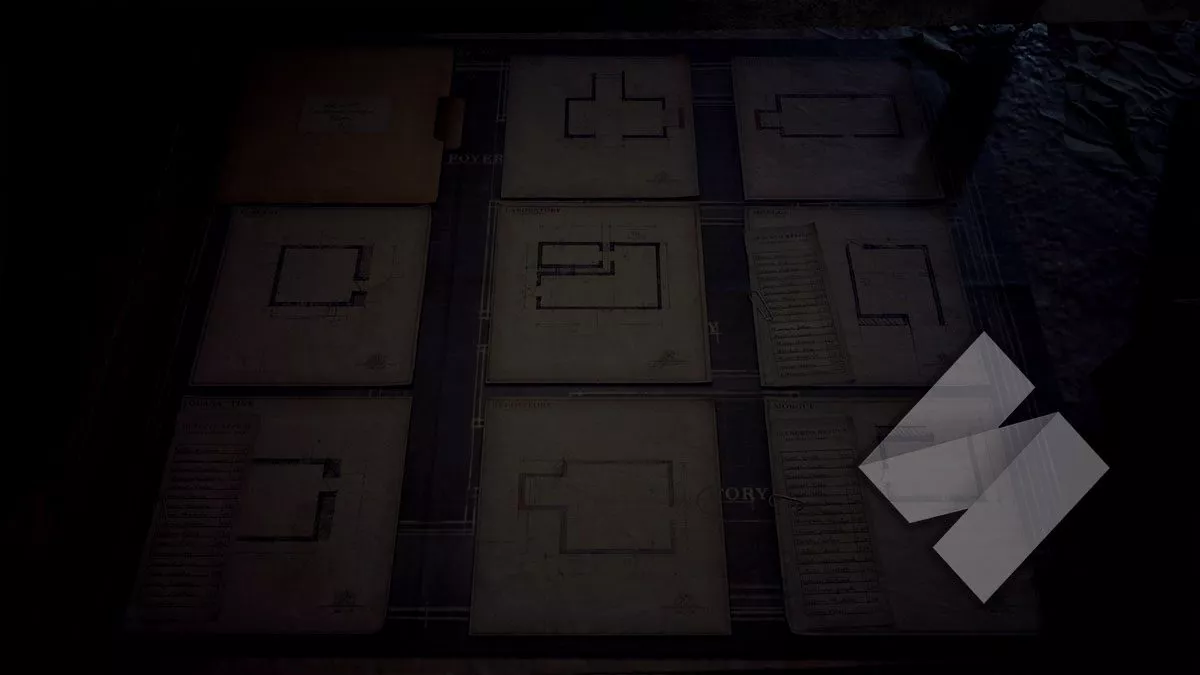
You can use the text on each image to make sure it’s the right way up, and don’t forget that the board underneath the images says which room is which.
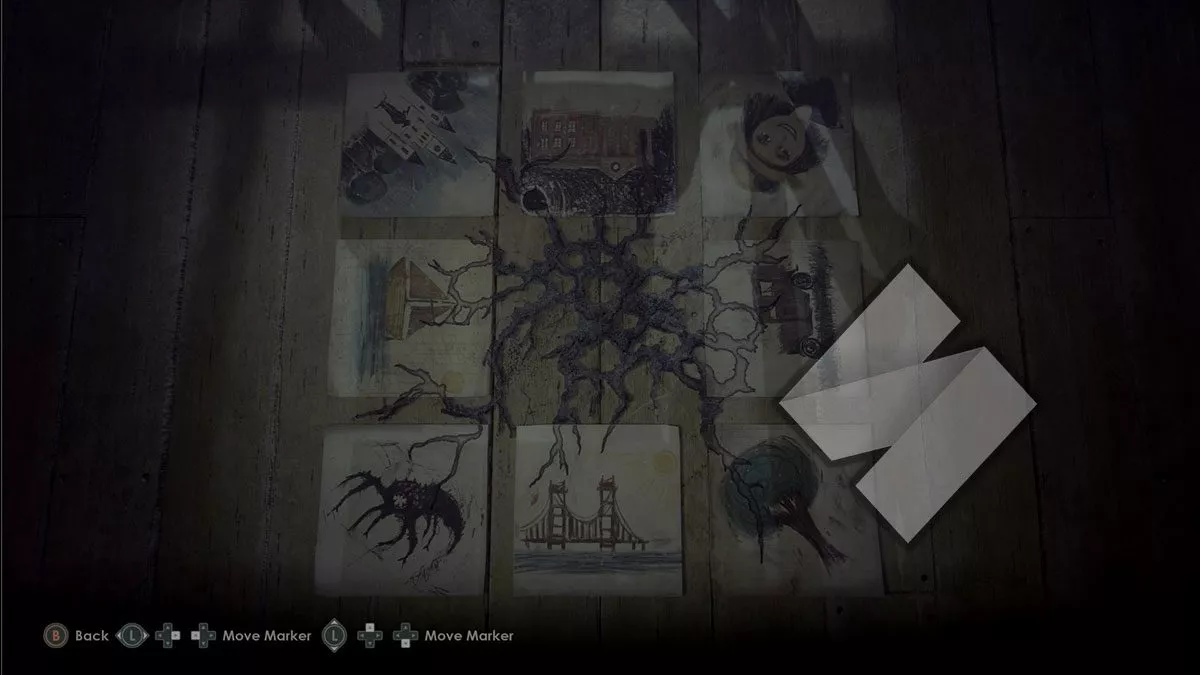
Grace’s drawings puzzle (Edward)
Just like the blueprints, you’ll need to reproduce a specific pattern, as below.
Final talisman code
Last one — it’s 000 this time around. It’s supposedly mirroring the floor in the next room, but I just decided to brute force it and started at 000.
Alone in the Dark now, from 20 March 2024, on Windows PC via Steam, Xbox Series S, Xbox Series X, and PS5. We reviewed it here.
 |
Alone in the Dark20 March 2024PC PS5 Xbox Series S & X
|
This article may contain affiliate links, meaning we could earn a small commission if you click-through and make a purchase. Stevivor is an independent outlet and our journalism is in no way influenced by any advertiser or commercial initiative.
