


Want 1,000 Gamerscore or a Platinum Trophy? We've got you covered.
- Estimated trophy difficulty: 5/10
- Approximate amount of time to platinum: 25 hours
- Achievement/Trophy count: 60 on Xbox, PC via Steam; 61 on PlayStation
- Number of missable trophies: None
- Glitched trophies: None
- Does difficulty affect trophies?: No
- Minimum Playthroughs: 1 full playthrough, then a restart of sector 11 (the second-last sector), followed by multiple playthroughs of the final sector “Endgame”
- Supports Manual Saves?: No, only autosaves; players have three save slots/runs they can employ. Sectors can be restarted at any time, and will not change progress (i.e.: you can restart sector 2 but can still access sector 12 in the same save slot without needing to replay sectors 3-11).
Introduction
Welcome to our Star Trek Voyager Across the Unknown Achievement/Trophy guide and roadmap! The game is a ‘what if’ simulator, letting captains chart their own course from the Delta Quadrant back to Earth.
It takes place across 12 main sectors, of which most have two side missions each. Achievements/Trophies are awarded for completing each sector, recruiting hero characters in several main and side missions, for researching technologies and upgrading Voyager, and for reaching several different endings.
Resource collection, away team outcomes, and automated combat outcomes are all dictated by chance-based, Dungeons & Dragons-style dice rolls, with other choices relying upon skill checks. This means that you may succeed or fail at crucial checkpoints, meaning it’s best to immediately quit out and then continue gameplay hoping for a different outcome.
Sectors can also be replayed as soon as they’re completed (or far afterward), meaning you can reverse decisions you’ve made for Achievements/Trophies — keeping Tuvix alive, as an example, and then splitting him for the “Canon” Achievement/Trophy later on. We’ve denoted where you might want to reconsider some decisions after obtaining their associated accolade.
As you play, it’s very important to always be researching — we found it easiest to research as many items in tier 1 as possible across each discipline before moving to tier 2 and doing the same, and so on and so forth.
You can get all endings but one in a single playthrough; a second run from the second-last sector, sector 11, is needed to obtain one of two endings that you can’t reach because of a fork in the road, so to speak. It’s also recommended to take the first ‘what if’ ending right at the beginning of the game (Stick To The Prime Directive) to then reload your save and continue on.
If you’re looking for basic tips and tricks, I’ve also got you covered through a new guide posted over on TrekMovie.com.
Star Trek Voyager Across the Unknown Achievement/Trophy guide
Achievements/Trophies below are listed as chronologically as possible.
- Shields Are Holding, Captain: Win your first combat.
- Story-related: You’ll get this within “Caretaker” after a practice battle with Chakotay and his Maquis Raider.
- Stick To The Prime Directive: Use the Caretaker’s Array to get home, instead of destroying it.
- Rather than helping the Ocampa and destroying the array, choose to use it to go home. You’ll finish the game and nab this; you can then restart your checkpoint and destroy the array, heading into sector 2.
- Setting Course For Home: Complete the main mission of sector 1.
- Story-related: You’ll get this if you either destroy the array and continue on, or simply use the array to go home.
- Against All Odds: Complete an away mission with less than the needed heroes.
- It’s recommended to go for this one as early as possible, as subsequent away missions will have higher and higher stat requirements to complete. To earn this, simply fill two of three away team slots and complete a mission.
- Flawless Execution: Complete 10 away missions without injury.
- You should get this in sector 2 or sector 3 — choose your best hero characters and make sure to pit your best against the challenge at hand. You should earn this without too much effort.
- We Are Not Alone: Hire allied ships 10 times.
- You can either earn this legitimately by hiring hero ships (from the bridge) as needed, or simply hire, release, rehire, re-release, and so on 10 times. Doing so will cost you the resources required to hire the ship each time.

- Beyond The Sect: Unlock the Kazon Kunut as a hero.
- This is done in Sector 2’s main mission. You’ll need to ensure that Kunut survives an ordeal, then refuse a visit from Culluh (or the Maje will kill the poor kid), and then eventually offer to protect Kunut and offer him to join your crew.
- Timestamps in the video below:
- 00:01: Save Kunut’s life, order Seska to take a blood test
- 01:05: Build expander, return to Kazon raider
- 01:23: Refuse Culluh’s visit (NECESSARY as you’ll fail otherwise), let him take the ship/tech (potentially optional but we went the path of least resistance)
- 01:57: Expose Seska, question and offer to protect Kunut
- Timestamps in the video below:
- This is done in Sector 2’s main mission. You’ll need to ensure that Kunut survives an ordeal, then refuse a visit from Culluh (or the Maje will kill the poor kid), and then eventually offer to protect Kunut and offer him to join your crew.
- You’ll Never Get Less Than My Best: Unlock Joe Carey as a hero.
- This is done in Sector 2’s main mission. You’ll need to ensure that you’re trusting Carey and setting Seska up for the big reveal that she’s *shock* a Cardassian secret agent. Carey is recruited at the same time as the Kazon Kunut if you choose correctly.
- Timestamps in the video below:
- 00:01: Save Kunut’s life, order Seska to take a blood test
- 01:05: Build expander, return to Kazon raider
- 01:23: Refuse Culluh’s visit (NECESSARY as you’ll fail otherwise), let him take the ship/tech (potentially optional but we went the path of least resistance)
- 01:57: Expose Seska, question and offer to protect Kunut
- Timestamps in the video below:
- This is done in Sector 2’s main mission. You’ll need to ensure that you’re trusting Carey and setting Seska up for the big reveal that she’s *shock* a Cardassian secret agent. Carey is recruited at the same time as the Kazon Kunut if you choose correctly.
- A Promise Kept: Fulfill 25 ship event promises.
- As you play, you’ll be challenged to do things like build rooms, upgrade rooms, harvest food, gather deuterium, and so long. Fulfilling those requests is important and should come naturally around sector 3 or so.
- Temporal Displacement: Unlock Telek R’Mor as a hero.
- This is possible during the Sector 2 side mission “Eye of the Needle”. You’ll need to basically comply with R’Mor’s wishes to return to his own space and time before eventually pulling the transport.
- Timestamps in the video below:
- 00:01: Progress to point of research of Linked Beaming
- 00:55: Research Linked Beaming
- 01:04: Return to wormhole
- 01:43: Comply with Telek R’Mor
- 01:55: Go through with transport
- 02:04: Abort transport
- 02:36: Recruit Telek R’Mor
- Timestamps in the video below:
- This is possible during the Sector 2 side mission “Eye of the Needle”. You’ll need to basically comply with R’Mor’s wishes to return to his own space and time before eventually pulling the transport.
- First Encounters, First Betrayals: Complete the main mission of sector 2.
- Story-related: You’ll get this as you complete the sector. Don’t forget to stick around and scan/harvest all planets for their valuable resources before you continue on!
- Fully Human: Unlock Human B’Elanna as a hero.
- This is done in Sector 3 side mission “Faces”. See Heghlu’meH QaQ jajvam! for more.
- It is recommended you restart Sector 3 and avoid this side mission to be able to earn Canon later on as it is unclear as to whether or not the original B’Elanna is needed for that achievement.
- Heghlu’meH QaQ jajvam!: Unlock Klingon B’Elanna as a hero.
-
- This is done in Sector 3 side mission “Faces”, and can be earned at the same time as Fully Human.
- Timestamps in the video below:
- 0:01: Agree to B’Elanna’s request
- 00:14: Wait until the team mines the ore
- 00:21: Return to planet
- 00:43: Develop transponders
- 01:00: Return to planet, send away team
- 02:33: Extract DNA from Klingon B’Elanna
- 02:59: Proceed with the reintegration *failure required*
- 03:06: Do it! (Recruit both Klingon and Human B’Elanna)
-
-
-
- It is recommended you restart Sector 3 and avoid this side mission to be able to earn Canon later on as it is unclear as to whether or not the original B’Elanna is needed for that achievement.
-
- Delta Quadrant Tourist: Visit a total of 150 points of interest.
- This will come naturally as you play, and likely around sector 3 or 4. You’ll need to scan and visit planets — or points of interest — to collect resources and continue on.
- Never Let Your Guard Down: Complete the main mission of sector 3.
- Story-related: You’ll get this as you complete the sector. Don’t forget to stick around and scan/harvest all planets for their valuable resources before you continue on! Sectors 3 and 4 are especially quick to complete and therefore great places to start beefing up your ship.
- Neevok?: Unlock Tuvix as a hero.
- This is earned within sector 4 side mission “Tuvix”.
- Timestamps in the video below:
- 0:01: Start mission and initiate transport
- 00:50: Investigate transporter protocols
- 00:57: Analyse orchid report
- 01:03: Accept comms request
- 01:29: Separate orchids
- 01:48: Don’t perform the separation, recruit Tuvix
-
- It is recommended you restart Sector 4 and either avoid this side mission, or replay it separating Tuvix, to be able to earn Canon later on as Tuvok is needed for that achievement.
- Against The Relentless Tide: Complete the main mission of sector 4.
- Story-related: You’ll get this as you complete the sector. Don’t forget to stick around and scan/harvest all planets for their valuable resources before you continue on! Sectors 3 and 4 are especially quick to complete and therefore great places to start beefing up your ship.
- To Boldly Go…: Complete 20 away missions.
- If you’re playing and completing both main and story missions, you should complete 20 away missions by around the time of sector 4 or 5.
- Happy Ship, Happy Crew: Have maximum morale for 20 cycles.
- If you’ve been hitting points of interest, gathering resources, and building and repairing rooms like the holodeck, you should get this Achievement/Trophy by sometime around sector 4 or 5. Make sure to provide replicator rations wherever possible to help boost morale, and ensure that you’ve build enough crew quarters to house your officers.
- Only 38, Right?: Fire a total of 38 torpedoes.
- You should unlock this around sector 4 or 5 from story-based and random combat encounters. Remember, though, that you need to fire photon torpedoes yourself; they’re not automatically controlled like phasers are.
- Double Agent: Unlock Seska as a hero.
- As part of the sector 5 main mission, “Loyalties”, you’ll need to directly confront and attack Culluh. Once victorious, you’ll decide the fates of three individuals; Seska is the final one. As a bonus, you can recruit her and then dismiss her if you don’t like the idea of her actually serving on your crew. If you don’t pass a skill check, immediately quit out and try again.
- Timestamps in the video below:
- 00:03: Offer Seska redemption (skill-check)
- 00:18: Double down (skill-check)
- 00:30: Decide if you want to keep Chakotay and/or Seska
- We Will Adapt: Unlock the borg Tech Tree.
- Story-related: This will happen naturally in sector 5’s side mission, “Unity”, or potentially as part of sector 6 if you skip the side mission (you shouldn’t).
- Out Of The Kazon’s Shadow: Complete the main mission of sector 5.
- Story-related: You’ll get this as you complete the sector. Don’t forget to stick around and scan/harvest all planets for their valuable resources before you continue on!
- More Than A Starship: Build 100 rooms.
- This should happen naturally as you build rooms. To aid in this, we recommend building multiple science laboratories for more skill points, more engineering offices to repair your ship, and more combat rooms to protect Voyager.
- Reclaiming Humanity: Unlock Seven of Nine as a hero.
- This isn’t story-related, as you can lose Seven in the sector 6 main mission, “Scorpion”. Simply nuture the Borg drone and do not do things to put her in jeopardy (like depressurizing the cargo bay). If you fail the skill check to secure her, like we do in the video below, simply quit out and continue to try again until you recruit her. The Vidiian Surgical Device from sector 2 side mission “Phage” helps quite a lot in this instance too.
- A Pact With The Devil: Complete the main mission of sector 6.
- Story-related: You’ll get this as you complete the sector. Don’t forget to stick around and scan/harvest all planets for their valuable resources before you continue on!
- Hunting Companion: Unlock the Hirogen Alpha Torark as a hero.
- You can recruit Torark as part of the side mission titled “Prey”. You’ll need to let him rest up in full, arm him, and then recruit him. Once you’ve done so, you may wish to quit and replay this sector and side mission, siding with Species 8472 instead, in order to obtain the Bio-neural interface technology instead.
- Timestamps in the video below:
- 00:03: Decide to help; send away team
- 01:10: Help Hirogen (skill check)
- 01:22: Wait for Hirogen’s recovery
- 01:31: Continue to wait for Hirogen’s recovery (do not wake up early)
- 01:45: Arm the Hirogen
- 02:23: Let the Hirogen kill Species 8472
- 02:40: Invite the Hirogen to stay, recruit Torark
- A Glimmer Of Home: Complete the main mission of sector 7.
- Story-related: You’ll get this as you complete the sector. Don’t forget to stick around and scan/harvest all planets for their valuable resources before you continue on!
- Living Legacy: Unlock Arturis as a hero.
- Arturis is, without a shadow of a doubt, the hardest crew member to recruit in the entire game. This is because you not only need to ensure he remains on the ship (or the Dauntless) throughout the mission, keeping Tuvok available for a bit of a sleuthing session, and ensuring your picking proper choices inside the mission’s second away team mission. There’s a lot of moving parts, so follow the video below down to the letter.
- Timestamps in the video below:
- 00:03: Progress through mission
- 00:10: Choose “Try to learn more about him and his people”
- 00:39: Away team: DO NOT choose Tuvok
- 01:53: Continue mission, following Dauntless
- 02:21: Choose “Curious: Why so invested?”
- 02:30: Choose “Counter: But is it wise to follow this pass?”
- 02:40: Choose “Let Tuvok monitor Arturis”
- 02:55: Complete a series of workshop and science lab research
- 03:12: Continue with second away team mission
- 03:46: Away Team Challenge 2: Choose “Talk him out of it”
- 03:59: Continue with second away team mission
- 04:17: Away Team Challenge 5: Choose “Approach Arturis – It’s not too late do the right thing”
- 04:37: Continue main mission
- 05:15: Choose: “Try to talk Arturis out of this” (skill-check)
- 05:22: Choose: “Appeal to honor and justice”
- 05:30: Choose: “Focus on a future beyond this”
- 05:37: Choose: “Offer help”
- 05:45: Choose: “Plea: Turn around the ship!” (skill-check)
- 06:00: Choose: “Beam out the Away Team AND Arturis” (skill-check)
- 06:35: Choose: “Ask him to join Voyager” (skill-check)
- Certified In Hazardous Heroics: Unlock Pelk as a hero.
- Pelk is found within the sector 8 side mission titled, “Juggernaut”. To recruit Pelk, go through with the rescue as normal, then believe him when he speaks out. He’ll immediately join your away team upon recruitment, and may very possibly die straight after. Ah well.
- Timestamps in the video below:
- 00:03: Proceed through mission, prioritising crew and safety
- 00:34: Prepare rescue items
- 00:43: Return to the freighter
- 00:50: Begin rescue
- 01:11: Hear Pelk out
- 01:17: Comfort Pelk
- Time For A Promotion: Reach Level 10 on a hero.
- You’ll likely get this without trying, especially if you keep to the same heroes. We generally used a combination of Tuvok, Chakotay, Tom Paris, and Harry Kim for most missions (sometimes using The Doctor as a medic, but most times not), meaning we got them all up to level 10 relatively quickly. You can also research technology that increases the XP you’ll gain from away missions if you think you’re lacking.
- All Decks Back Online: Repair all lifesupports.
- You’ll need a steady stream of resources, including bio-neural gel packs and dilithium, to repair every single deck’s life support system. Pick away at this throughout the course of the game, and remember you can turn some life supports/decks off until you’re ready to actually build that deck out.
- Chief Engineer, Supreme: Unlock Tier 5 of the Engineering Tab in the Tech Tree.
- See We Have Adapted.
- Home Away From Home: Unlock Tier 5 of the Crew Tab in the Tech Tree.
- See We Have Adapted.
- Scientific Breakthrough: Unlock Tier 5 of the Science Tab in the Tech Tree.
- See We Have Adapted.
- Always Vigilant, Always Victorious: Unlock Tier 5 of the Security Tab in the Tech Tree.
- See We Have Adapted.
- We Have Adapted: Unlock Tier 5 of the Borg Tab in the Tech Tree.
- It’s around sector 8 that you’ll likely be able to unlock at least one level 5 tab in the tech tree. Steady on from there — or simply unlock each tier and restart the sector to complete another, then repeat, to get these out of the way. Always be researching, though! Build multiple science laboratories to keep your science points flowing, and remember that you can harvest them from points of interest or target them as rewards in away missions.
- Yesterday’s Echoes: Complete the main mission of sector 8.
- Story-related: You’ll get this as you complete the sector. Don’t forget to stick around and scan/harvest all planets for their valuable resources before you continue on!
- Maximum Warp: Upgrade your Warpcore to the maximum.
- You’ll generally be able to max out your warp core during sector 9, using a bunch of resources to do so. Don’t forget that, just like life supports and decks, you can lower your warp core output to use less deuterium if you don’t need a bunch of power.
- A Borg Like No Other: Unlock One as a hero.
- You’ll obtain this in the sector 9 side mission titled, “The Drone”. You’ll also need a shuttle, so ensure one’s in your inventory before you begin. With that out of the way, simply nurture the drone, One, and let Seven work her magic. Then, protect the drone when the Borg comes knocking.
- Timestamps in the video below:
- 00:03: Build shuttlecraft (if needed), investigate proto-nebula
- 00:26: Wait for the away team to finish
- 00:42: Get the team to safety – sacrifice the shuttle
- 01:00: Analyze the broken mobile emitter
- 01:39: Let the drone live – for now
- 01:47: Wait for the drone to mature
- 02:17: Disagree with Seven: Allow the drone to mature
- 02:48: Let Seven proceed
- 03:00: Don’t intervene – Let Seven try to calm it down
- 03:18: Let One settle in on Voyager
- 03:30: Not yet – growth takes time
- 03:45: Accept the Borg’s hail
- 03:52: Talk One out of it, recruit One
- Behold, The Queen: Complete the main mission of sector 9.
- Story-related: You’ll get this as you complete the sector. Don’t forget to stick around and scan/harvest all planets for their valuable resources before you continue on!
- Atonement In Action: Unlock Marla Gilmore as a hero.
-
- You’ll obtain this in the sector 10 main mission, “Equinox”. Channel your best Starfleet officer here, going by the book and reminding Captain Ransom that he’s gone off the deep end. As this mission resolves, you’ll be given the chance to offer Marla, an officer on the Equinox, redemption. Do so and recruit her to team Voyager!
- Timestamps in the video below:
- 00:03: Offer Marla redemption
- Dark Reflection: Complete the main mission of sector 10.
- Story-related: You’ll get this as you complete the sector. Don’t forget to stick around and scan/harvest all planets for their valuable resources before you continue on!
- Triple-Armored Hull: Upgrade your hull capacity to the maximum of 1000.
- There are five tiers of hull upgrades — “Hull Reinforcement”, in-game — found within the Combat tab of the research tree. If you’re always researching things — and you should be — this should come sometime around sector 11 or 12. You can tie this into Armed to the Teeth as well as you’ll need to research and build a number of items in the Combat tab to hit a combat strength of 250.

- Resistance Is Not Futile: Defeat a Borg Cube.
- Story-related: You’ll get this as part of normal progression. Time to up that combat strength, eh?
- Young Mind, Free Spirit: Unlock Icheb as a hero.
- Timestamps in the video below:
- 00:03: Proceed normally through mission
- 04:39: Don’t create the pathogen
- 05:09: Convince drones (skill-checks)
- 05:23: Continue convincing drones (skill-checks)
- 05:33: Break free (skill-checks)
- 05:52: Beam out hostages and children
- 06:11: Wait until the Doctor removes the children’s Borg implants
- 06:28: Offer solace to Icheb
- Timestamps in the video below:
- Cracks In The Collective: Complete the main mission of sector 11.
- Story-related: You’ll get this as you complete the sector. Don’t forget to stick around and scan/harvest all planets for their valuable resources before you continue on!
- It’s here that you’ll need to make an important decision. To obtain a majority of Across the Unknown’s endings, we recommend you ally and protect Ralik at the end of sector 11. We’d also recommend starting sector 12 to mop up a number of Achievements and Trophies tied to resource collection, research, and room building before actually engaging with endgame.
- Coffee, Black: Reach Level 10 on Janeway.
- You can’t send Janeway on away missions (she’s the captain after all — that’s what Chakotay is for!), so you’ll need to level her up through all the side missions that present themselves. Luckily for you, most of those side missions will earn you recruitable heroes, so you’ve likely been playing through them all, and resultingly, will have Janeway to level 10 by sector 11 or 12. You can head to the heroes tab to not only check on Janeway’s level, but that of all your heroes.

- Armed To The Teeth: Have a combined combat strength of 250.
- Research, build, and upgrade combat rooms — phasers, photons, shields, Borg cutting beam, etc — and you should have this easily. I didn’t have a strength of 250 by sector 12 so just built and upgraded a couple of rooms until I did, ensuring I built every room found within the Combat tab for Tuvok Approves. Thinking the rooms were taking up too much space on my ship, I then restarted the sector and kept the rooms I wanted. You can keep this mentality in mind for a number of other Achievements and Trophies including Self-Sustaining. Like you can check hero status, you can also check your corresponding combat strength in the combat tab (see below).

-
- Tuvok Approves: Have all rooms in the Combat Tab built at the same time.
- For this, you’ll need to research and actually build all rooms in the Combat tab. They’re as follows:
- Phaser Control Room: Your ship has one of these already, hurrah! This can be upgraded to Level 2 (Tier 3) and Level 3 (Tier 5); it’s built in the Combat building menu.
- Shield Generator: Your ship has one of these already, hurrah! This can be upgraded to Level 2 (Tier 3) and Level 3 (Tier 5); it’s built in the Combat building menu.
- Disruptor Array Control Room: Found in Tier 2 of the Combat tree (requires 16 cycles, 60 Science Points) and can be upgraded to Level 2 (Tier 4) and Level 3 (Tier 5); it’s built in the Combat building menu.
- Energy Dissapator Control Room: Found in Tier 4 of the Science tree; it’s built in the Combat building menu.
- Cloaking Device: Found in Tier 4 of the Science tree; it’s built in the Combat building menu.
- Metaphasic Shield Room: Found in Tier 3 of the Science tree (requires 18 cycles, 90 Science Points) and can be upgraded to Level 2 (Tier 5); it’s built in the Combat building menu.
- For this, you’ll need to research and actually build all rooms in the Combat tab. They’re as follows:
- Self-Sustaining: Have 2 Waste Deassembler, 2 Hydroponics Bay and 2 Bio Laboratories at the same time.
- I didn’t find the Waste De-assmbler all that useful, so I made room for and built all required rooms and then restarted sector 12 to free my ship back up. You’ll find these rooms in the following spots:
- Waste De-assembler: Researched in Tier 3 of the Science tree, and upgraded to Level 2 in Tier 5; it’s built in the Technology building menu.
- Hydroponics Bay: Researched in Tier 1 of the Science tree and upgraded to Level 2 (Tier 2) and to Level 3 (Tier 4); it’s built in the Technology building menu.
- Bio Laboratory: Researched in Tier 2 of the Science tree and upgraded to Level 2 (Tier 3) and to Level 3 (Tier 5); it’s built in the Technology building menu.
- I didn’t find the Waste De-assmbler all that useful, so I made room for and built all required rooms and then restarted sector 12 to free my ship back up. You’ll find these rooms in the following spots:
- All The Options: Unlock all rooms.
- You don’t need to build all rooms, just unlock them in research trees. Below is a list of every room alongside where to research and built it:
- Engineering office: Your ship has one of these already, hurrah! This can be upgraded to Level 2 as part of the Engineering tab, Tier 3; it’s built in the Engineering building menu.
- Cargo Bay: Your ship has one of these already, hurrah! This can be upgraded to Level 2 as part of the Engineering tab, Tier 2; it’s built in the Engineering building menu.
- Large Cargo Bay: Researched in Tier 3 of the Engineering tab, and can be upgraded to Level 2 in Tier 4; it’s built in the Engineering building menu.
- Battery Compartment: Researched in Tier 1 of the Engineering tab, and can be upgraded to Level 2 in Tier 3; it’s built in the Engineering building menu.
- Large Battery Compartment: Researched in Tier 4 of the Engineering tab, and can be upgraded to Level 2 in Tier 5; it’s built in the Engineering building menu.
- Emergency Quarters: Your ship has one of these already, hurrah! This can be upgraded to Level 2 as part of the Crew tab, Tier 2; it’s built in the Crew building menu.
- Crew Quarters: Researched in Tier 1 of the Crew tab, and can be upgraded to Level 2 in Tier 3; it’s built in the Crew building menu.
- Officers’ Quarters: Researched in Tier 2 of the Crew tab, and can be upgraded to Level 2 in Tier 4; it’s built in the Crew building menu.
- Sickbay: Your ship has one of these already, hurrah! This can be upgraded to Level 2 as part of the Crew tab, Tier 2, and then to Level 3 as part of Tier 5; it’s built in the Crew building menu.
- Holodeck: Your ship has one of these already, hurrah! This can be upgraded to Level 2 as part of the Crew tab, Tier 3, and then to Level 3 as part of Tier 5; it’s built in the Crew building menu.
- Observation Lounge: Researched in Tier 2 of the Crew tab, and can be upgraded to Level 2 in Tier 4; it’s built in the Crew building menu.
- Science Laboratory: Your ship has one of these already, hurrah! This can be upgraded to Level 2 as part of the Science tab, Tier 3, and then to Level 3 as part of Tier 5; it’s built in the Science building menu.
- Hydroponics Bay: Researched in Tier 1 of the Science tree and upgraded to Level 2 (Tier 2) and to Level 3 (Tier 4); it’s built in the Technology building menu.
- Large Hydroponics Bay: Researched in Tier 3 of the Science tree and upgraded to Level 2 (Tier 5); it’s built in the Technology building menu.
- Bio Laboratory: Researched in Tier 2 of the Science tree and upgraded to Level 2 (Tier 3) and to Level 3 (Tier 5); it’s built in the Technology building menu.
- Waste De-assembler: Researched in Tier 3 of the Science tree, and upgraded to Level 2 in Tier 5; it’s built in the Technology building menu.
- Phaser Control Room: Your ship has one of these already, hurrah! This can be upgraded to Level 2 (Tier 3) and Level 3 (Tier 5); it’s built in the Combat building menu.
- Shield Generator: Your ship has one of these already, hurrah! This can be upgraded to Level 2 (Tier 3) and Level 3 (Tier 5); it’s built in the Combat building menu.
- Disruptor Array Control Room: Found in Tier 2 of the Combat tree (requires 16 cycles, 60 Science Points) and can be upgraded to Level 2 (Tier 4) and Level 3 (Tier 5); it’s built in the Combat building menu.
- Energy Dissapator Control Room: Found in Tier 4 of the Science tree; it’s built in the Combat building menu.
- Cloaking Device: Found in Tier 4 of the Science tree; it’s built in the Combat building menu.
- Metaphasic Shield Room: Found in Tier 3 of the Science tree (requires 18 cycles, 90 Science Points) and can be upgraded to Level 2 (Tier 5); it’s built in the Combat building menu.
- Regeneration Alcoves: Found in Tier 1 of the Borg tree, upgraded to Level 2 in Tier 3; it’s built in the Borg building menu.
- Cutting Beam Control Room: Found in Tier 1 of the Borg tree, upgraded to Level 2 in Tier 3 and Level 3 in Tier 5; it’s built in the Borg building menu.
- Shield Matrix: Found in Tier 2 of the Borg tree, upgraded to Level 2 in Tier 4; it’s built in the Borg building menu.
- Aru (Automated Repair Unit) Facility: Found in Tier 3 of the Borg tree, upgraded to Level 2 in Tier 5; it’s built in the Borg building menu.
- Neuro Electric Field Generator: Found in Tier 2 of the Borg tree, upgraded to Level 2 in Tier 4; it’s built in the Borg building menu.
- Borg Maturation Chamber: Found in Tier 3 of the Borg tree, upgraded to Level 2 in Tier 5; it’s built in the Borg building menu.
- You don’t need to build all rooms, just unlock them in research trees. Below is a list of every room alongside where to research and built it:
- Tuvok Approves: Have all rooms in the Combat Tab built at the same time.
- The Starfleet Way: Complete sector 12 without having any Borg Buildings.
- You’re going to be replaying sector 12 a number of times to get various endings; in one run, just delete all the Borg buildings for your ship before you hit a point of no return. Simple! See All the Options if you need help IDing Borg rooms.
- Canon: Reach earth with: Tom Paris, Harry Kim, Chakotay, Tuvok, B’Elanna Torres, The Doctor, Seven, Icheb
- We took this one pretty literally, meaning we didn’t split B’Elanna in the “Faces” side mission (see Fully Human and Heghlu’meH QaQ jajvam!), and carefully recruited Seven (Reclaiming Humanity) and Icheb (Young Mind, Free Spirit). All the crew named in the description above need to be alive and survive until the end of the game. This Achievement and Trophy will unlock if you’ve recruited more than just the crew listed here, so don’t worry about that!
- Home, Hub And Holdfast: Take control of the Transwarp Hub with the help of the awakened Borg and fly home.
- This is one of many endings that can be unlocked by allying with Ralik at the end of sector 11. Here’s how, broadly (with timestamps for the video below):
- 00:03: [Sector 11] Ally with Ralik (Choose “Disagree with Ralik’s sacrifice…”)
- 00:12: [Sector 12] Prepare by ensuring you have 100 Ex-Borg, an Energy Dissipater Control Room and 35 Science tech researched, or a Combat Power of 400 (the latter is likely the easiest and can be done in sector 12 without much planning); progress to the first point of no return
- 00:46: Choose “The captain alone decides: Head into the nebula – engage the cube”
- 01:28: Choose “For the good of the crew: Don’t destroy the hub and enter the aperture. Go home.”
- 01:54: Choose “Change your mind: Retreat and get to safety”
- 02:29: Choose “Agree to take over the hub [three options available]”
- This is one of many endings that can be unlocked by allying with Ralik at the end of sector 11. Here’s how, broadly (with timestamps for the video below):
- The Calm Before The Storm: Fail to destroy the Transwarp Hub and get sent home by Admiral Janeway.
- This is one of many endings that can be unlocked by allying with Ralik at the end of sector 11. Here’s how, broadly (with timestamps for the video below):
- 00:03: [Sector 11] Ally with Ralik (Choose “Disagree with Ralik’s sacrifice…”)
- 00:12: [Sector 12] Progress to the first point of no return
- 00:46: Choose “The captain alone decides: Head into the nebula – engage the cube”
- 01:29: Choose “For the good of the galaxy: Reject shortcut and retreat. Plan to destroy the hub”
- 02:12: Choose “Stand by your decision: Retreat and plan to destroy the hub”
- 02:46: Choose “Accept Ralik’s help but refuse to take over the hub: We’ll just fly home”
- 03:04: Choose “Consider it: Would someone be willing to sacrifice themself?”
- 03:30: [Select a crew member to sacrifice]
- 03:47: [Collect Borg Vinculum and develop pathogen]
- 03:58: Choose “There’s no time! Drop the pathogen and go with the initial plan”
- 04:18″ Choose “Give up – Let the autopilot fly you into the aperture”
- This is one of many endings that can be unlocked by allying with Ralik at the end of sector 11. Here’s how, broadly (with timestamps for the video below):
- Welcome Home, Voyager: Destroy the Transwarp Hub and get Voyager back home. Just like I remembered it!
- This is one of many endings that can be unlocked by allying with Ralik at the end of sector 11. Here’s how, broadly (with timestamps for the video below):
- 00:03: [Sector 11] Ally with Ralik (Choose “Disagree with Ralik’s sacrifice…”)
- 00:12: [Sector 12] Progress to the first point of no return
- 00:43: Choose “The captain alone decides: Head into the nebula – engage the cube”
- 01:18: Choose “For the good of the galaxy: Reject shortcut and retreat. Plan to destroy the hub”
- 01:59: Choose “Stand by your decision: Retreat and plan to destroy the hub”
- 02:29: Choose “Accept Ralik’s help but refuse to take over the hub: We’ll just fly home”
- 02:54: Choose “Condemn it: There will be no sacrifices!”
- 04:58: [Collect Borg Vinculum and develop pathogen]
- This is one of many endings that can be unlocked by allying with Ralik at the end of sector 11. Here’s how, broadly (with timestamps for the video below):
- Was It Worth It?: Bring Voyager home without destroying the Transwarp Hub.
- This is one of many endings that can be unlocked in the game, and can be done regardless of the choice you make at the end of sector 11. Here’s how, broadly (with timestamps for the video below):
- 00:03: [Sector 12] Progress to the first point of no return
- 00:36: Choose “The captain alone decides: Head into the nebula – engage the cube”
- 01:17: Choose “For the good of the crew: Don’t destroy the hub and enter the aperture. Go home.”
- 01:51: Choose “Stand by your decision: Fight the Queen and go home!”
- This is one of many endings that can be unlocked in the game, and can be done regardless of the choice you make at the end of sector 11. Here’s how, broadly (with timestamps for the video below):
- The Long Road Continues: Don’t risk entering the Borg nebula, and find another way home, even if it takes another 16 years.
- This is one of many endings that can be unlocked in the game, and can be done regardless of the choice you make at the end of sector 11. Here’s how, broadly (with timestamps for the video below):
- 00:03: [Sector 12] Progress to the first point of no return
- Choose “The captain alone decides: We will find another way home”
- Choose “Your decision remains unchanged: Do not enter the nebula. Voyager will find another way.”
- This is one of many endings that can be unlocked in the game, and can be done regardless of the choice you make at the end of sector 11. Here’s how, broadly (with timestamps for the video below):
- For The Greater Good: Sacrifice your way home by destroying the Hub and spend 16 more years in the Delta Quadrant.
- This is the only ending that absolutely requires you to sacrifice Ralik to the Borg Queen at the end of sector 11. As such, you may need to replay from sector 11 to then earn this. Here’s how, broadly (with timestamps for the video below):
- 00:03: [Sector 11] Sacrifice Ralik (Choose “Agree to Ralik’s sacrifice…”)
- 00:12: [Sector 12] Progress to the first point of no return
- 00:44: Choose “The captain alone decides: Head into the nebula – engage the cube”
- 02:23: Choose “Stand by your decision: Retreat and plan to destroy the hub”
- 02:43: Choose “The captain alone decides: We will destroy that hub!”
- 03:02: Choose “Consider it: Would someone be willing to sacrifice themself?”
- 03:37: [Select a crew member to sacrifice]
- 04:00: [Collect Borg Vinculum and develop pathogen]
- 05:03: Choose “There’s no time! Drop the pathogen and go with the initial plan”
- 05:40: Progress and pass three different skill checks — or at the very least, the second and third — to defy Admiral Janeway’s plan
- This is the only ending that absolutely requires you to sacrifice Ralik to the Borg Queen at the end of sector 11. As such, you may need to replay from sector 11 to then earn this. Here’s how, broadly (with timestamps for the video below):
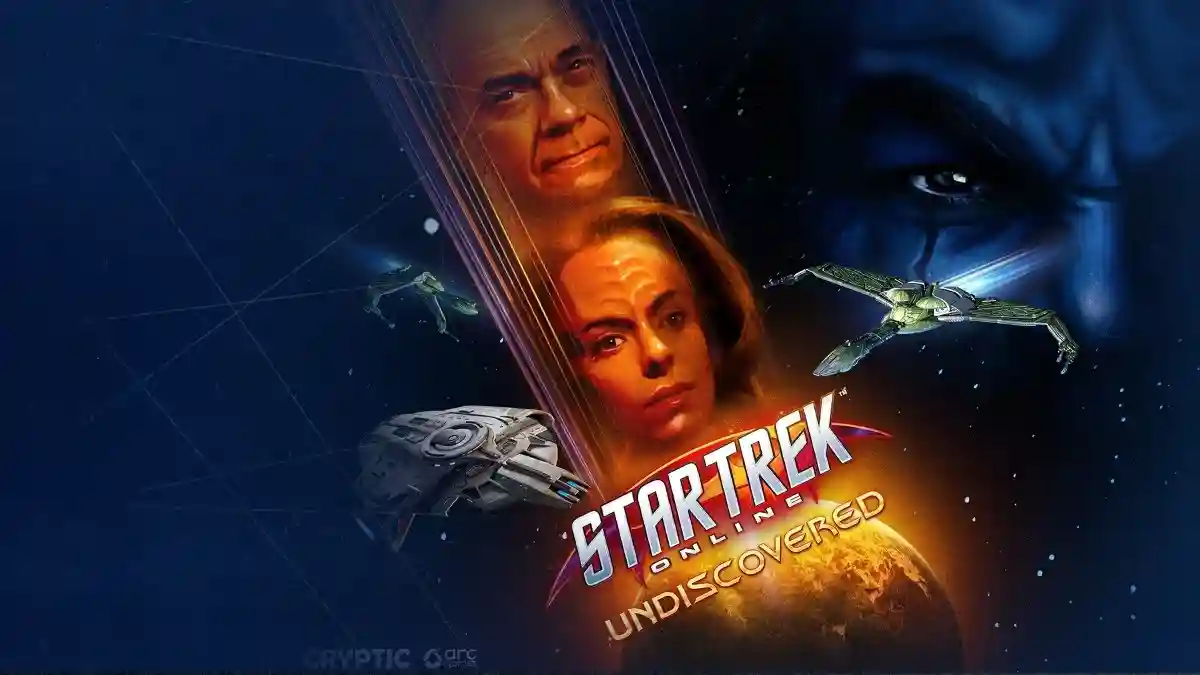
Star Trek Voyager Across the Unknown is available today on Windows PC via Steam, Xbox Series S, Xbox Series X, PS5, and Switch 2.
 |
Star Trek Voyager Across the Unknown19 February 2026PC PS5 Switch 2 Xbox Series S & X
|
This article may contain affiliate links, meaning we could earn a small commission if you click-through and make a purchase. Stevivor is an independent outlet and our journalism is in no way influenced by any advertiser or commercial initiative.
