


If you’re sick of being destroyed by Thunder Jaws and Behemoths in Horizon: Zero Dawn, we’ve got the details on how to access some super powerful armour.
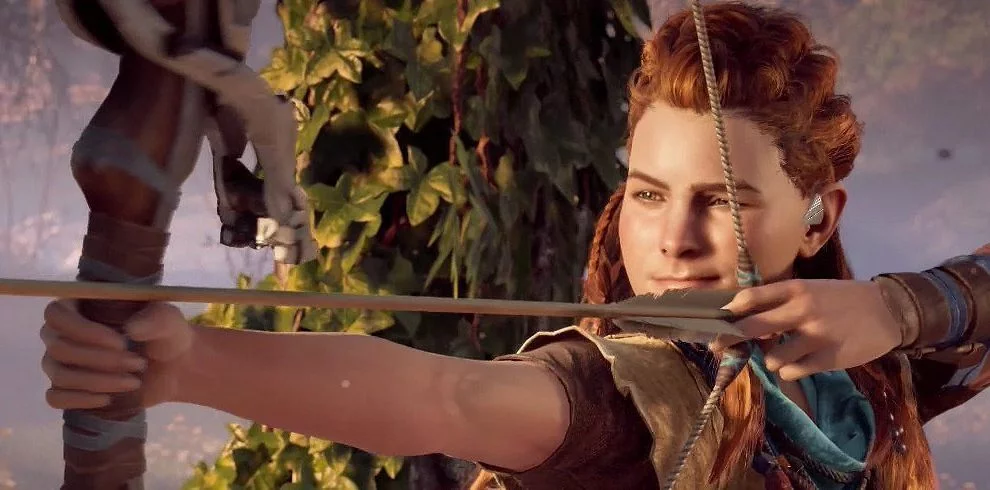
The secret Shield Weaver armour projects an electronic shield around Aloy which absorbs several massive attacks in full without so much as causing her to stumble before it’s depleted, effectively making you invincible for short periods of time. Avoiding further attacks will allow the armour to quickly recharge. Think of it like Master Chief’s power armour in Halo: Combat Evolved.
However such a powerful outfit comes at the price of gathering five collectables from around the map and then solving two simple puzzles.
If you’re keen to turn your Nora Brave into a Spartan, read on for our comprehensive guide.
Warning: This guide contains minor spoilers ahead by way of quest titles, character and location names and location descriptions. While we’ll keep everything as brief as possible, consider yourselves warned.
Collect the Power Cells
Power Cell 1
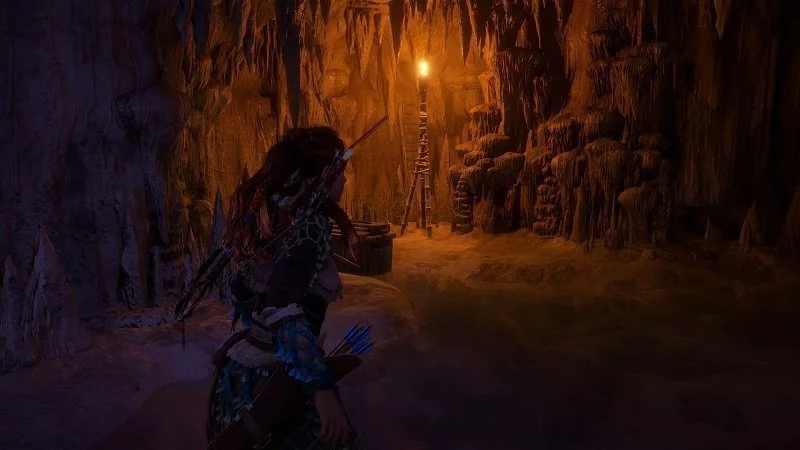
The first Power Cell is found in the underground ruin that Aloy fell into as a child.
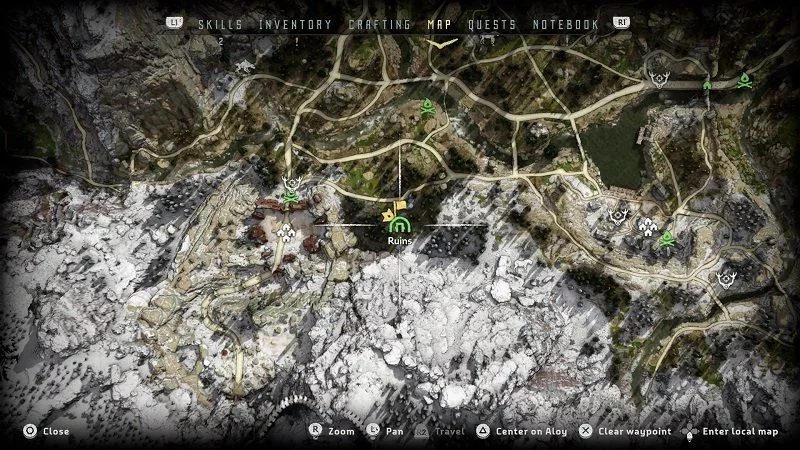
Upon entering the underground facility you’ll eventually come across a doorway blocked by stalactites.
These can be broken with your spear and upon entering the room beyond the power cell can be easily located within. Note in this area there are two rooms blocked with stalactites yet only one contains a Power Cell.
Power Cell 2
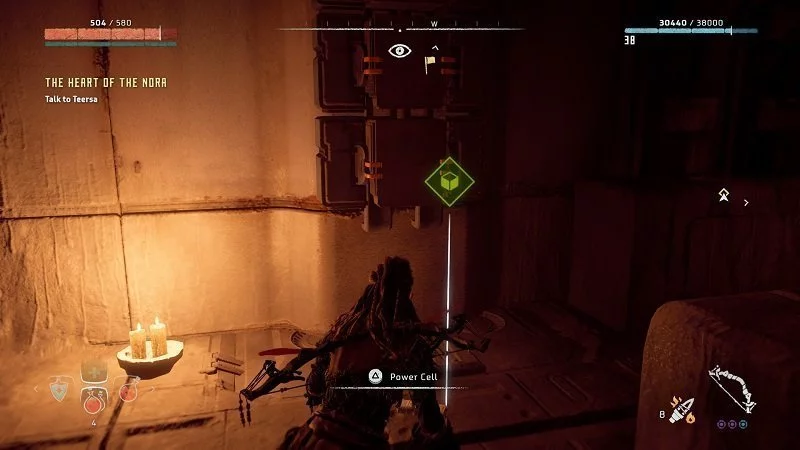
Your first chance to find the second Power Cell occurs during the quest entitled The Womb of the Mountain which is immediately after the Proving. If you’ve already completed this quest and didn’t pick up the power cell you’ll need to keep playing until you’ve completed The Heart Of The Nora which is much later in the game.
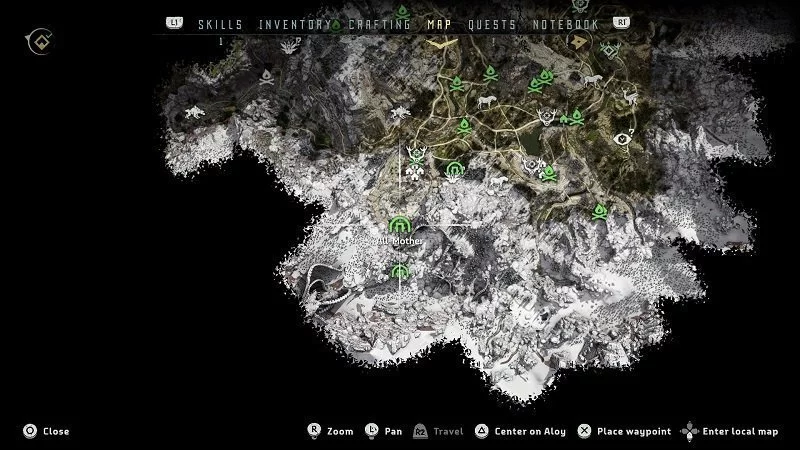
Once Aloy has woken up and you’ve collected her gear, fight the temptation to follow Matriarch Teersa after she makes her left turn through the caves. Instead there will be a locked door immediately in front of you with a red circle of light on it. Move towards it and then find a small tunnel on your left.
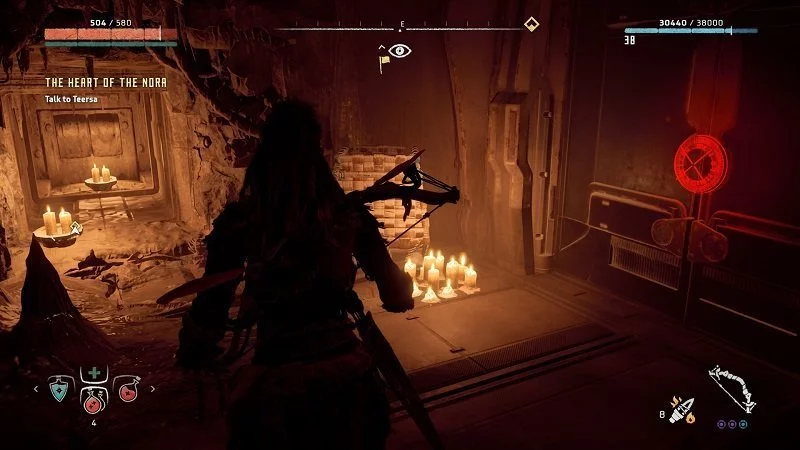
Follow the tunnel and you’ll find your second Power Cell.
Power Cell 3
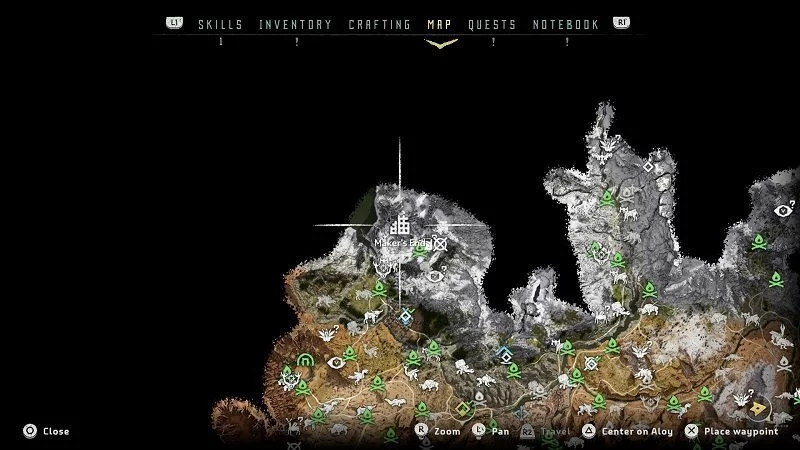
During a key story mission entitled Makers End you’ll find yourself climbing up the inside of a huge skyscraper until you reach an old boardroom. After watching the relevant story sequences, instead of returning back to the bottom of the building via the elevator shaft, look to the area immediately above the elevator door and a little to the right. You’ll find a yellow handhold which will lead you further up to the highest point of the building.
Once you can climb no further your Power Cell will be waiting for you at the top.

Power Cell 4
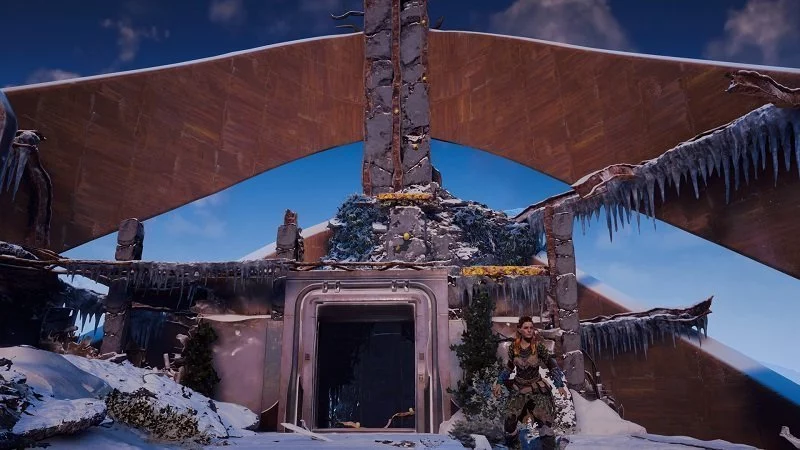
This cell is located in the Grave-Hoard which is part of the quest of the same name and occurs immediately after the above mentioned Makers End quest.
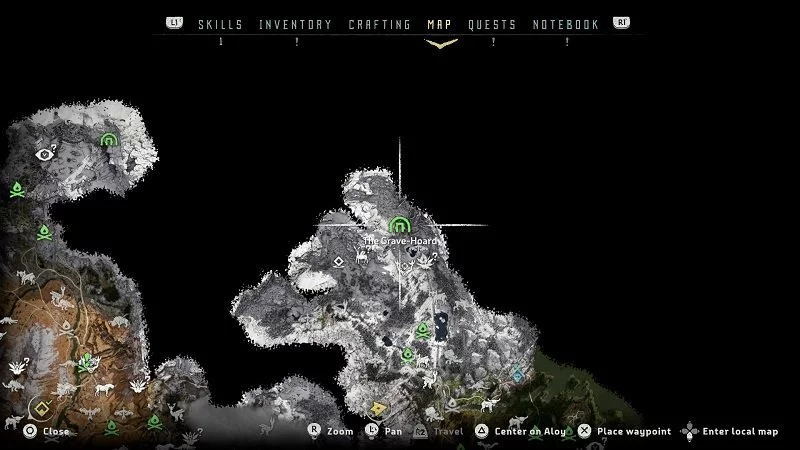
After walking down the short ramp into the lobby area and dealing with the enemies within, you’ll come across a fairly easy puzzle which, when completed will unlock a door. Directly on the other side of the door is a small area lit with torches where the Power Cell can be easily located.
Chances are if you’ve completed this mission you picked up the Power Cell without realising it -like I did- but for your convenience it’s located here.
Power Cell 5
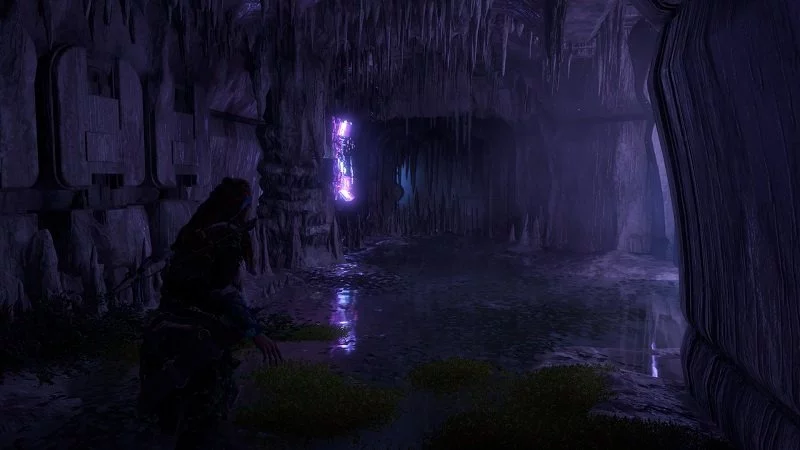
This cell is found in GAIA Prime either during, or after, The Mountain That Fell quest.
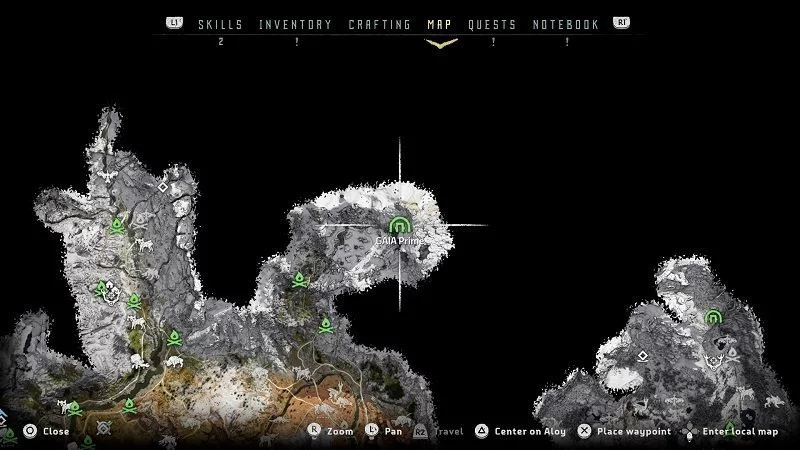
As you explore the area (either during the above mentioned quest or after) through natural progression you’ll come across an area where you need to rappel down. It’s the only way down the mountain so you can’t miss it. Instead of rappelling down, look to the left of the rappel hook and very cautiously approach the cliff edge near the curved metal strut protruding from the ground.
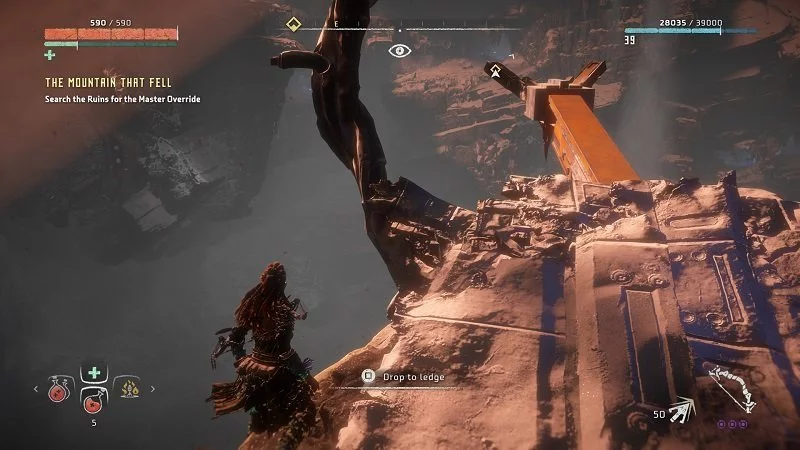
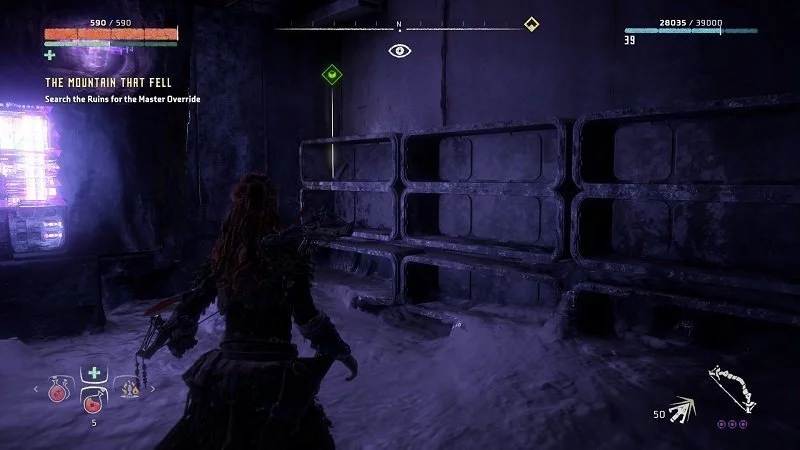
After safely dropping down and climbing around the cliff wall you’ll come across a room filled with purple light.
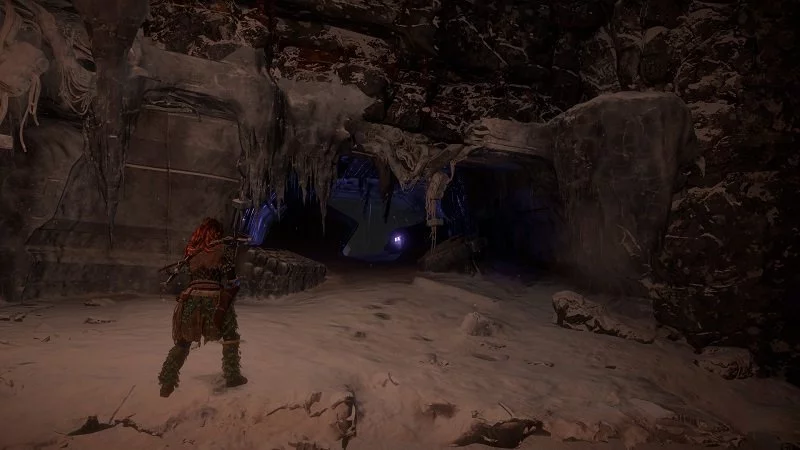
At the very back your final power cell will be sitting there on a shelf to the right.
With the cells found, you’ll need to complete some puzzles.
This article may contain affiliate links, meaning we could earn a small commission if you click-through and make a purchase. Stevivor is an independent outlet and our journalism is in no way influenced by any advertiser or commercial initiative.